
Finished massive repairs to 1951 Martin 0-18! with video
-
johnnparchem
- Posts: 2354
- Joined: Sat Apr 10, 2010 10:50 pm
- Location: Seattle
- Contact:
Re: Massive repairs to 1951 Martin 0-18
John do you know the stain used on these guitars to get the mahogany dark. I got close playing with tobacco brown and amber (two tints that I had), but not really correct.
-
tippie53
- Posts: 7192
- Joined: Fri Mar 03, 2006 7:09 pm
- Location: Hegins, Pa
- Contact:
Re: Massive repairs to 1951 Martin 0-18
on these older one it was a combination of 2 stains and lets not forget the age
a red mahogany first with a dark mahogany on top of the
the sealer as applied over that and the filler followed by another sealer
then finish
I use a few materials mostly minwax
special walnut
dark walnut
ebony
and a few others look at the minwax selection and get a few from red to really dark and start playing. It took me a while to get it.
John Hall
Blues Creek Guitars Inc
Authorized CF Martin Repair Center
president of Association of Stringed Instrument Artisans
http://www.bluescreekguitars.com
Blues Creek Guitars Inc
Authorized CF Martin Repair Center
president of Association of Stringed Instrument Artisans
http://www.bluescreekguitars.com
-
johnnparchem
- Posts: 2354
- Joined: Sat Apr 10, 2010 10:50 pm
- Location: Seattle
- Contact:
Re: Massive repairs to 1951 Martin 0-18
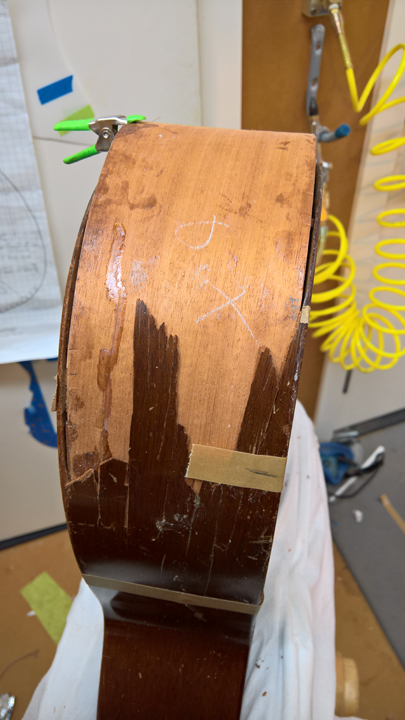
Bit by bit I am making progress. I closed the cracks on the top and back and installed cleats to keep them closed. When looking at the pictures keep in mind that I want to maintain the history of the smashed guitar. I hope to cleanly install the veneer, but the old and the new wood will be obvious, maybe even outlined with black fiber purfling.
I made an insert that included a tongue to reinforced the intact but cracked area in the sides and kerfed linings to replace the missing linings and assure a good glue joint to the top and back. I was going to use a 1 mm cross grain strip, but could not find one long enough. Instead I thinned an orphaned side to 1 mm, bent it to shape, installed the kerfed linings than fitted and glued it into the guitar. It is recessed in about 1.5-2.0 mm to allow me to inlay a mahogany veneer.
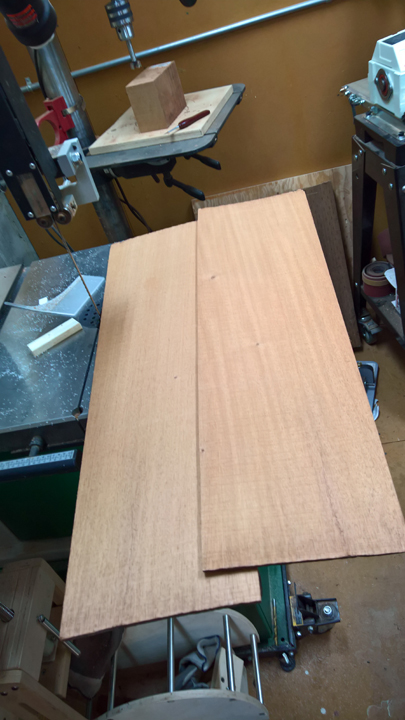
A couple of orphaned sides to work with. I pick these up in the sale bins on the various tonewood sites. Often they sell a batch of unlabeled sides cheap
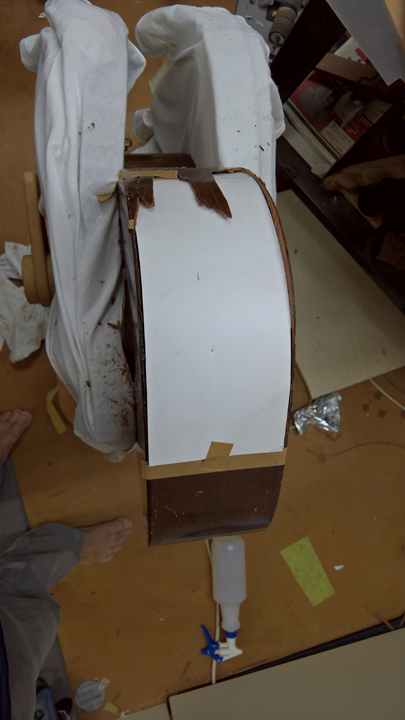
I made a cardboard template for the insert.
I bent the insert to the correct shape. It took a bit to get it to fit in the guitar. Once fitted I installed the linings and so reinforcement strips.
Instead of gluing all at once. I used hot hide glue to glue the tongue inside the cracked area. I made special shaped cauls attached to a spreader clamp to some what gently provide an internal backing. (sorry no pictures). I installed a few small cleats on the top and back to help me set the depth on the insert.
With all of the in place I was able to use hot hide glue to glue the insert onto place.
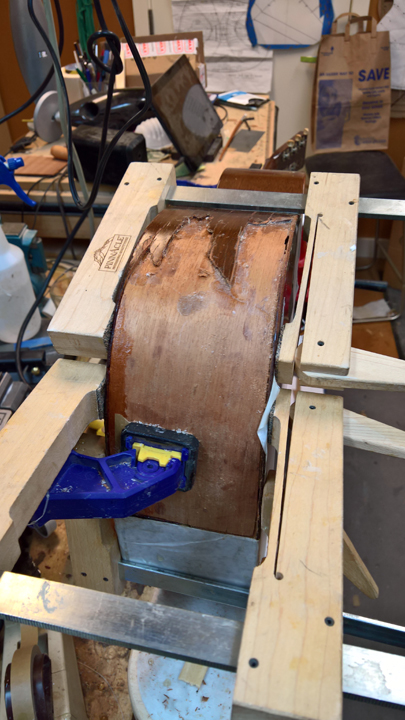
The small gap is where the back brace comes in. The kerfing was inset to the accommodate the brace.
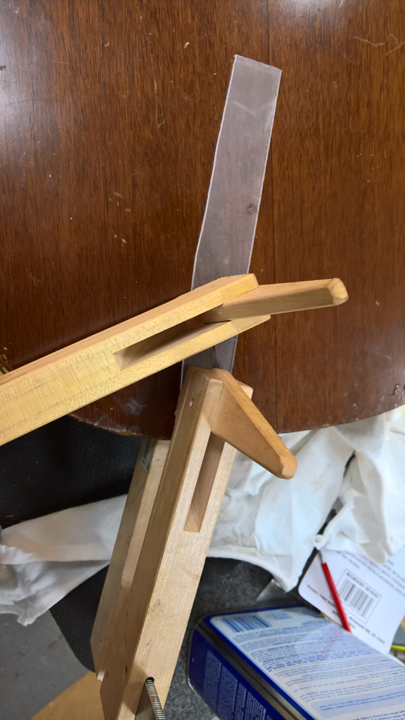
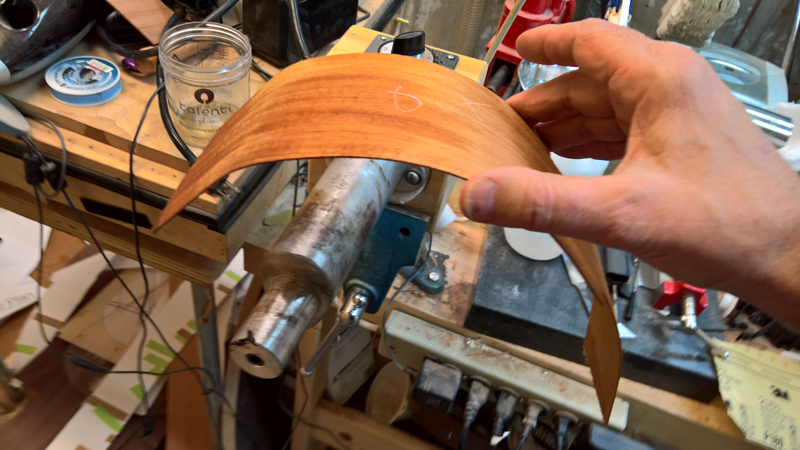
The neck step is to make the veneer. I traced the shape onto some paper. I bend the side veneer to the correct shape. THen I had a nutty idea to put the template on the inside as it would be easier to cut out the shape. I say nutty because I did not flip the template so cut out a mirror image of what I wanted.
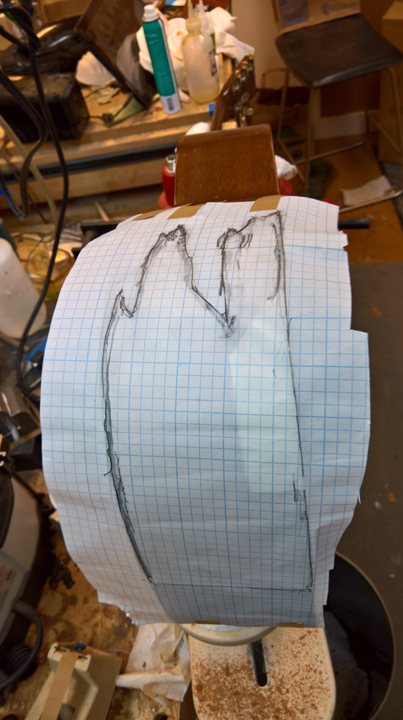
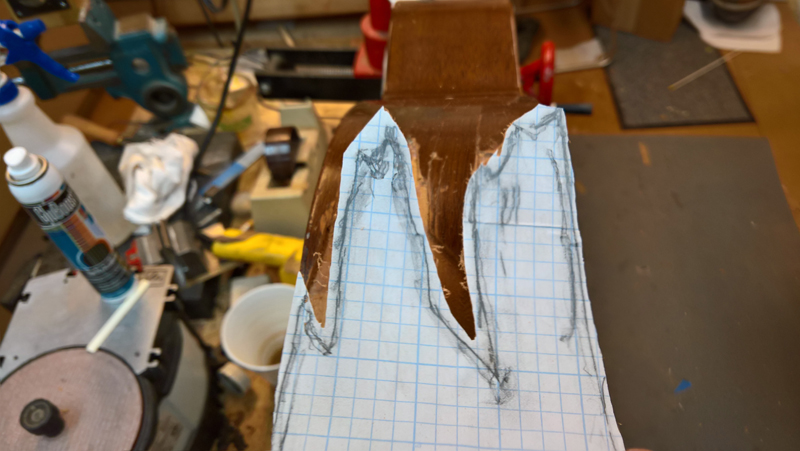
I took the veneer back to the bender and reversed the bend. I will redo the veneer though as it is not as smooth of a bend as I want. That is why I stopped tonight.
I made an insert that included a tongue to reinforced the intact but cracked area in the sides and kerfed linings to replace the missing linings and assure a good glue joint to the top and back. I was going to use a 1 mm cross grain strip, but could not find one long enough. Instead I thinned an orphaned side to 1 mm, bent it to shape, installed the kerfed linings than fitted and glued it into the guitar. It is recessed in about 1.5-2.0 mm to allow me to inlay a mahogany veneer.
A couple of orphaned sides to work with. I pick these up in the sale bins on the various tonewood sites. Often they sell a batch of unlabeled sides cheap
I made a cardboard template for the insert.
I bent the insert to the correct shape. It took a bit to get it to fit in the guitar. Once fitted I installed the linings and so reinforcement strips.
Instead of gluing all at once. I used hot hide glue to glue the tongue inside the cracked area. I made special shaped cauls attached to a spreader clamp to some what gently provide an internal backing. (sorry no pictures). I installed a few small cleats on the top and back to help me set the depth on the insert.
With all of the in place I was able to use hot hide glue to glue the insert onto place.
The small gap is where the back brace comes in. The kerfing was inset to the accommodate the brace.
The neck step is to make the veneer. I traced the shape onto some paper. I bend the side veneer to the correct shape. THen I had a nutty idea to put the template on the inside as it would be easier to cut out the shape. I say nutty because I did not flip the template so cut out a mirror image of what I wanted.
I took the veneer back to the bender and reversed the bend. I will redo the veneer though as it is not as smooth of a bend as I want. That is why I stopped tonight.
-
tippie53
- Posts: 7192
- Joined: Fri Mar 03, 2006 7:09 pm
- Location: Hegins, Pa
- Contact:
Re: Massive repairs to 1951 Martin 0-18
that is the way you do that
looking good
looking good
John Hall
Blues Creek Guitars Inc
Authorized CF Martin Repair Center
president of Association of Stringed Instrument Artisans
http://www.bluescreekguitars.com
Blues Creek Guitars Inc
Authorized CF Martin Repair Center
president of Association of Stringed Instrument Artisans
http://www.bluescreekguitars.com
-
Kevin Sjostrand
- Posts: 4143
- Joined: Sat Feb 09, 2008 8:06 pm
- Location: Visalia, CA
Re: Massive repairs to 1951 Martin 0-18
Wow what a project John. So will you blend in, or cover the ragged area? Not sure I'm getting this.
-
johnnparchem
- Posts: 2354
- Joined: Sat Apr 10, 2010 10:50 pm
- Location: Seattle
- Contact:
Re: Massive repairs to 1951 Martin 0-18
I have a piece of mahogany that I have cut out to fit into the area with the new wood. I am treating it like an inlay. I will as best as possible match the stain on the mahogany inlay. But I will emphasize with black the jagged area. When finished it will look like an old beat up guitar, but it will be functional.Kevin Sjostrand wrote:Wow what a project John. So will you blend in, or cover the ragged area? Not sure I'm getting this.
-
johnnparchem
- Posts: 2354
- Joined: Sat Apr 10, 2010 10:50 pm
- Location: Seattle
- Contact:
Re: Massive repairs to 1951 Martin 0-18
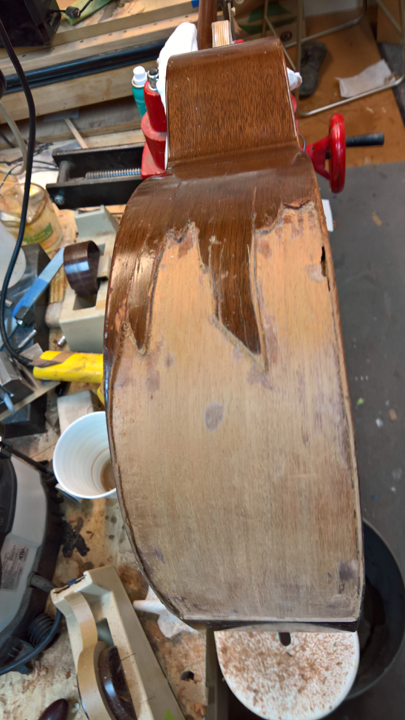
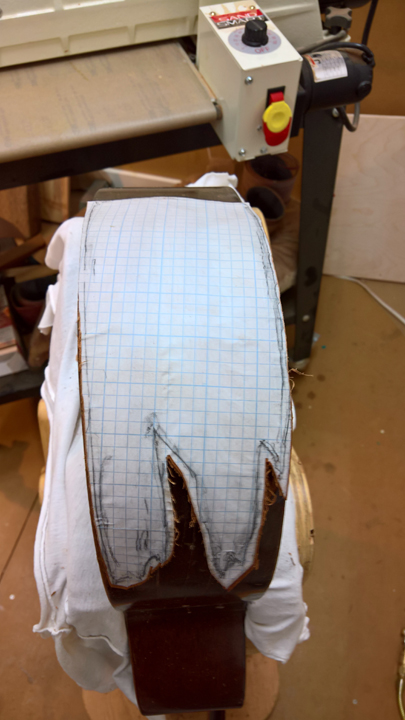
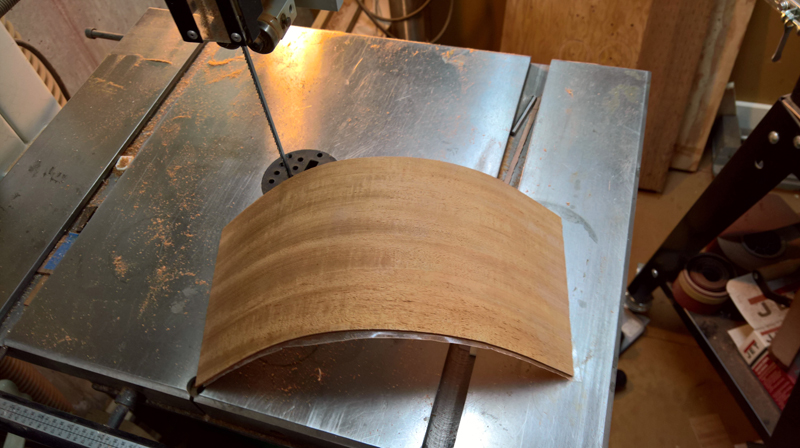
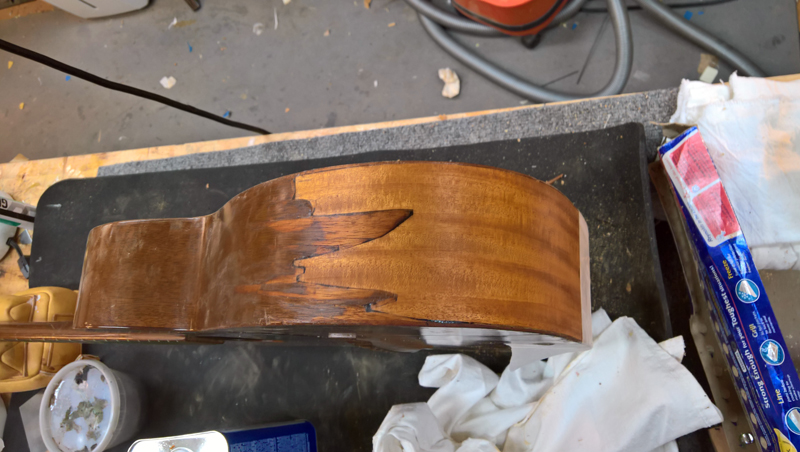
After making an inside out patch and rebending it, I decided to start fresh. I still had the other half of the orphaned side I was using and it only take a few minutes to bend into shape. I did apply a few things I learned on the first attempt. Like before I traced out the outline rubbing on the outline with a pencil. THis time I cut it out the pattern and spend a bit of time getting it closer fitting it to the guitar. When ready I taped the pattern to the side of the side and cut close with a band saw.
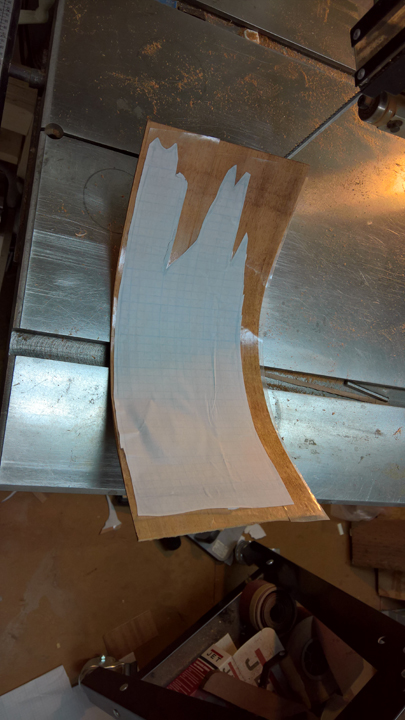
It did take a combination of a plane for the top and back edges, chalk, chisels, files and sanding sticks to fit the inlay
 .
.
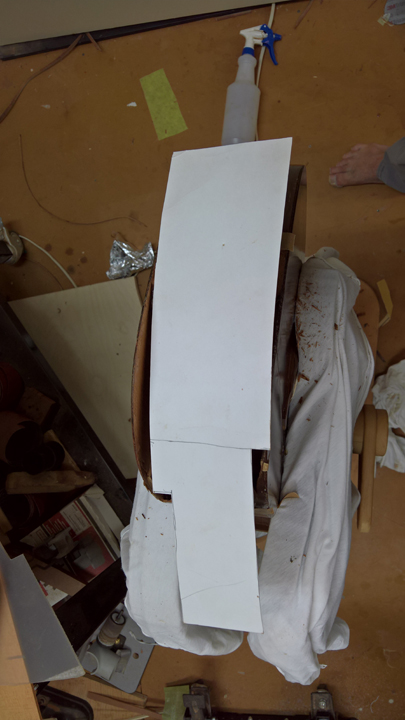
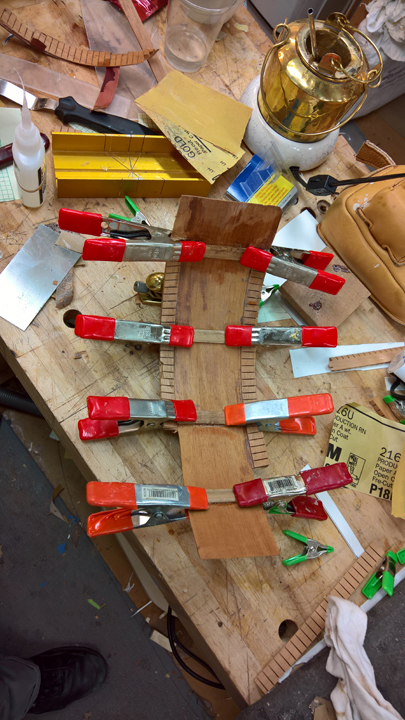
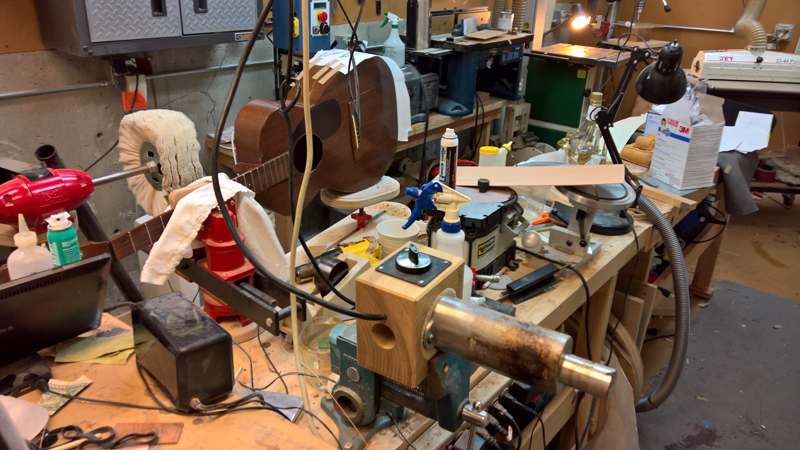
I spend a few moments to decide how to clamp it, after a trial run I decided on the belt clamp. I used fish glue to give me a bit more time to fuss around. Yes I do work bare foot and in my pajamas, retirement is great!
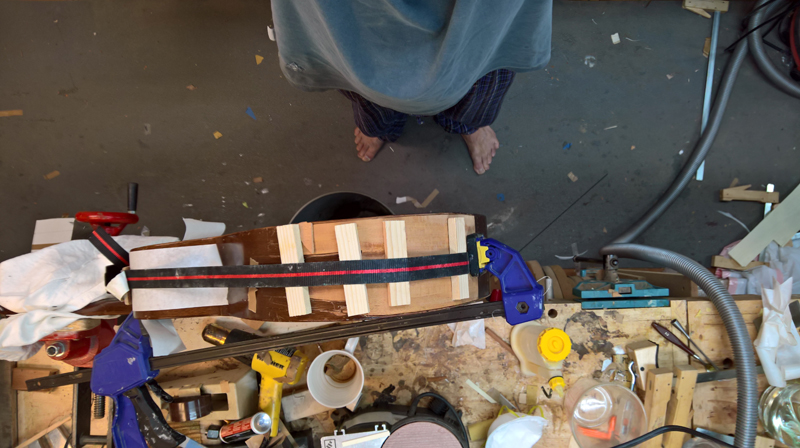
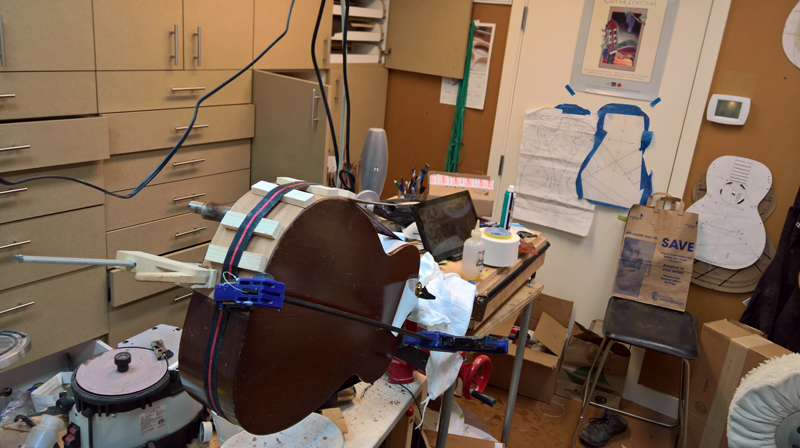
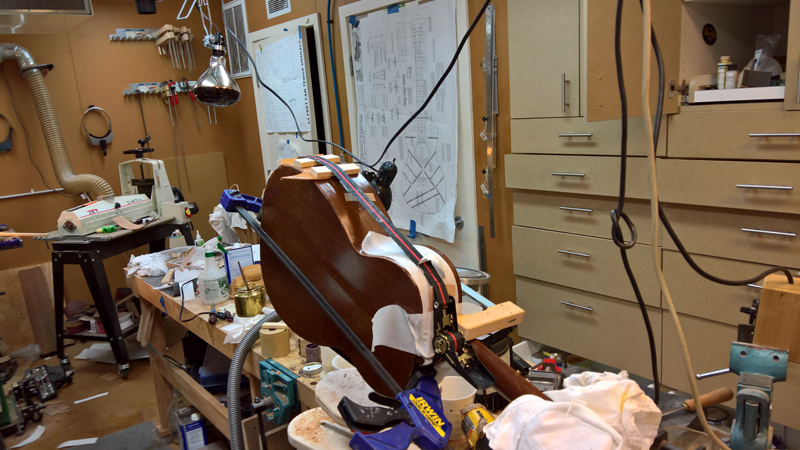
It did take a combination of a plane for the top and back edges, chalk, chisels, files and sanding sticks to fit the inlay
. I spend a few moments to decide how to clamp it, after a trial run I decided on the belt clamp. I used fish glue to give me a bit more time to fuss around. Yes I do work bare foot and in my pajamas, retirement is great!
-
johnnparchem
- Posts: 2354
- Joined: Sat Apr 10, 2010 10:50 pm
- Location: Seattle
- Contact:
Re: Massive repairs to 1951 Martin 0-18
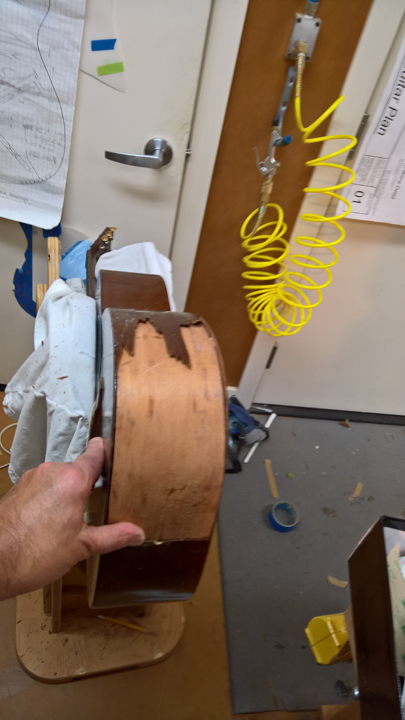
I will play with the color a bit more. Maybe a little bit of yellow, or less red. This with done with Red Mahogany, tobacco brown and a touch of black.
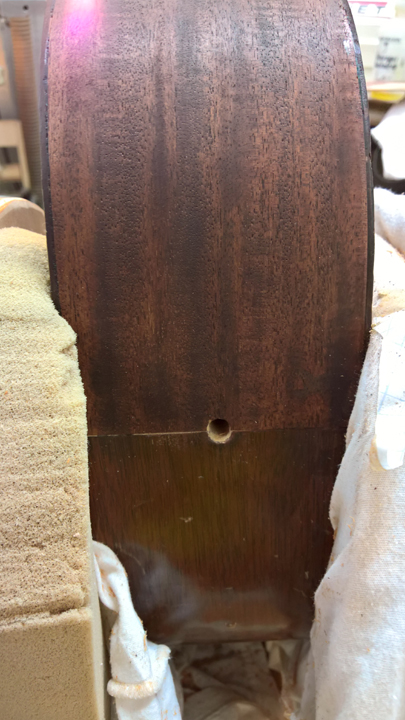
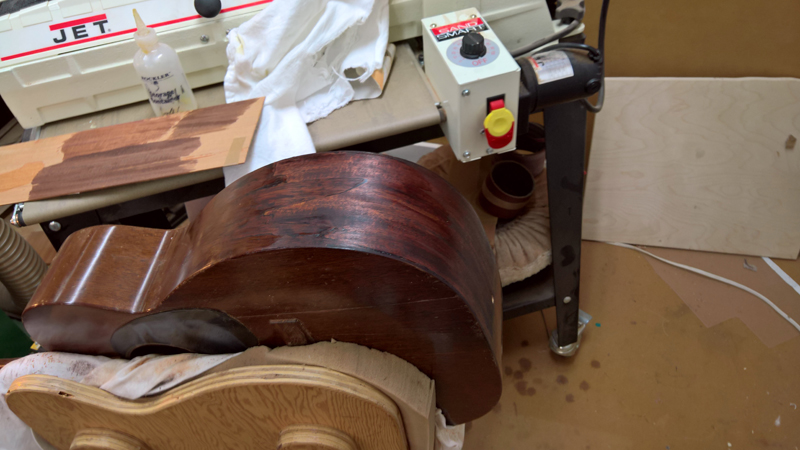
Here is what I had before the stain (just some naptha)
Here is what I had before the stain (just some naptha)
-
Kevin Sjostrand
- Posts: 4143
- Joined: Sat Feb 09, 2008 8:06 pm
- Location: Visalia, CA
Re: Massive repairs to 1951 Martin 0-18
Boy John this is really interesting and amazing how it's turning out
-
johnnparchem
- Posts: 2354
- Joined: Sat Apr 10, 2010 10:50 pm
- Location: Seattle
- Contact:
Re: Massive repairs to 1951 Martin 0-18
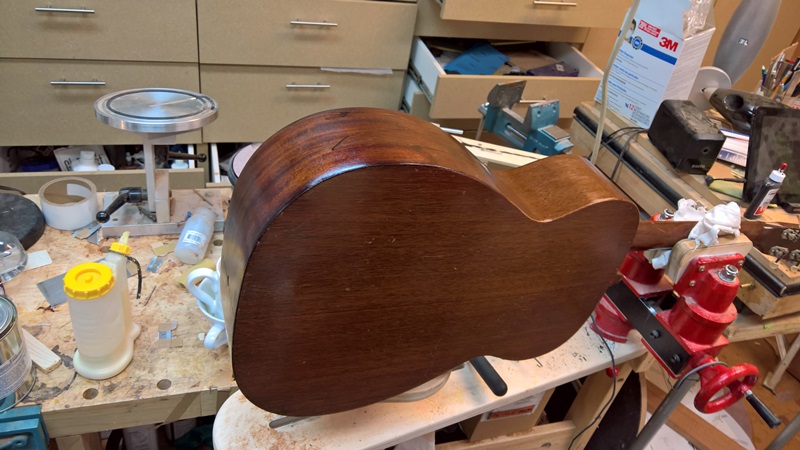
I sanded off all of what I put on yesterday and sanded into the original finish a bit more. I remixed the dye with less red a and a bit more amber. It is not perfect, but looks ok unless looking right at it. The repair is very solid. The guitar has a clean drum like tap sound.
Last edited by johnnparchem on Sun Mar 05, 2017 4:27 pm, edited 1 time in total.