Second Falcate Classical with strings!

What're You Doing?
johnnparchem
Posts: 2354
Joined: Sat Apr 10, 2010 10:50 pm
Location: Seattle
Contact:

Second Falcate Classical with strings!

Post by johnnparchem »

As I am building the same guitar as my last (viewtopic.php?f=67&t=7105) I decided not to blog this build, I will highlight any new procedures that differ from last project. This guitar is a commission from my classical guitar instructor. He loved the sound of the last more importantly though is he really like the ergonomic features I added. Slightly narrower nut and the 20" radius on the fret board. He also like the cutaway. For this guitar I selected a nice engelmann spruce top and panama rosewood back and sides. The tap quality and the stiffness of the rosewood was outstanding. I picked up the rosewood set a couple of years ago from LMI. I went totally classical and chose spanish cedar for the neck. Other than the wood the only design difference is that I will make the braces a mm taller based on the results of my last guitar. Also I am trying to avoid all of the hidden mistakes I had in the last one. So far that is going well.

So far I have the rims built and profiled, the neck has been prepared and I am starting on bracing the top and the back.

Image

Image

I went away from my neck jig and just used a table saw for the tenon. The advantages of the table saw is I can still set the neck angle, but I van also angle the cheeks making it easier to fit the neck on the body. Also the procedure was so clean compared to mucking with the 1/2 inch router bit. I have a sawstop saw, so I am less nervous about cutting my fingers off. Ultimatly I will build a sled to make this an easier process. The neck will be a bolt on bolt off neck. The Spanish cedar glued to the fret board will be planed to a wedge to create the negative angle required for a classical.

Image

Image

Image

Image

I posted my rosette build viewtopic.php?f=5&t=7303

Image

Today I installed the sound hole patch and am starting the back

Image

Image

Image
Last edited by johnnparchem on Thu Nov 12, 2015 8:39 pm, edited 1 time in total.
Kevin Sjostrand
Posts: 3985
Joined: Sat Feb 09, 2008 8:06 pm
Location: Visalia, CA

Re: Second Falcate Classical

Post by Kevin Sjostrand »

I really like the rosewood. It's going to be beautiful.
John I'm not understanding the need for the wedge. On my crossover I did a flat transition at the body and slightly tapered the fretboard over the top and it seemed pretty uncomplicated and turned out fine....the action that is.
johnnparchem
Posts: 2354
Joined: Sat Apr 10, 2010 10:50 pm
Location: Seattle
Contact:

Re: Second Falcate Classical

Post by johnnparchem »

No real need, the tapered fret board works fine for the standard classical guitar. On the last one and this guitar instead of building flat or flat with a domed lower bout I had a 32' radius sanded onto the the top rims (flatten around the fret board) but still giving the neck a bit of an angle just like (but less) than a steel string. This dome gives the top a different look than the standard built Classical. To counter this I would need a bigger taper to the fret board nearly twice as much to get the correct angle. The wedge allows the neck to be co-planer with the top for the bolt on - bolt off neck and gives me the fret board angle I want. When I glue it to the neck it takes a bit to even find the glue line as I cut it from the same neck wood. Also the fret board is not tapered also a different visual look.
Kevin Sjostrand
Posts: 3985
Joined: Sat Feb 09, 2008 8:06 pm
Location: Visalia, CA

Re: Second Falcate Classical

Post by Kevin Sjostrand »

Okay, I see.
By the way, I cut my tenons with the table saw, compound angles, before I got that jig from you. It works fine, but I was thinking of going back to the table saw also. The end result I think is much cleaner surfaces.
johnnparchem
Posts: 2354
Joined: Sat Apr 10, 2010 10:50 pm
Location: Seattle
Contact:

Re: Second Falcate Classical

Post by johnnparchem »

Bit by bit with my travels, I am going to be starting to put the guitar together. I have the rims, top and the back ready to close the box. I will route the rims for the braces and double check my neck angle and then close the box.

I was a bit more deliberate while epoxying on the braces and CF and overall I was less messy. Still have a ways to go in that regard.

Image

Image

Image

Image

Image

Image

Image

Image

Image

Image

Image

Image

Image

Image
Kevin Sjostrand
Posts: 3985
Joined: Sat Feb 09, 2008 8:06 pm
Location: Visalia, CA

Re: Second Falcate Classical

Post by Kevin Sjostrand »

Getting oh so close now John. Looks great.
johnnparchem
Posts: 2354
Joined: Sat Apr 10, 2010 10:50 pm
Location: Seattle
Contact:

Re: Second Falcate Classical

Post by johnnparchem »

Well I did one step forward, about 8 steps back then forward again.

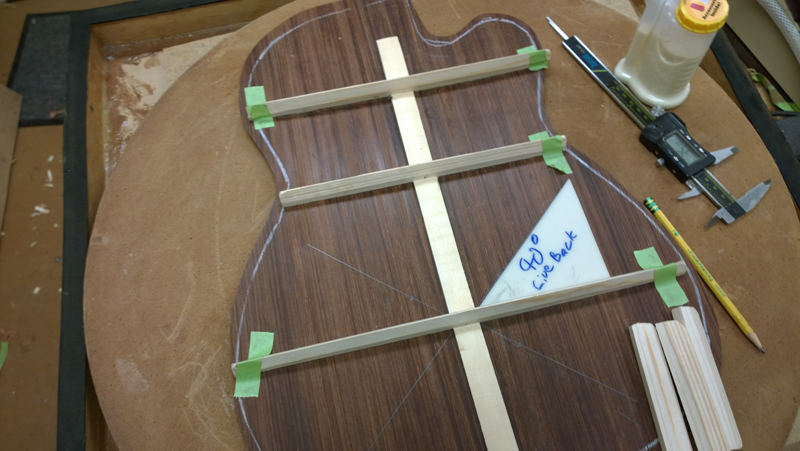
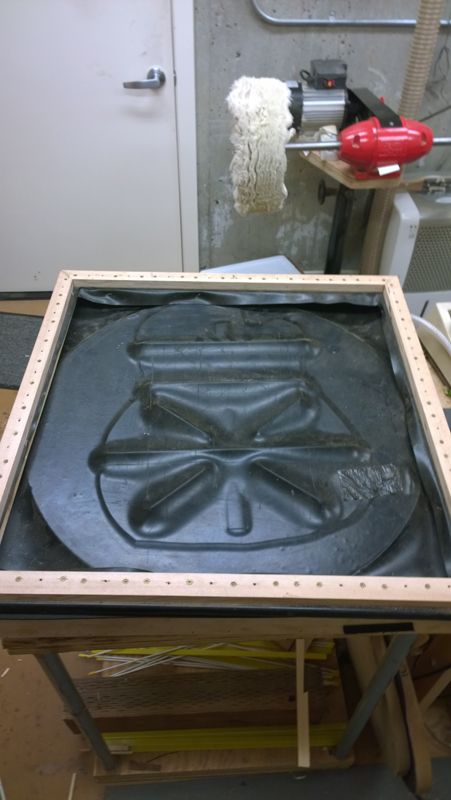
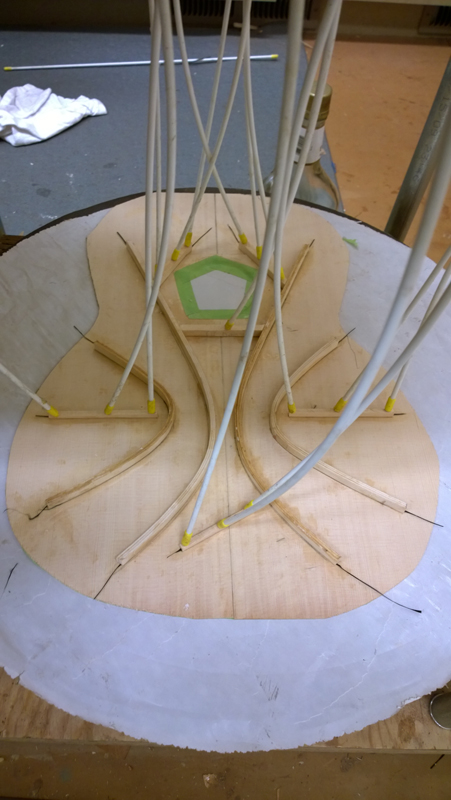
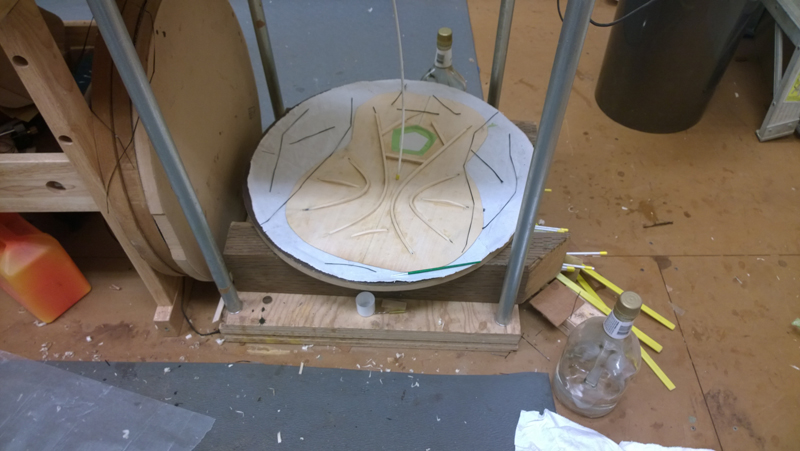
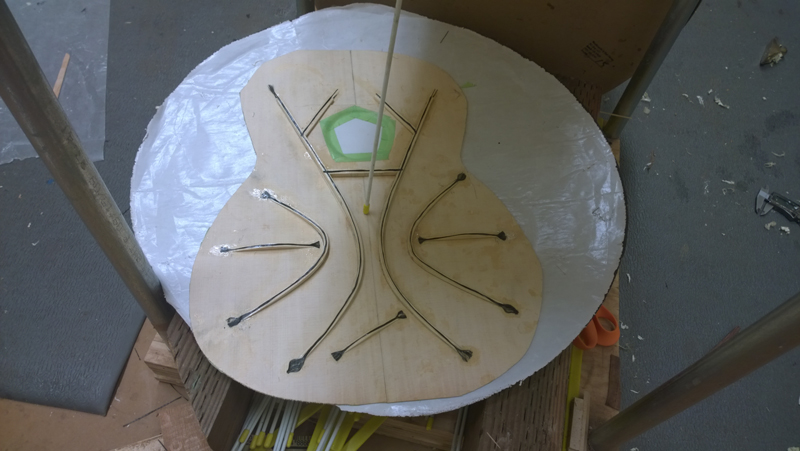
I closed the box successfully, but when I tapped the closed box I was not happy with the resonance frequency of the top. It ended up about 10 hertz lower than my target. I was pretty sure the guitar would end up close to my first. As I really wanted to hear would the higher pitched top would sound like I ripped off the top with plans to make another.

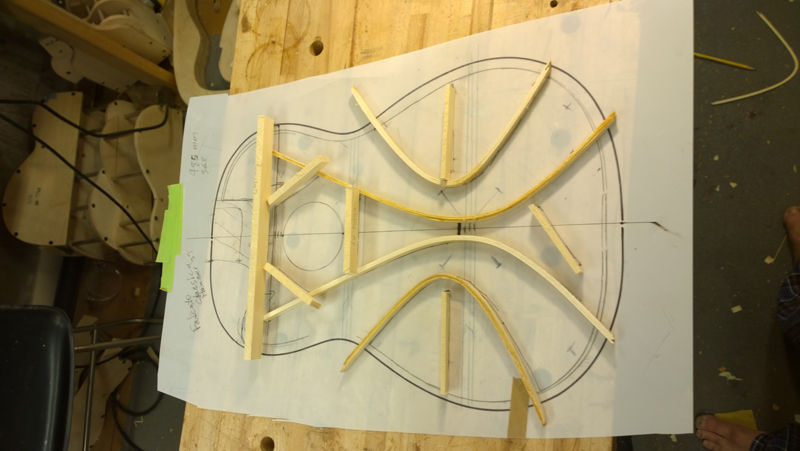
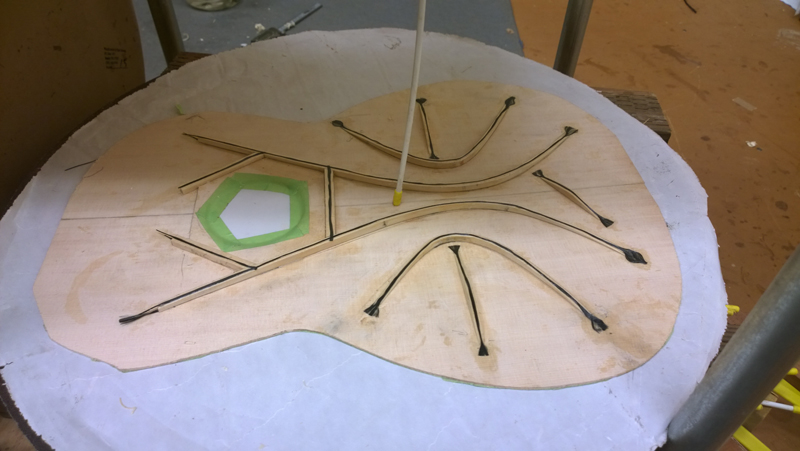
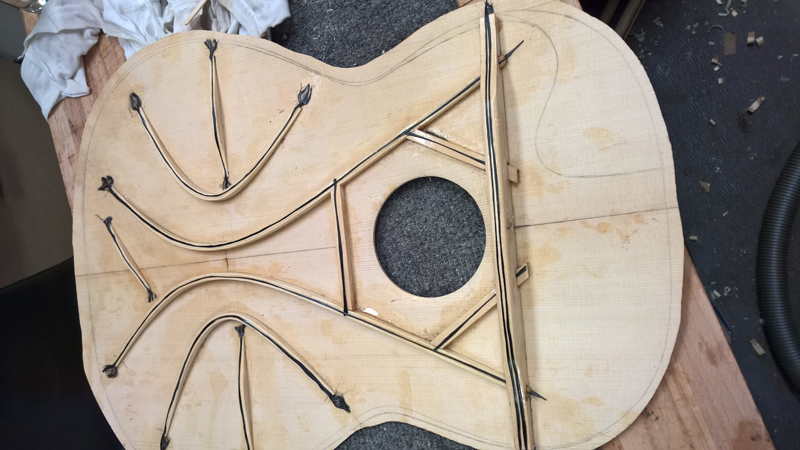
I put the project on the back burner and built a top for an eight string classical guitar with higher falcate braces (8.5mm) and ended up with a top pitched at my target.

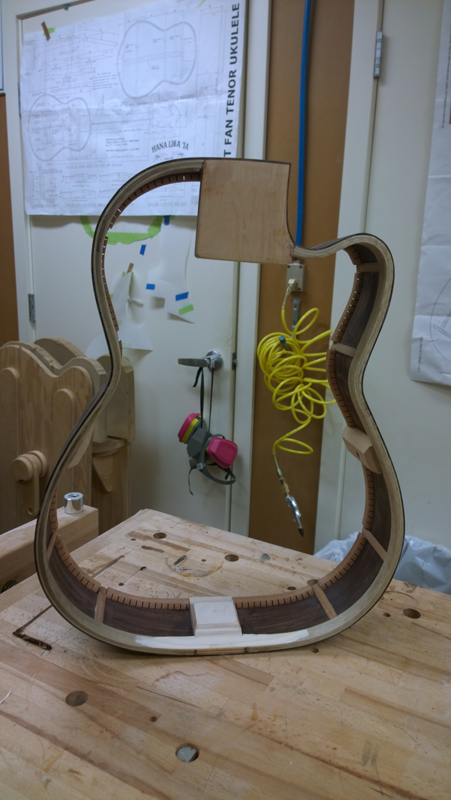
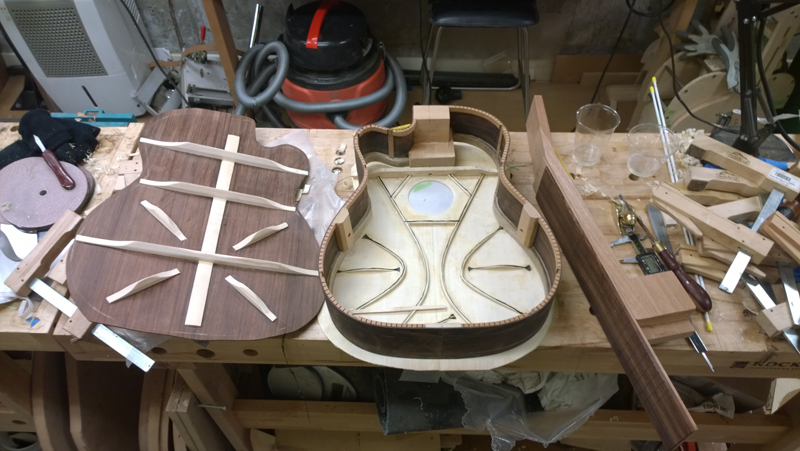
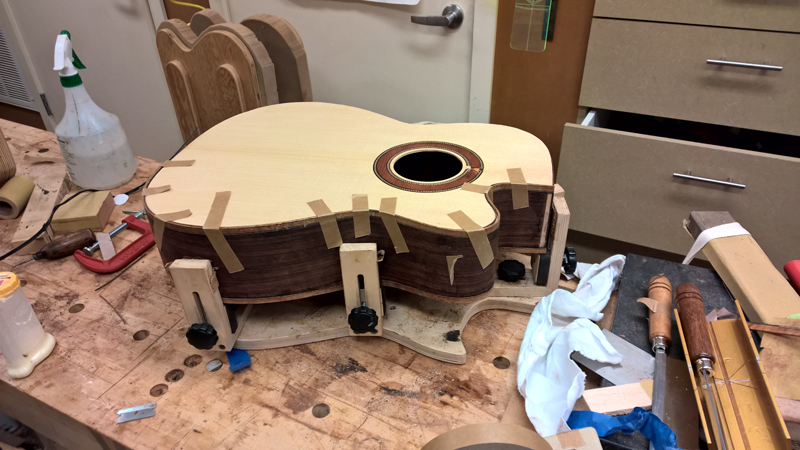
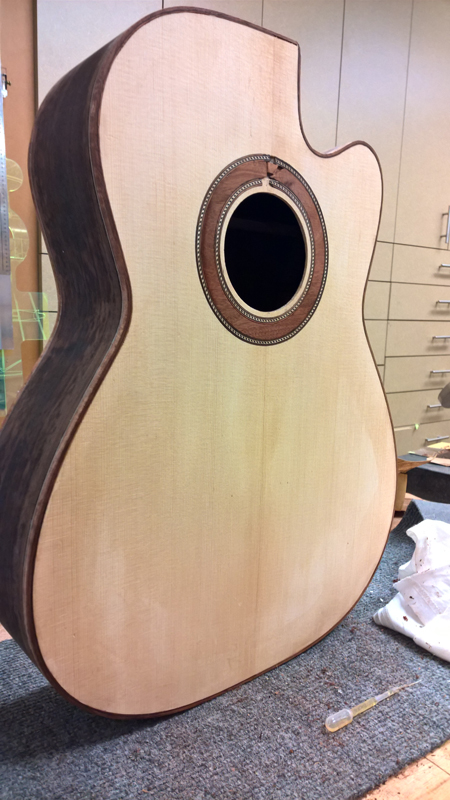
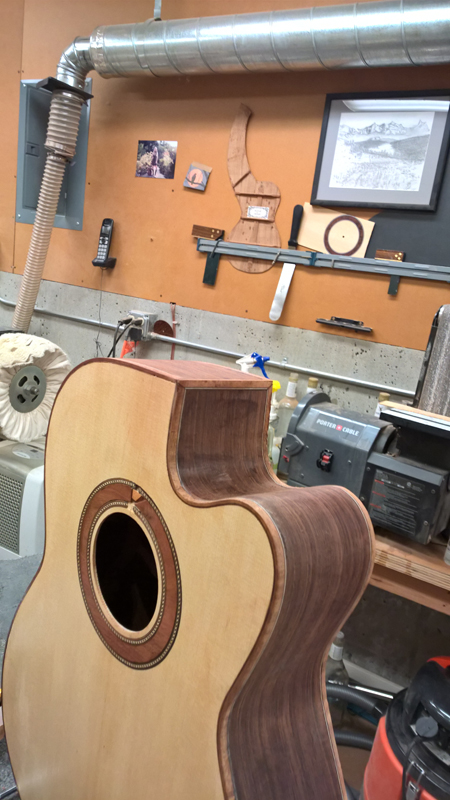
So I am back on this guitar. I made the new top, glued it to the rims and back and got the bindings on ...

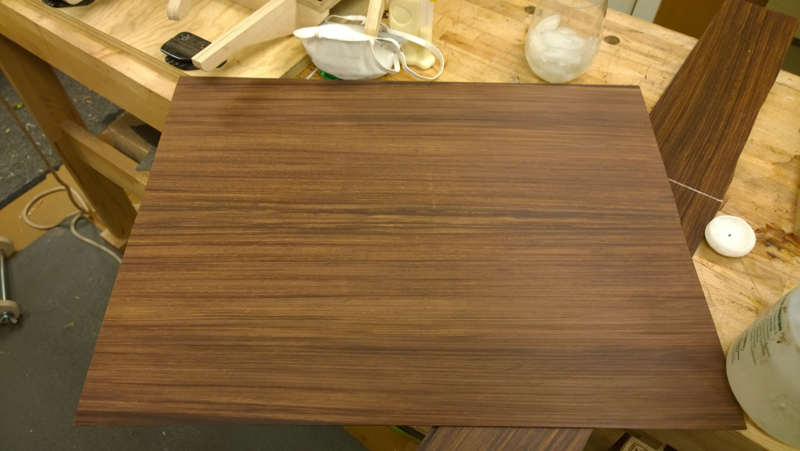
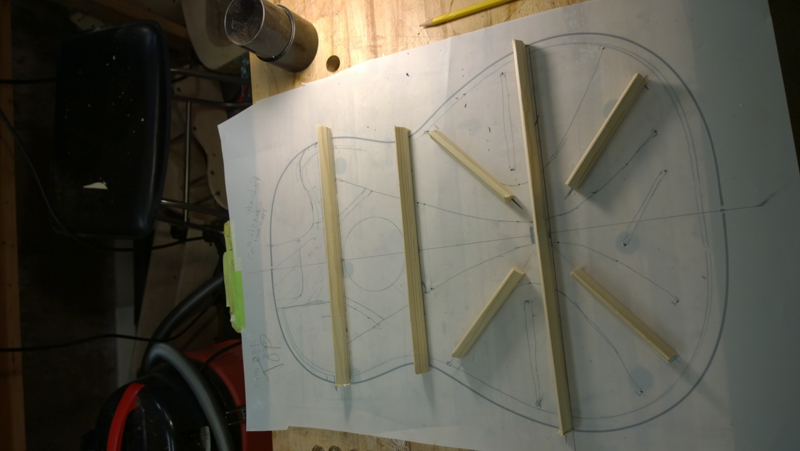
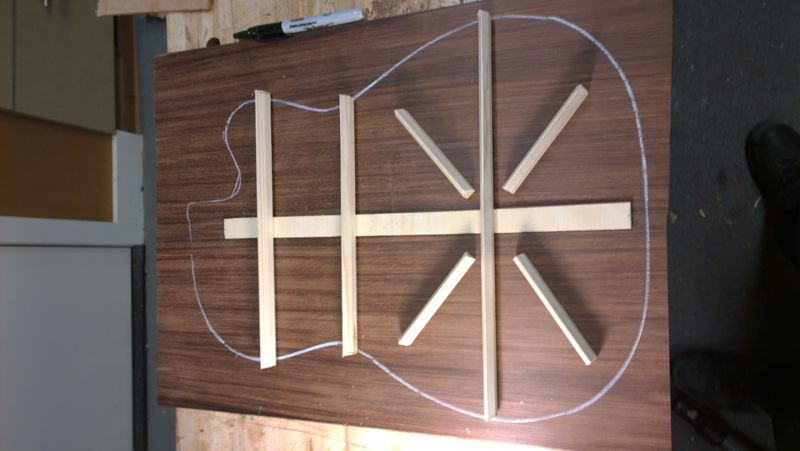
I pulled the first top I was using for this project. I accidentally spilled a bottle of brown stain on the top after the rosette was installed and put it off in disgust. Well the stain came off with light sanding so I had a top with a nice rosette all ready for bracing.

Image

Image

Image

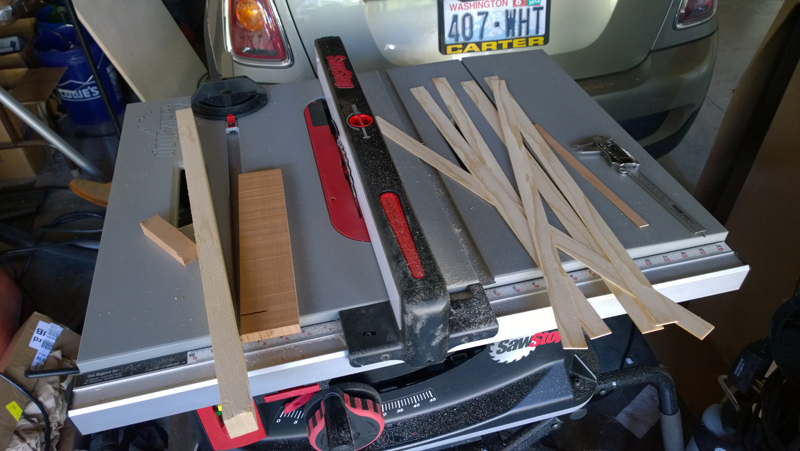
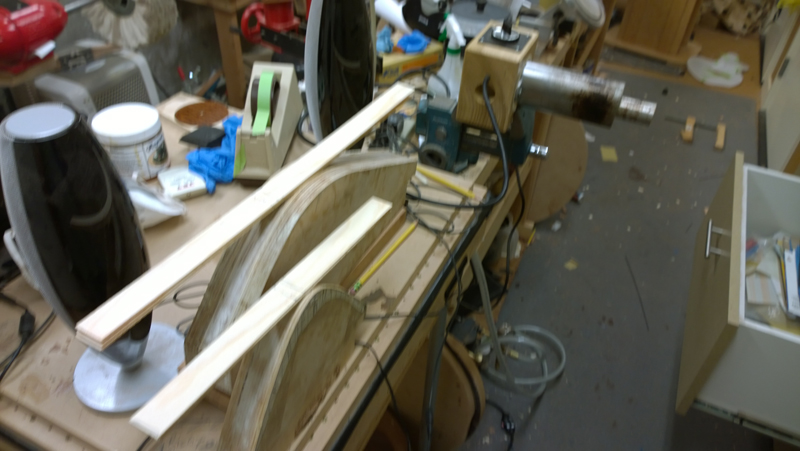
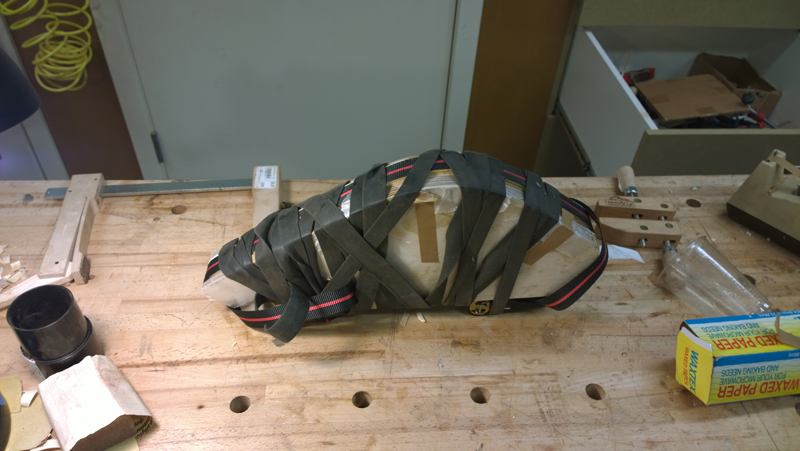
The Australian Blackwood bindings for the cutaway side I bent in the fox bender were cracked so I bent new ones on a hot pipe. A fun job but I did learn a few things about bending on a hot pipe. First after very carefully achieving a perfect bend for the waste and cut away sections be careful. One can still crack a side bending the lower bout. Also I bent these purflings dry. I use a very very hot pipe. I found the wood got plastic much quicker dry, probably as the moisture keeps the wood closer to 220 degrees as it evaporates. Bending by hand I ended up with bindings that fit without having to be forced into the channel shape wise. Also I used a long fabric strip to bind the bindings after I glued them on. I have a 10' radius on the back. The binds fit the profile but they still need to be forced to the back radius. That forcing wants to twist the bindings a bit so they pull away from the channel. Binding them helped close any gaps.


Image

Image

Image

Image

Also I am happy with the resonance frequency of the box now. I think when I finished the guitar it will be very close to my target.
tippie53
Posts: 7140
Joined: Fri Mar 03, 2006 7:09 pm
Location: Hegins, Pa
Contact:

Re: Second Falcate Classical

Post by tippie53 »

you can see the experience coming through. I bet you learned a great deal on the first one. Great to see this . Thanks for posting
John Hall
Blues Creek Guitars Inc
Authorized CF Martin Repair Center
president of Association of Stringed Instrument Artisans
http://www.bluescreekguitars.com
Randy
Posts: 44
Joined: Fri Aug 24, 2012 11:31 am
Location: Arlington wa state

Re: Second Falcate Classical

Post by Randy »

Great build again Jhon do you put fiber under and on top of the braces? Can you tell me the purpose? And do you trim the braces for tap tone or just glue up straight. A fascinating build.
Randy
johnnparchem
Posts: 2354
Joined: Sat Apr 10, 2010 10:50 pm
Location: Seattle
Contact:

Re: Second Falcate Classical

Post by johnnparchem »

Thanks John
Randy wrote:Great build again Jhon do you put fiber under and on top of the braces? Can you tell me the purpose? And do you trim the braces for tap tone or just glue up straight. A fascinating build.
Randy
Thank you Randy,

Having the fiber under and above the brace makes the best use of the CF as it is as far away from the neutral axis as possible.

I use the CF for a few reasons, if I am careful I can make a lighter brace that an equivalent stiffness all spruce brace.

The CF will also nearly eliminate cold creep of the wood. The CF will resist conforming to the bow created with string tension. I will see in 10-15 years if that is true.

Also I tap tune the top plate for a consistent stiffness build to build. As the CF provides a good percentage of the stiffness of the brace, it helps even out the effects of the variances one sees in all spruce braces. So I do not do any tap tuning after the braces are installed I rely on careful measurement of brace height to control the top resonance.
Post Reply