
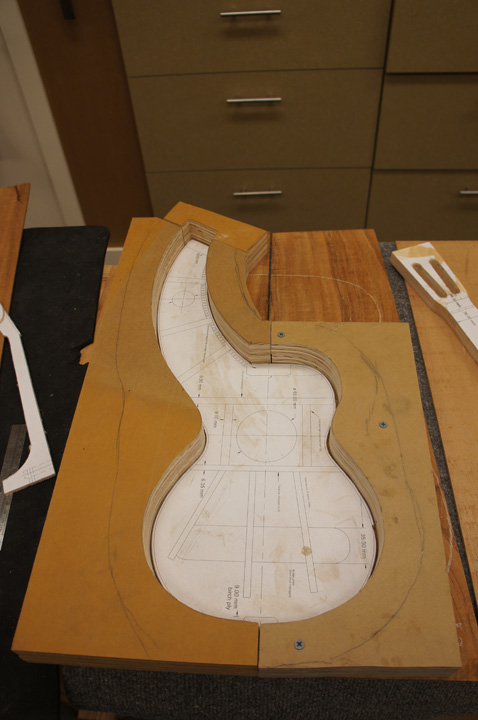
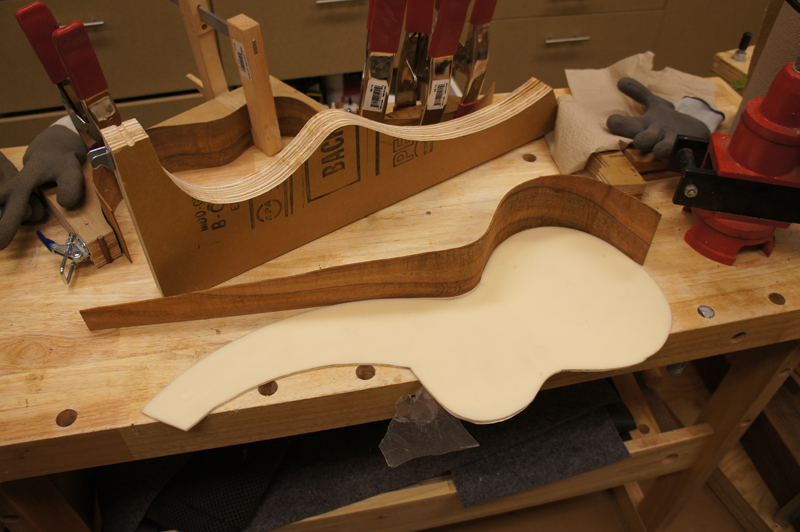
I have not done all that much yet. I copied a set of plans I had to use to make a set of plastic templates and a bending form. I also made a slotted headstock out of plywood to use as a quide.
harp ukulele build blog - together at last!.
-
johnnparchem
- Posts: 2354
- Joined: Sat Apr 10, 2010 10:50 pm
- Location: Seattle
- Contact:
harp ukulele build blog - together at last!.
You do not have the required permissions to view the files attached to this post.
Last edited by johnnparchem on Wed Dec 26, 2012 5:21 pm, edited 14 times in total.
-
johnnparchem
- Posts: 2354
- Joined: Sat Apr 10, 2010 10:50 pm
- Location: Seattle
- Contact:
Re: Starting a harp ukulele
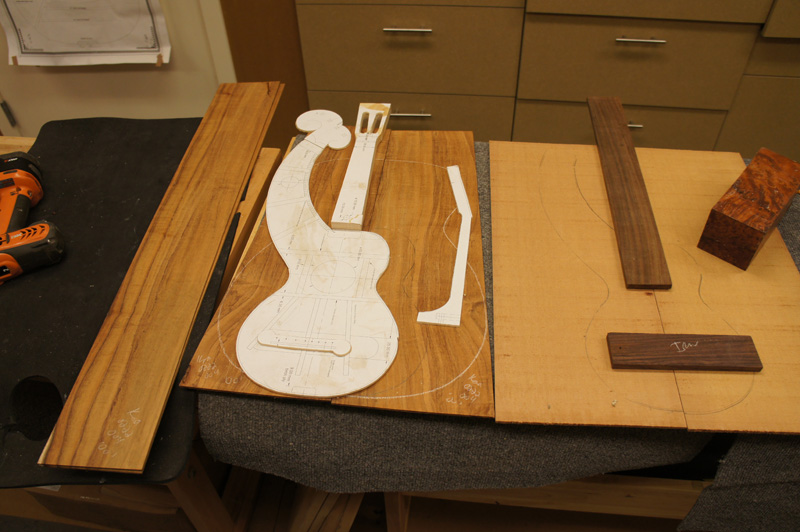
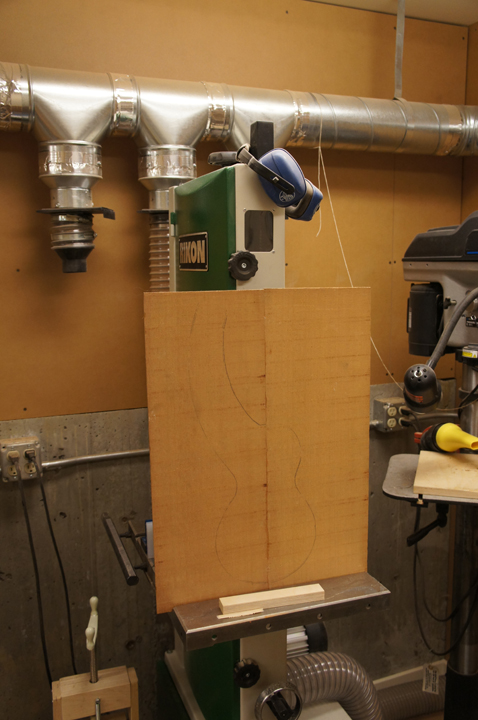
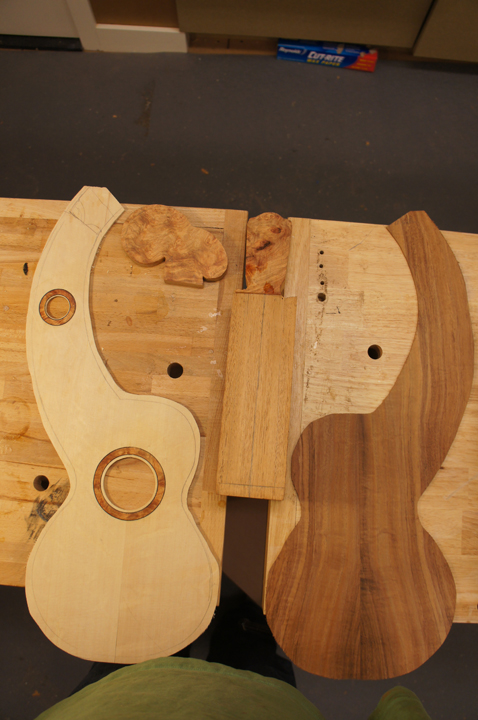
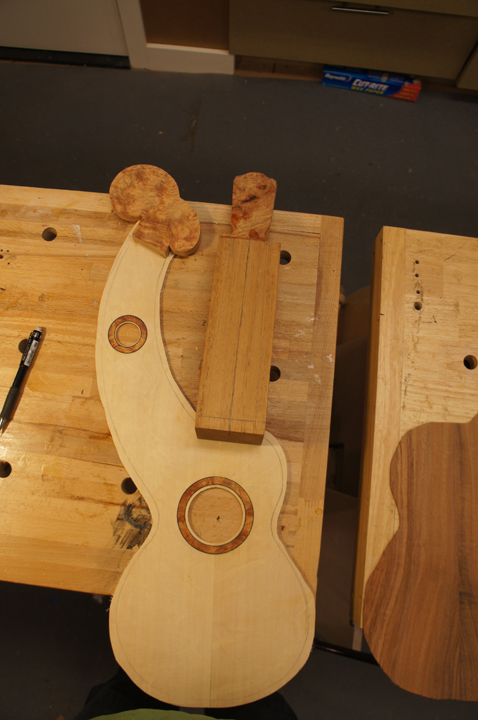
I roughed out the mold and I decided to use koa for the back and sides and cedar for the top. My koa set is for a guitar, so I though I would cut out a set of koa binding and put them in with a black fiber side purfling. I will use the thuya burl you see in the photo for the headstock and peg board veneer and possibly the rosettes. Also you can see in the picture that I will make a rosewood fretboard and a rosewood bridge.
-
darren
- Posts: 794
- Joined: Sun Apr 19, 2009 9:26 pm
- Location: Williams Bay, Wi
- Contact:
-
Valleyisle
- Posts: 12
- Joined: Mon Mar 19, 2012 3:12 am
Re: Starting a harp ukulele
Very interesting. Thanks.
-
johnnparchem
- Posts: 2354
- Joined: Sat Apr 10, 2010 10:50 pm
- Location: Seattle
- Contact:
Re: Starting a harp ukulele
With the bass guitar out of the way and a couple of weekends doing garden work :(. I finally got to get back to the harp ukulele.
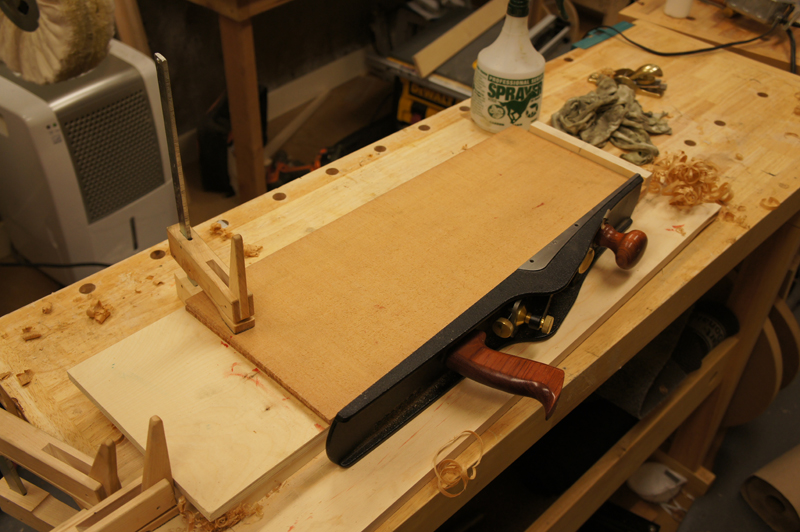
First up I made a shooting board to help when I need to join the top and back plates. I am still learning with the plane. The jointer in the picture worked great for the cedar but had too low of an angle for the koa and tended to tear out some of the more figured areas. I do not have a good bench plane so I finished the koa joint with a strip of sand paper on glass.
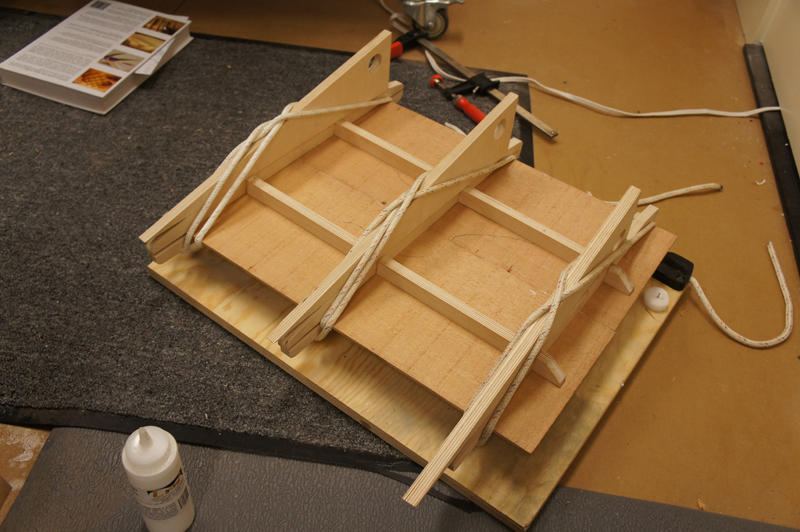
I do like using the plate joining jig. Before buying this jig (I know looks pretty easy to make) I tried both the streched tape and clamping it between some nails. This jig is fool proof to assure the plates are both clamped flat and have good clamping force.
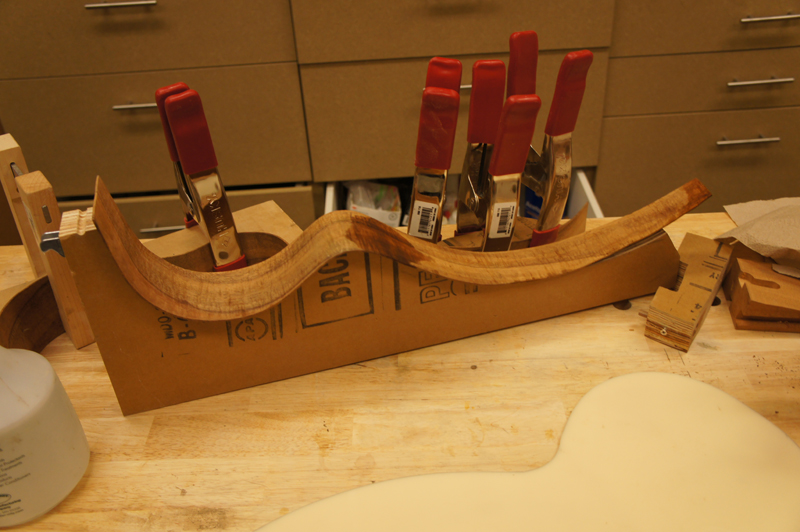
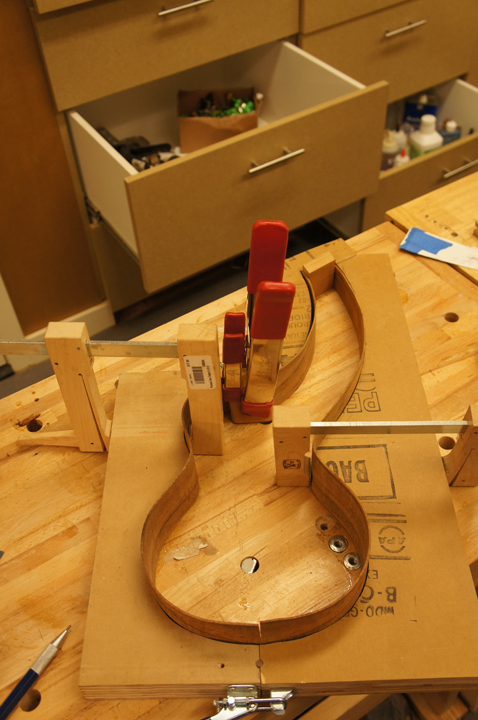
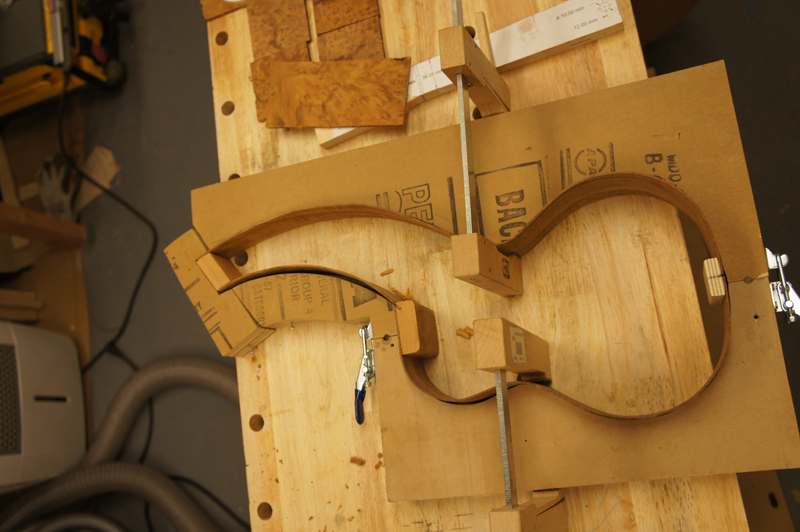
With the back curing, I went to assemble to rims but Oh - oh. Notice how flat the profiled sides are laying; basically top down but the top template is UP. Any one need a koa rim set bent for a left handed harp ukulele?

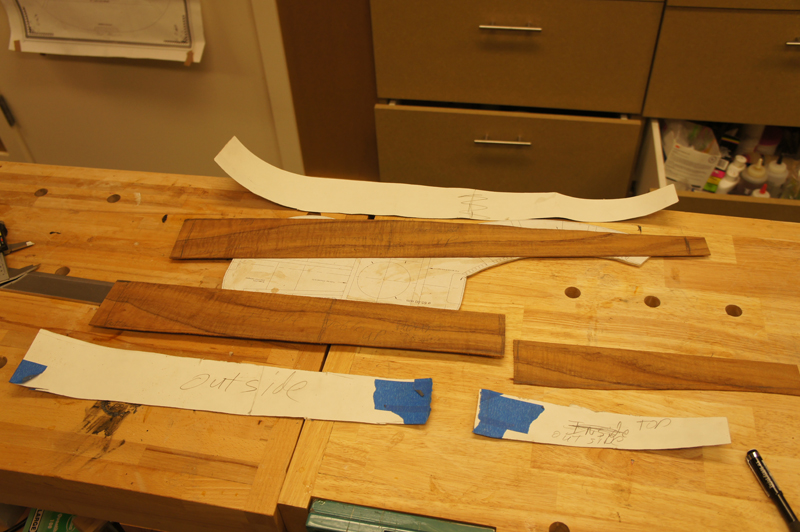
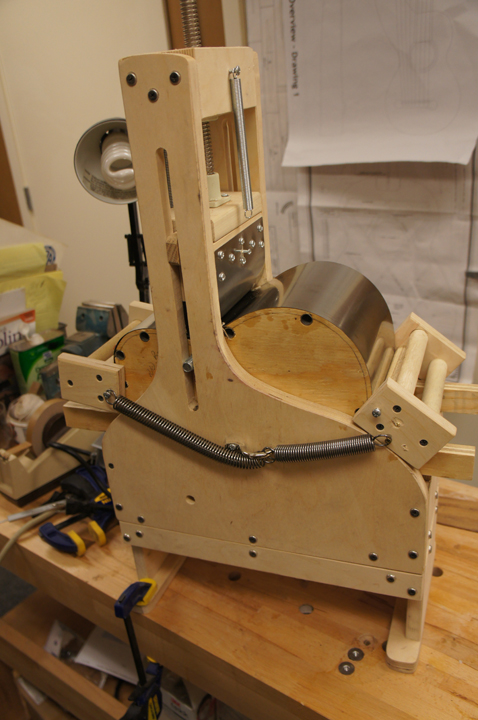
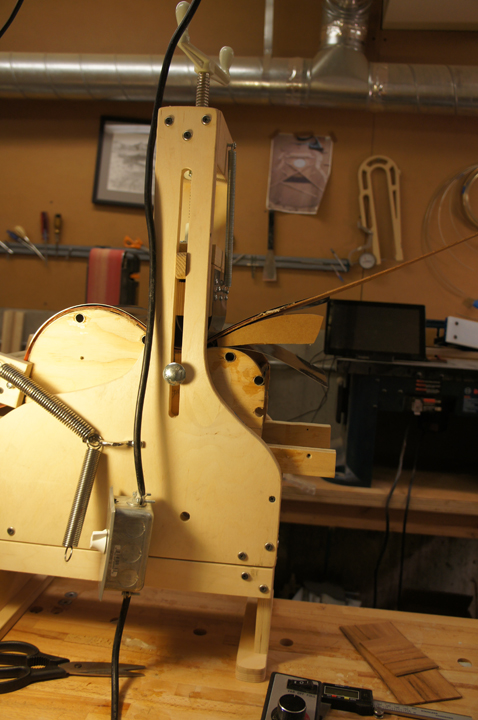
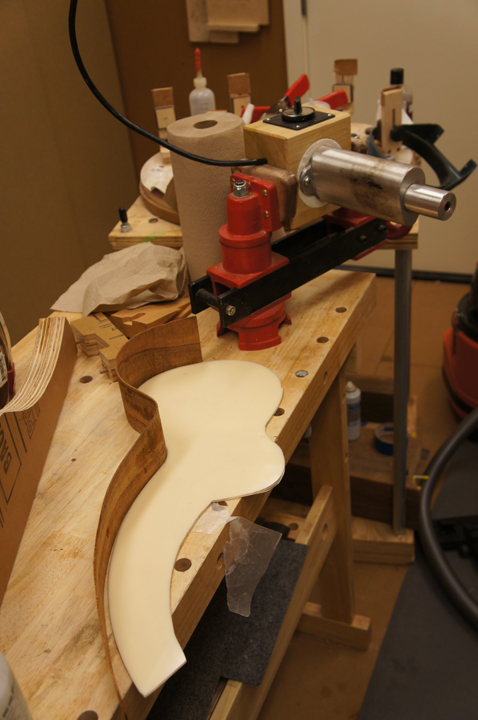
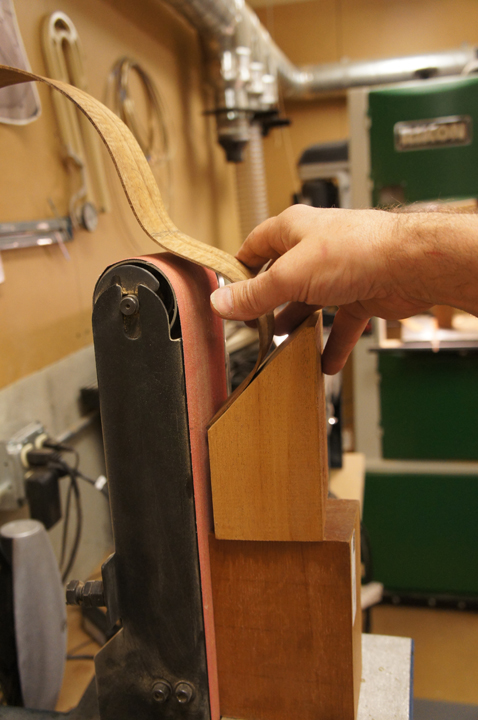
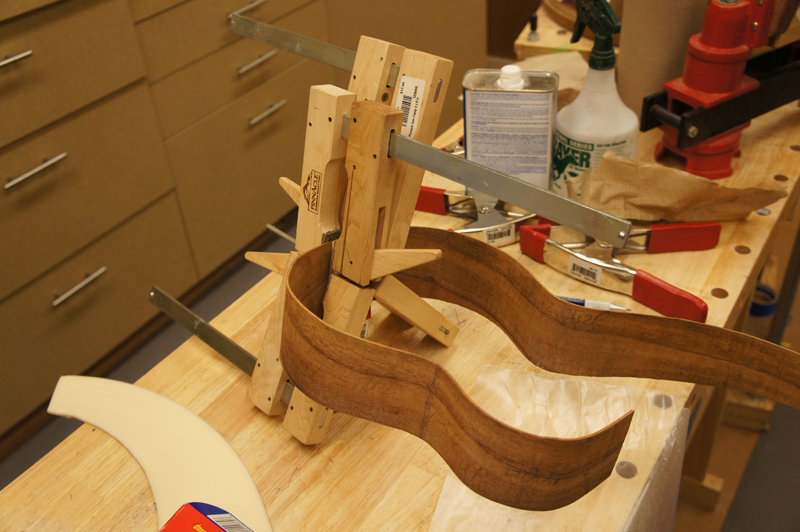
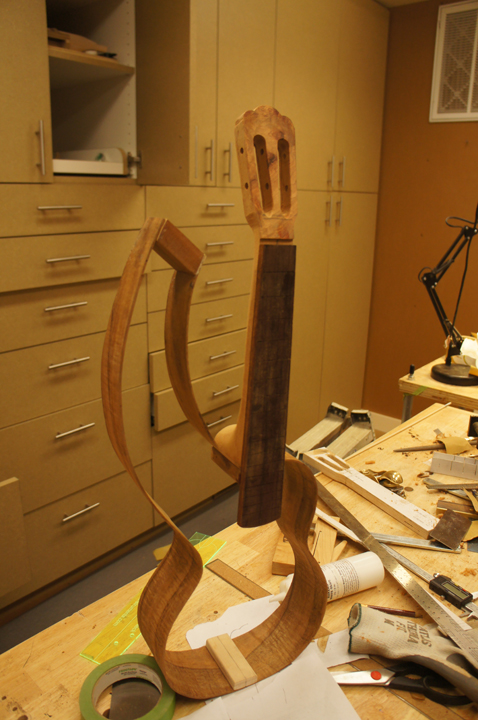
I had another Koa set set :{ and as the next series of photos show I produced a new set of rim components. I rigged up my John Hall bender the best I could to bend the small sides. The harp components I bent on a bending pipe.
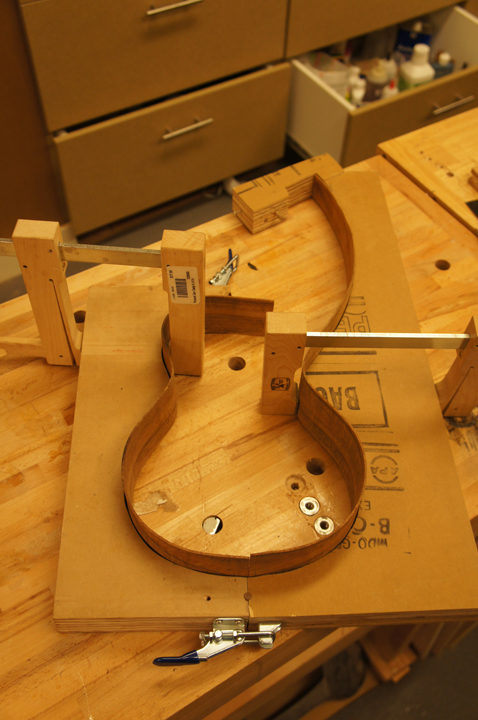
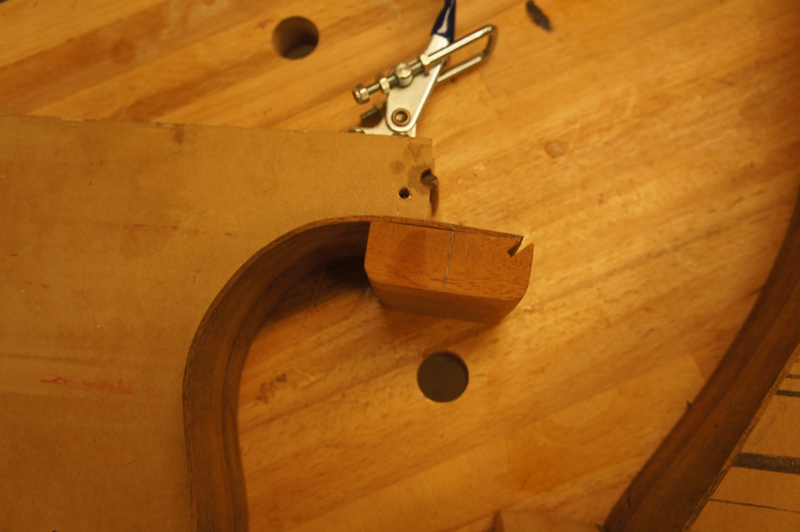
The right side miters into the inside harp neck, so I had to build a little jig on my belt sander to sand the 45 degree angle. As you can see in the second photo the angled on the end of the side matches the 45 degree angle on the inside neck block.
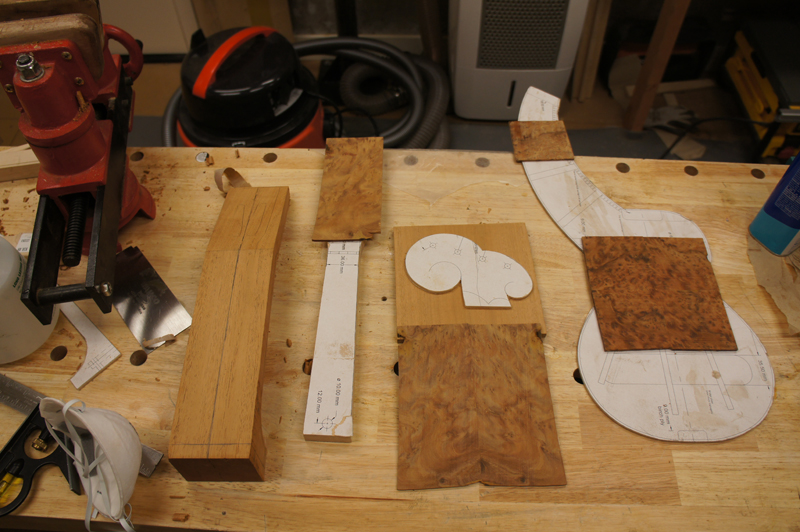
As the next set of picutres showed I worked between gluing the right handed ukulele sides to the neck and tail blocks and preparing the remaining components of the ukulele. I had a block of thuya burl that I resawed of both the bottom and the sides. I joinded the veneers together in various ways to produce a set of veneers for the rosettes, the harp peg board and the uke peg board.

I hope to get more done this weekend I will post again.
First up I made a shooting board to help when I need to join the top and back plates. I am still learning with the plane. The jointer in the picture worked great for the cedar but had too low of an angle for the koa and tended to tear out some of the more figured areas. I do not have a good bench plane so I finished the koa joint with a strip of sand paper on glass.
I do like using the plate joining jig. Before buying this jig (I know looks pretty easy to make) I tried both the streched tape and clamping it between some nails. This jig is fool proof to assure the plates are both clamped flat and have good clamping force.
With the back curing, I went to assemble to rims but Oh - oh. Notice how flat the profiled sides are laying; basically top down but the top template is UP. Any one need a koa rim set bent for a left handed harp ukulele?
I had another Koa set set :{ and as the next series of photos show I produced a new set of rim components. I rigged up my John Hall bender the best I could to bend the small sides. The harp components I bent on a bending pipe.
The right side miters into the inside harp neck, so I had to build a little jig on my belt sander to sand the 45 degree angle. As you can see in the second photo the angled on the end of the side matches the 45 degree angle on the inside neck block.
As the next set of picutres showed I worked between gluing the right handed ukulele sides to the neck and tail blocks and preparing the remaining components of the ukulele. I had a block of thuya burl that I resawed of both the bottom and the sides. I joinded the veneers together in various ways to produce a set of veneers for the rosettes, the harp peg board and the uke peg board.
I hope to get more done this weekend I will post again.
-
johnnparchem
- Posts: 2354
- Joined: Sat Apr 10, 2010 10:50 pm
- Location: Seattle
- Contact:
Re: Starting a harp ukulele
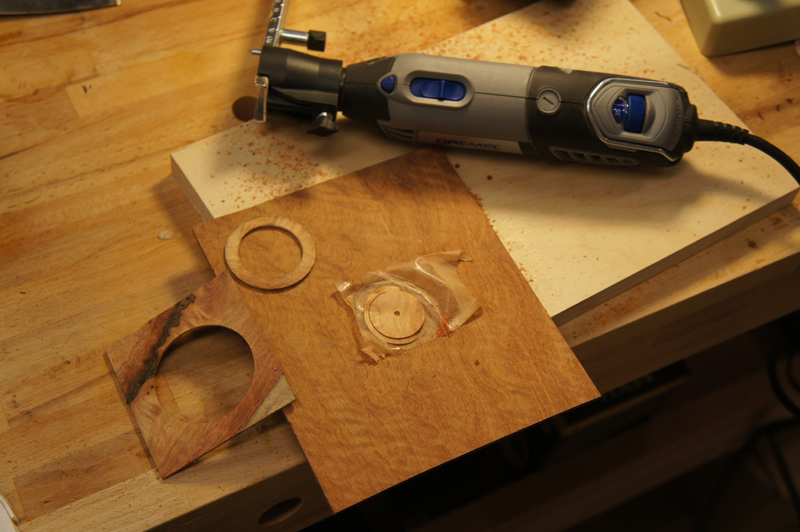
I ended up not liking the color of the Thuya burl on Cedar. They are so close that they clash. So I ended up changing my top to bear claw Sitka spruce with Amboya burl for the rosettes and the peg board veneers. I was able to make and install both rosettes. The little rosette in the harp neck was too small for my PC 310 router with the Bishop Cochran router base, so I had to use the little circle maker that came with my dremel. The little rosette was particularly hard as there is not a fret board that covers up the top of the rosette. Ultimately to get the exact size for the purfling I measured the diameters of the rebates and multiplied them by pi. Then I had the perfect size.
Included in the pictures show the reason I really like a good router in a stable base. You can really see the difference in the quality of the cuts when you compare the two rebates one made by the dremel the other made by the Porter Cable310 abd the Cochran base.

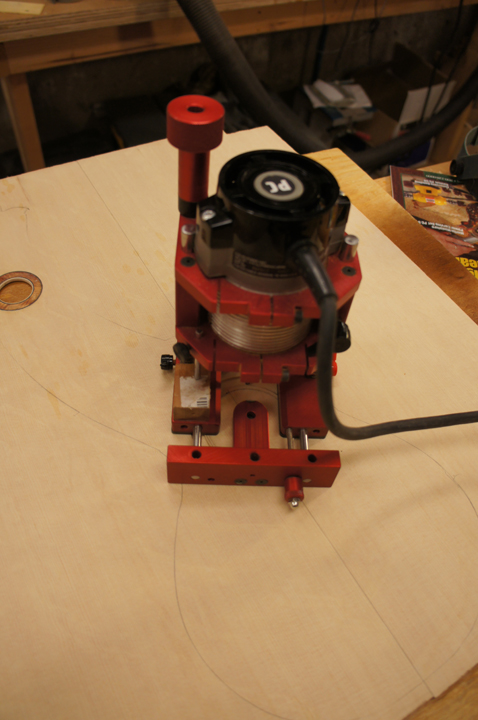
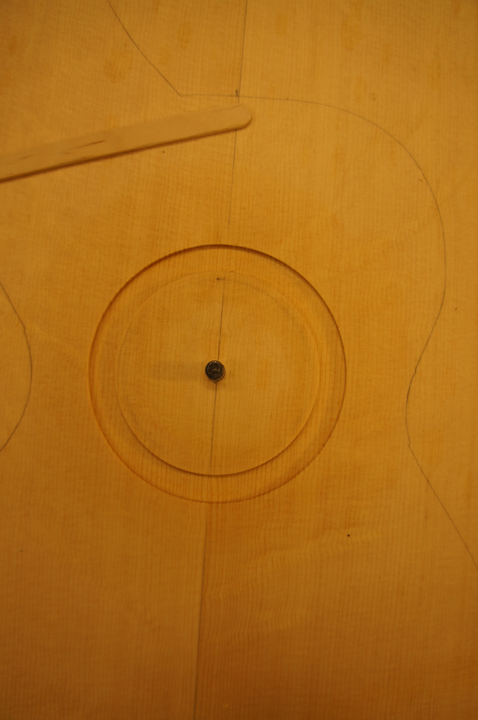
Included in the pictures show the reason I really like a good router in a stable base. You can really see the difference in the quality of the cuts when you compare the two rebates one made by the dremel the other made by the Porter Cable310 abd the Cochran base.
-
johnnparchem
- Posts: 2354
- Joined: Sat Apr 10, 2010 10:50 pm
- Location: Seattle
- Contact:
Re: Starting a harp ukulele
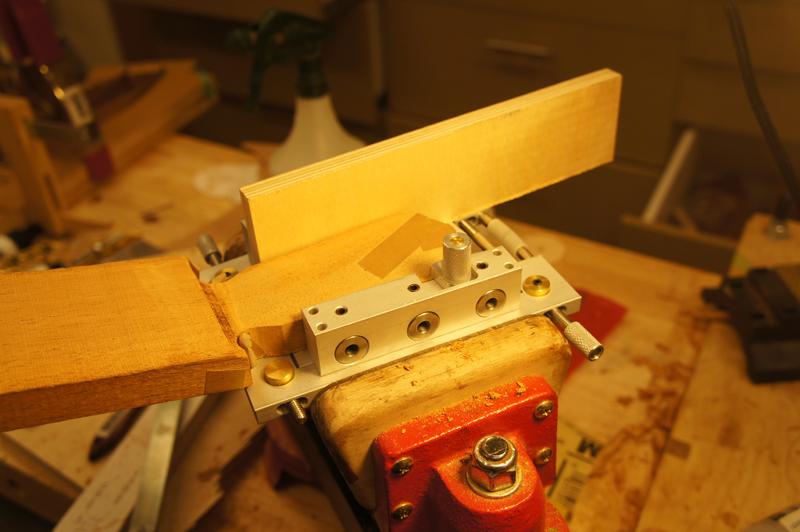
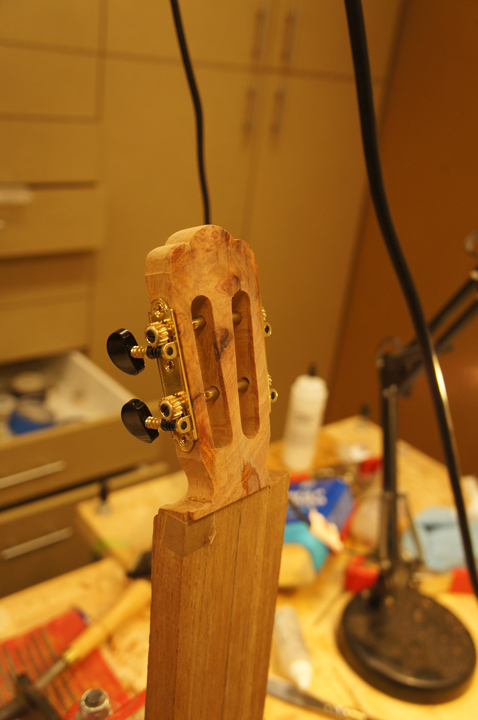
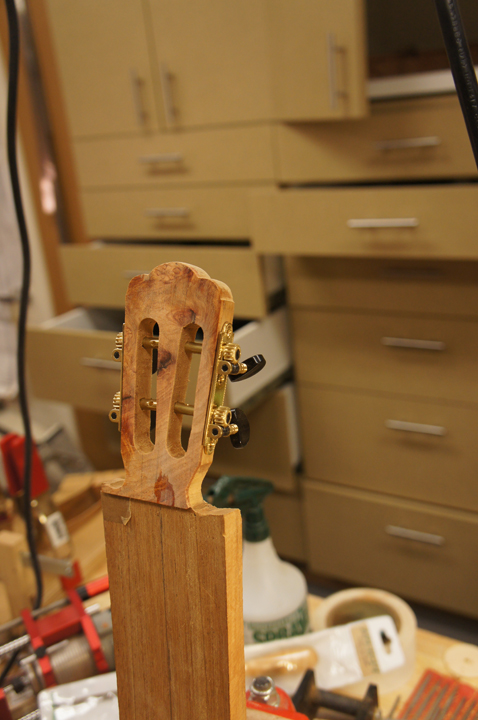
Normally I have a nice tool that allows me to drill the slot head holes and route out slots for my acoustic and classical slot head guitars. I do not have a tool with the right spacing for the ukulele holes or a template narrow enough for the slots. So this one I mostly had to do the old fashion way with a drill and a rasp for the slots. I was able to jury-rig my slot head tool as a drill guide. I had to mark the tuning machine holes and align the tool by eye for each hole. All in all it came out ok. When I was drilling the holes at the end of the slots I blew out the back of the peg head a bit so I sanded it down 2mm and I am gluing on a 2 mm koa back strap veneer. I was considering that any way so I was sort of forced into it.
Last edited by johnnparchem on Mon Jun 11, 2012 9:54 am, edited 1 time in total.
-
darren
- Posts: 794
- Joined: Sun Apr 19, 2009 9:26 pm
- Location: Williams Bay, Wi
- Contact:
Re: Starting a harp ukulele
Looking good John. Much better than my attempt at the cumpiano style of cutting a slotted headstock.
I just love seeing a headstock shape almost ready for finish sanding hanging on to a neck blank like that.
I just love seeing a headstock shape almost ready for finish sanding hanging on to a neck blank like that.
Darren
-
johnnparchem
- Posts: 2354
- Joined: Sat Apr 10, 2010 10:50 pm
- Location: Seattle
- Contact:
Re: harp ukulele build -- Power tool wake-up call :(
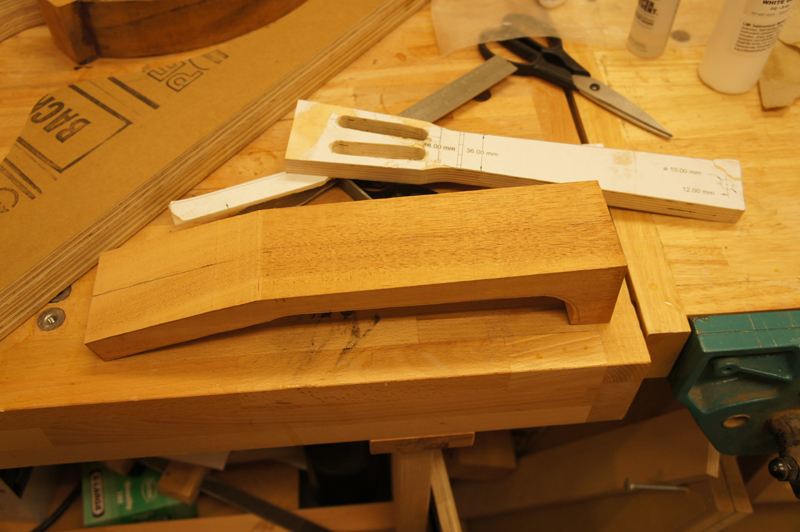
On the back of the harp headstock there is going to be 1 " radius curve. I have a very sharp 1" radius cove bit. A big bit 2 inch around an inch or so high. Some how I must not have tighten down the bit well enough in the router because half way through the cut the bit took off into the air like a whirly toy taking the board and my hands with it. I think I let go of the board but as the bit was flying by it nicked my index finger. Ouch! Nice clean but deep cut. I did not hit any thing important as it hit the out side index finger between the first joint and nail.
But ignore all of that; with nice safe hand tools (as long as one keeps their body parts out of the way) I have the neck rough carved.

But ignore all of that; with nice safe hand tools (as long as one keeps their body parts out of the way) I have the neck rough carved.
-
Ken Hundley
- Posts: 608
- Joined: Mon Mar 13, 2006 12:34 am
- Location: Wilmette, IL
Re: harp ukulele build -- Power tool wake-up call :(
Looks great, John! I would love to do something like this, but have no idea what I would do with it when finished!
Ken Hundley
Nocturnal Guitars
http://www.nocturnalguitars.com
So, my big brother was playing guitar and I figured I'd try it too.
- Stevie Ray Vaughan
Nocturnal Guitars
http://www.nocturnalguitars.com
So, my big brother was playing guitar and I figured I'd try it too.
- Stevie Ray Vaughan