
Finished construction on my Koa Parlor Guitar.
-
Darryl Young
- Posts: 1685
- Joined: Fri Jul 30, 2010 6:44 pm
- Location: Arkansas
Re: Working on the neck for the Koa Parlor Guitar for my nie
John, are you putting your name on the headstock? If so, will the grain pattern on the first veneer pic hide your logo?
Slacker......
-
johnnparchem
- Posts: 2354
- Joined: Sat Apr 10, 2010 10:50 pm
- Location: Seattle
- Contact:
Re: Working on the neck for the Koa Parlor Guitar for my nie
No name, I will probably put on my hawk and moon logo, which would be ok.Darryl Young wrote:John, are you putting your name on the headstock? If so, will the grain pattern on the first veneer pic hide your logo?
You do not have the required permissions to view the files attached to this post.
-
johnnparchem
- Posts: 2354
- Joined: Sat Apr 10, 2010 10:50 pm
- Location: Seattle
- Contact:
Re: Working on the neck for the Koa Parlor Guitar for my nie
This amounts to a couple of days of work and includes a bunch of pictures, maybe too many, but you all get to see how I went about nearly finishing this neck. As part of this work one could see the advantaged of a nicely indexed fingerboard. I like to glue on the fingerboard very late because once glued the neck angle set gets harder. But I do want to know exactly where the fingerboard is on the neck when gluing on the headstock veneer and carving the neck. I will glue on the fingerboard for the sanding of the neck so that I will sand the neck and the fingerboard edge together.
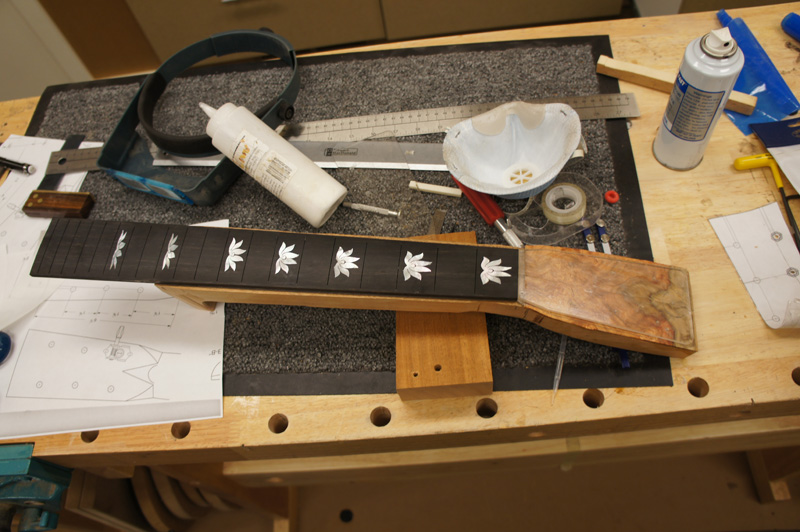
For this guitar I made a headstock template out of plexiglass with holes for the tuner and my logo.
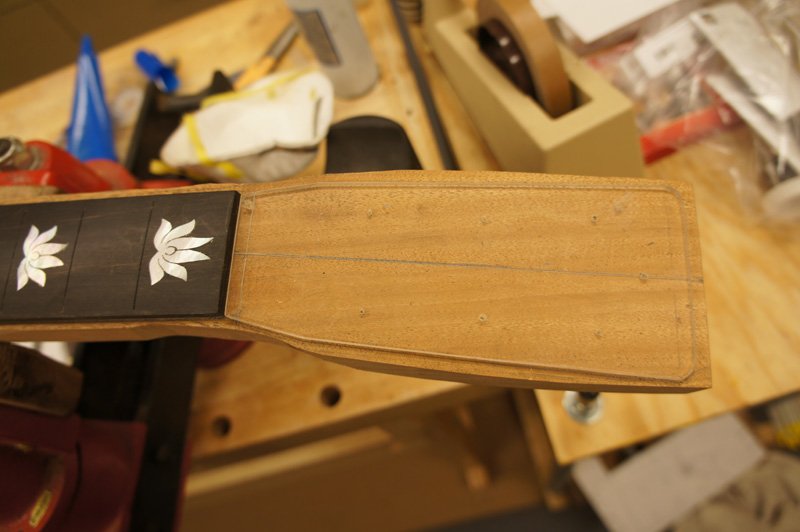
I used the template to decide where to cut the nut end of the headstock veneer, marked it and used my belt sander to sand in the headstock angle.
I have a properly sized nut blank, that I cut too short on one guitar, which I use to properly space the headstock veneer.
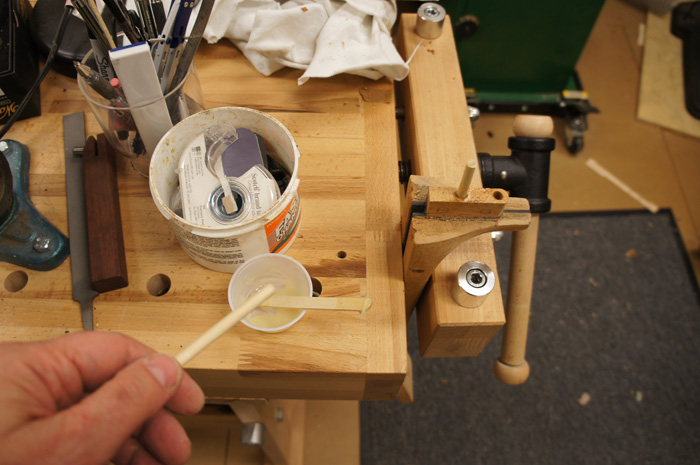
I laid out the headstock veneer double checking everything and proceeded to glue it on to the headstock with LMI white glue.
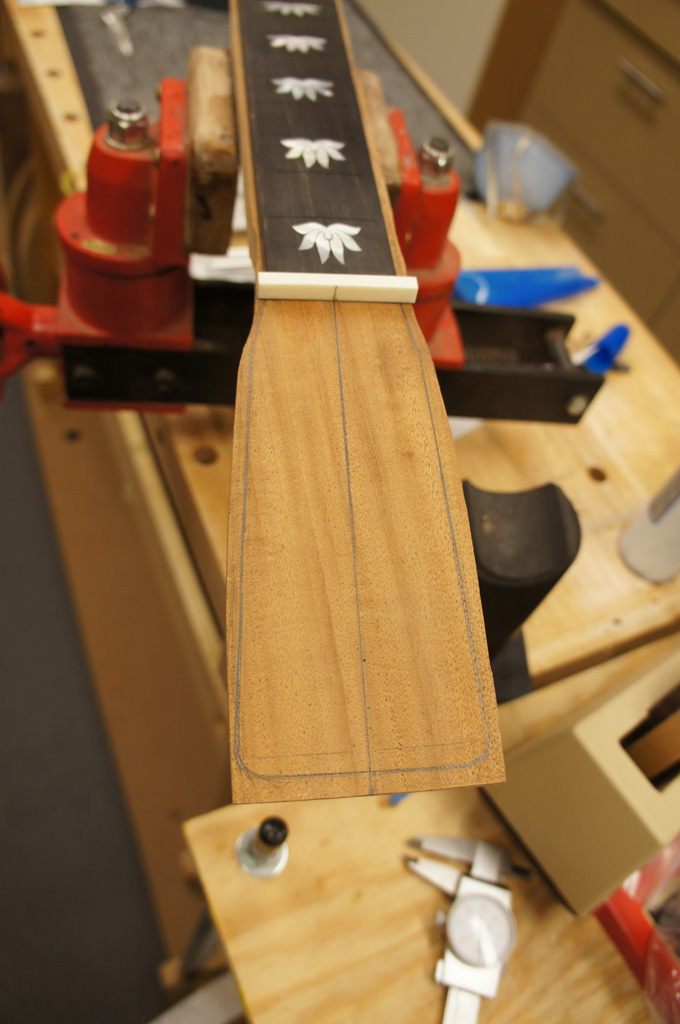
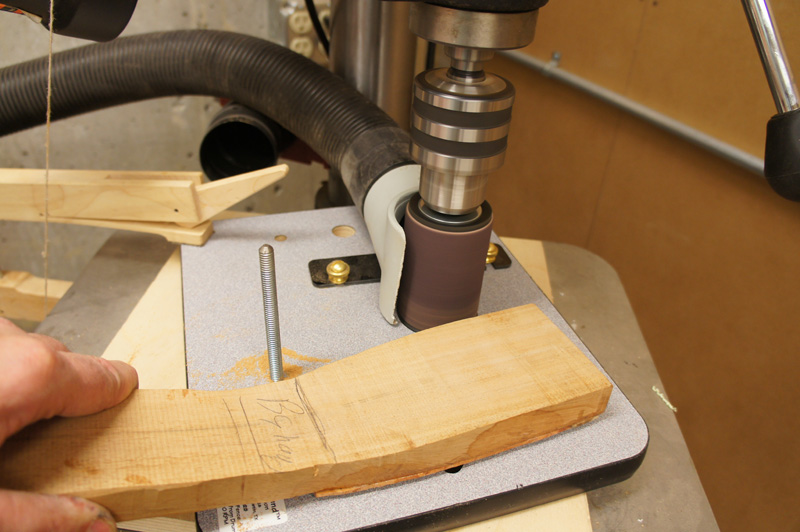
I used good double stick-um tape to glue the template on to the headstock and used the template as an index for the Luthier friend sanding drum.
I think next time I will use a router. With a router I could have profiled this in one pass, with less opportunity of error.
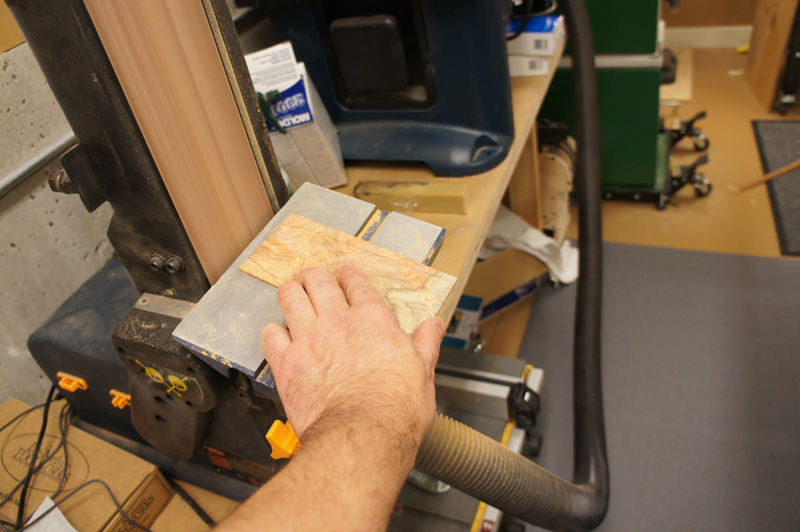
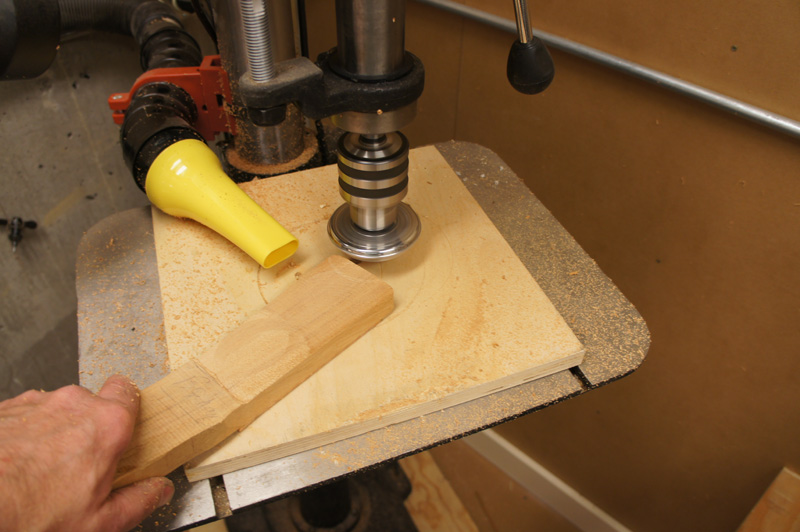
I used my favorite tool the safe-t planer (how can it be any safer!), wheel of spinning blades, to take the headstock to the right depth. I take very little off each pass. Basically I bump height wheel with the drill press locked. Toward the end, I carefully dial it in using the depth stop on the drill press.
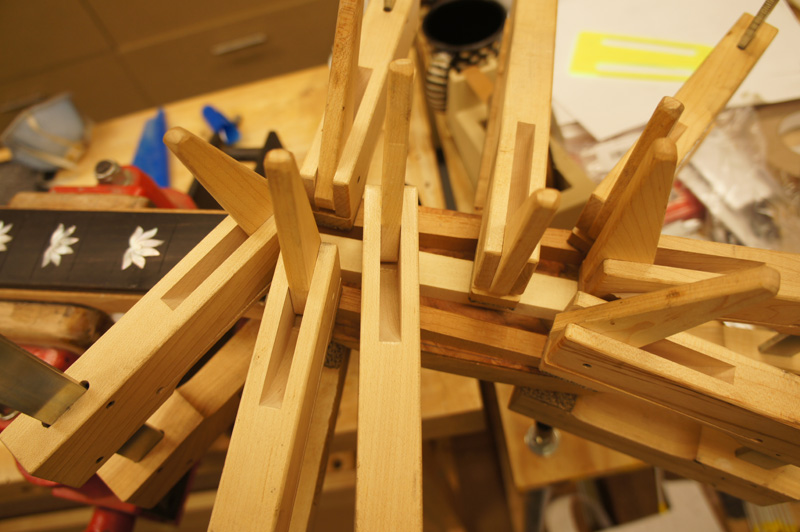
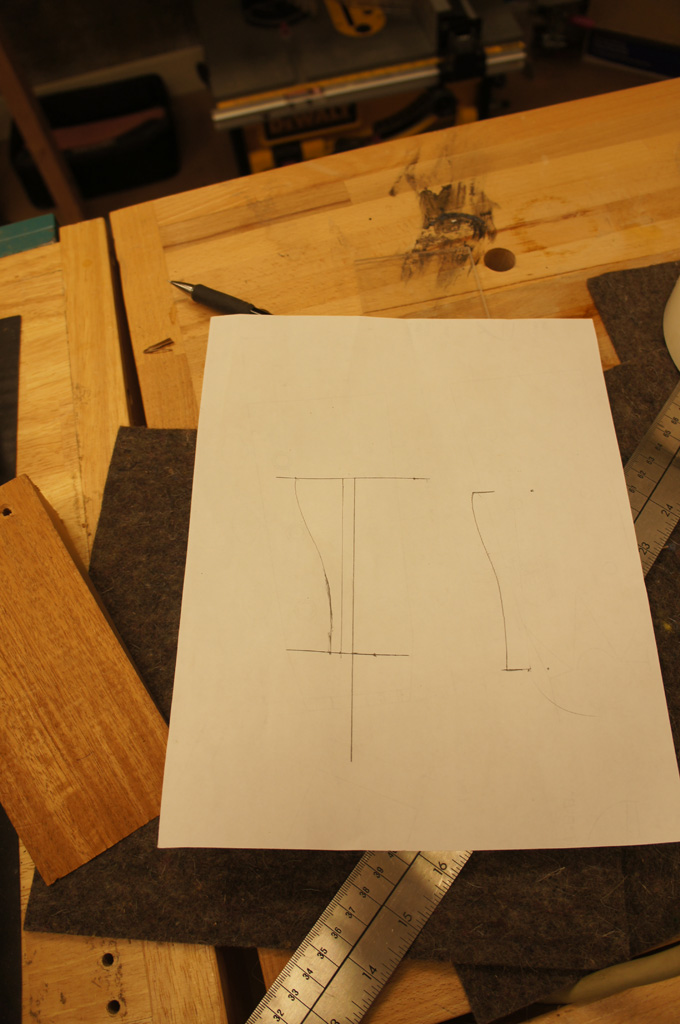
I took the desired width at the fingerboard and at the tail of the heel and made a half pattern that I transferred first to a piece of plexiglass and then to the bottom of the neck heal. I also free hand drew a heal cap shape and glued it on to the heel with CA.

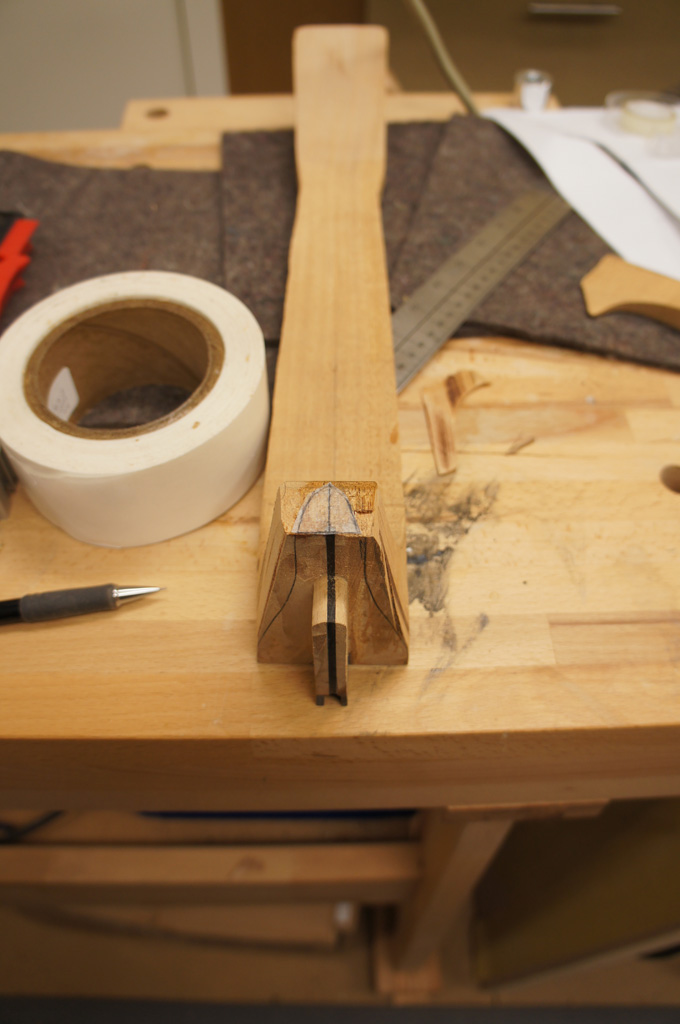
I use long sweeping strokes with the rasp or micro plane to follow the profile and approach the center line on the top of the heel. I find that if I keep the approach to the center line and the approach to the profile somewhat even and use long sweeping strokes the heel carves to a natural (based on the profile) curve.
When first starting I use a micro plane to take off some of the bulk. I mostly use course and fine carpenter rasps from LMI as I like the feel in my hand.
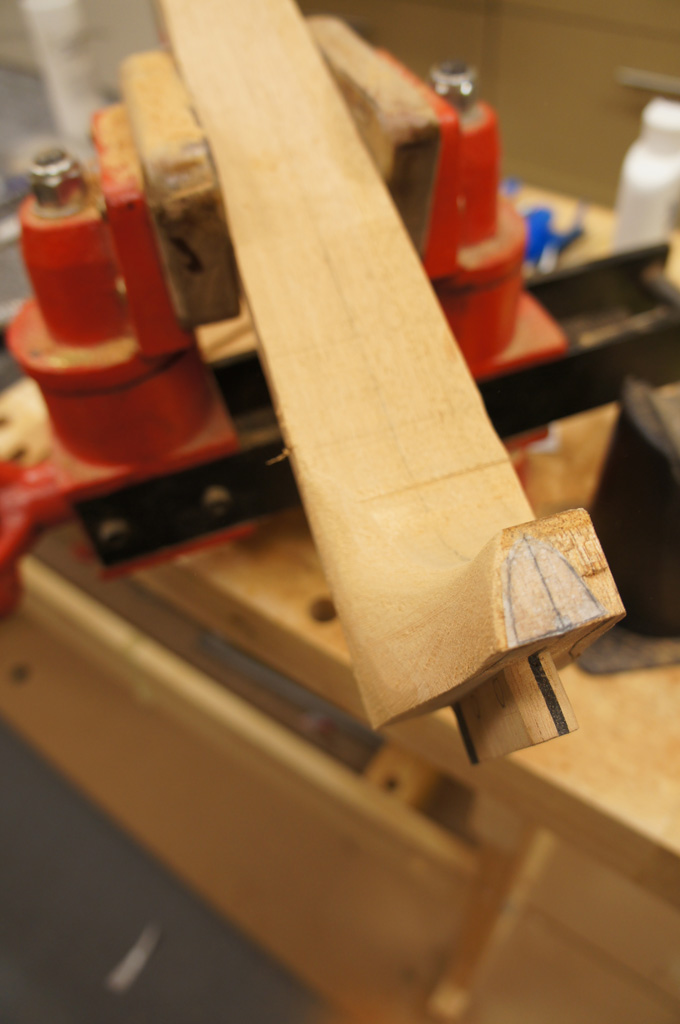
This is good enough for now. It is close to symmetrical. I still have a little to go but I will save it until after the rest of the neck is carved.

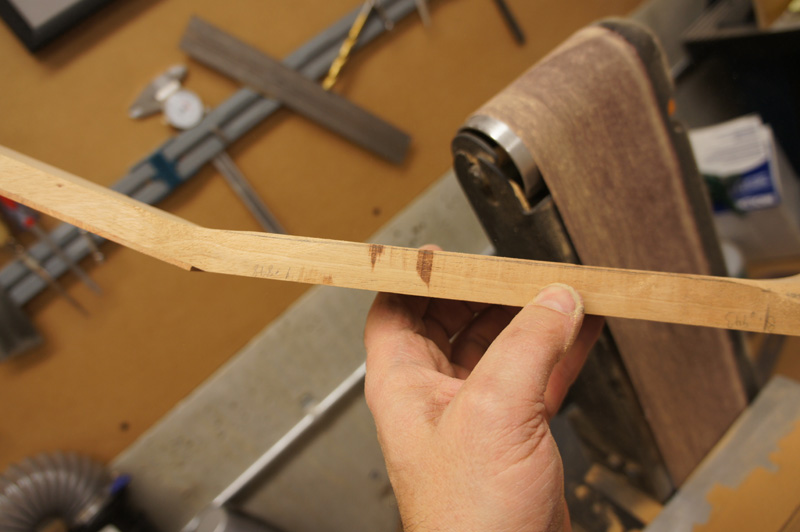
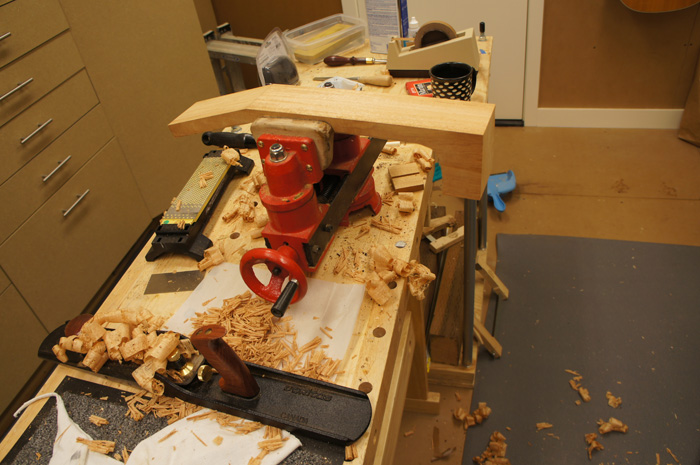
Although the use of fast power tools often gets me in trouble I used the belt sander to profile the thickness I wanted for the final neck. With it I can be sure that I have a plane along the centerline instead of a curve. I am making the neck about .85” at the first fret and .95” at the eighth fret.
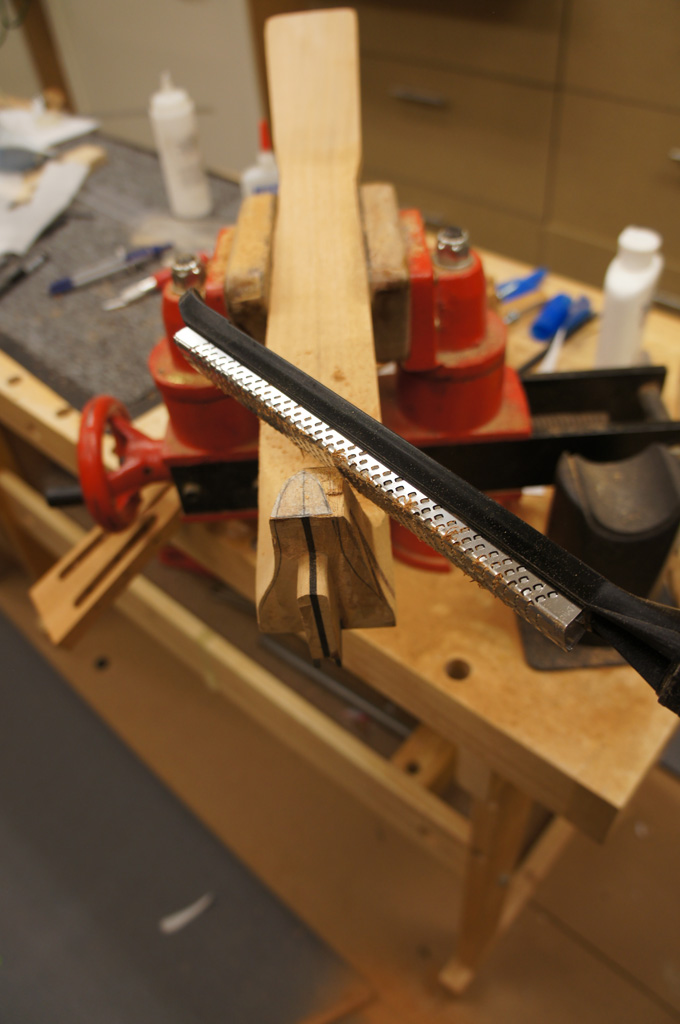
I general just freehand the carve; working toward the edge and the centerline somewhat evenly (as a percent) using nice sweeping stokes. I did carve one side making a 45 degree facet and using a 22 degree angle to take the edges off of the first facet. I could see this method would allow me to better match a desired template with the proper use of layout lines.

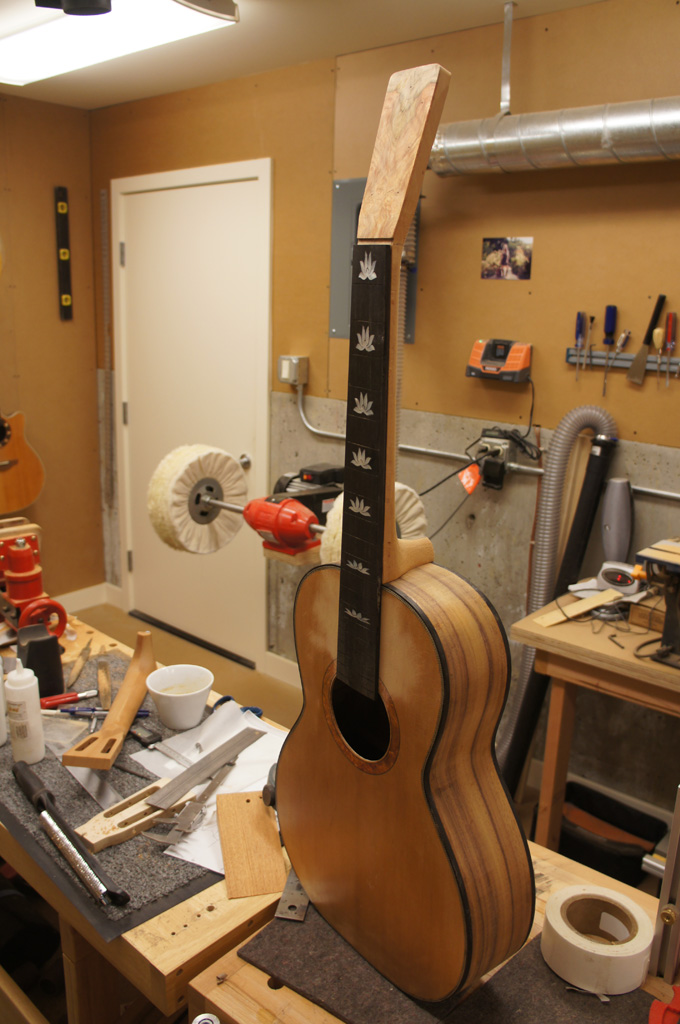
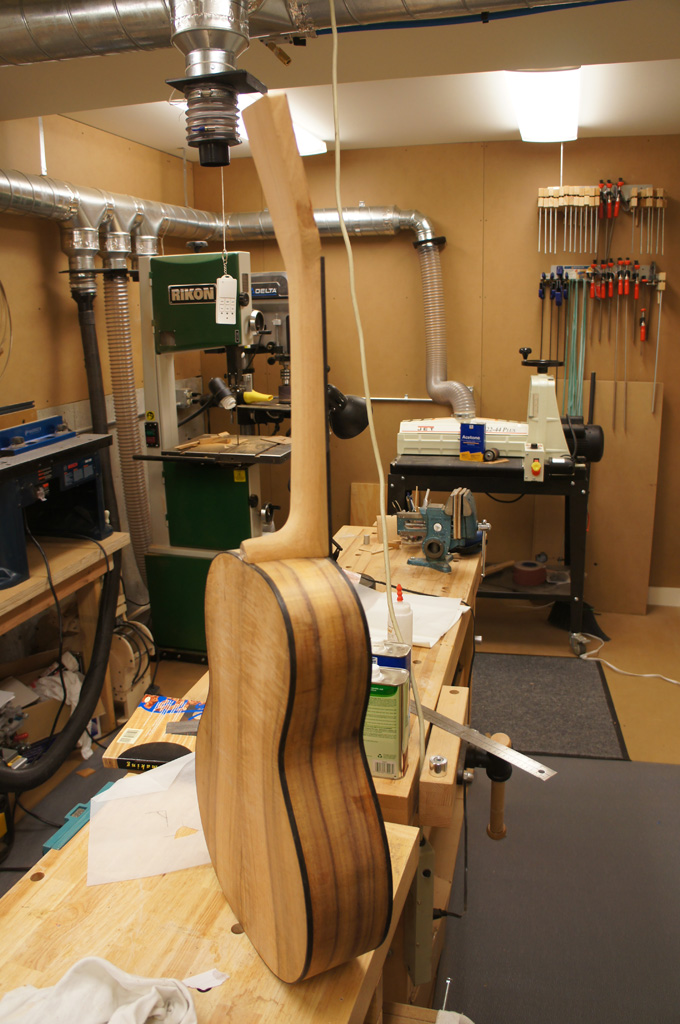
Here are a few photos of where I am at. The neck angle is still right on and over all the neck looks good on the guitar. After a break to get out of the push mode I am in I will glue on the finger board, work out the transition between the headstock and the neck and final sand the neck. Also note in the pictures the smoothness of the carving from the fine rasp. I have not yet used any sandpaper on the carved parts of the of the heel.
For this guitar I made a headstock template out of plexiglass with holes for the tuner and my logo.
I used the template to decide where to cut the nut end of the headstock veneer, marked it and used my belt sander to sand in the headstock angle.
I have a properly sized nut blank, that I cut too short on one guitar, which I use to properly space the headstock veneer.
I laid out the headstock veneer double checking everything and proceeded to glue it on to the headstock with LMI white glue.
I used good double stick-um tape to glue the template on to the headstock and used the template as an index for the Luthier friend sanding drum.
I think next time I will use a router. With a router I could have profiled this in one pass, with less opportunity of error.
I used my favorite tool the safe-t planer (how can it be any safer!), wheel of spinning blades, to take the headstock to the right depth. I take very little off each pass. Basically I bump height wheel with the drill press locked. Toward the end, I carefully dial it in using the depth stop on the drill press.
I took the desired width at the fingerboard and at the tail of the heel and made a half pattern that I transferred first to a piece of plexiglass and then to the bottom of the neck heal. I also free hand drew a heal cap shape and glued it on to the heel with CA.
I use long sweeping strokes with the rasp or micro plane to follow the profile and approach the center line on the top of the heel. I find that if I keep the approach to the center line and the approach to the profile somewhat even and use long sweeping strokes the heel carves to a natural (based on the profile) curve.
When first starting I use a micro plane to take off some of the bulk. I mostly use course and fine carpenter rasps from LMI as I like the feel in my hand.
This is good enough for now. It is close to symmetrical. I still have a little to go but I will save it until after the rest of the neck is carved.
Although the use of fast power tools often gets me in trouble I used the belt sander to profile the thickness I wanted for the final neck. With it I can be sure that I have a plane along the centerline instead of a curve. I am making the neck about .85” at the first fret and .95” at the eighth fret.
I general just freehand the carve; working toward the edge and the centerline somewhat evenly (as a percent) using nice sweeping stokes. I did carve one side making a 45 degree facet and using a 22 degree angle to take the edges off of the first facet. I could see this method would allow me to better match a desired template with the proper use of layout lines.
Here are a few photos of where I am at. The neck angle is still right on and over all the neck looks good on the guitar. After a break to get out of the push mode I am in I will glue on the finger board, work out the transition between the headstock and the neck and final sand the neck. Also note in the pictures the smoothness of the carving from the fine rasp. I have not yet used any sandpaper on the carved parts of the of the heel.
-
tippie53
- Posts: 7178
- Joined: Fri Mar 03, 2006 7:09 pm
- Location: Hegins, Pa
- Contact:
Re: Mostly completed neck for the Koa Parlor Guitar.
very nice indeed
John Hall
Blues Creek Guitars Inc
Authorized CF Martin Repair Center
president of Association of Stringed Instrument Artisans
http://www.bluescreekguitars.com
Blues Creek Guitars Inc
Authorized CF Martin Repair Center
president of Association of Stringed Instrument Artisans
http://www.bluescreekguitars.com
-
Darryl Young
- Posts: 1685
- Joined: Fri Jul 30, 2010 6:44 pm
- Location: Arkansas
Re: Mostly completed neck for the Koa Parlor Guitar.
That looks very nice John. I'm starting to get the itch to make a neck. Probably will make the Dobro neck but it's much simpler.
Slacker......
-
Kevin Sjostrand
- Posts: 4121
- Joined: Sat Feb 09, 2008 8:06 pm
- Location: Visalia, CA
Re: Mostly completed neck for the Koa Parlor Guitar.
The neck is coming along nicely. That headstock is killer! Making the neck is one of the most enjoyable aspects of guitar building to my way of thinking. Because I only do it once a year, it is like doing it for the first time each time!!!!
Kevin
Kevin
-
johnnparchem
- Posts: 2354
- Joined: Sat Apr 10, 2010 10:50 pm
- Location: Seattle
- Contact:
Re: whoops!!! on to second neck for the Koa Parlor Guitar.
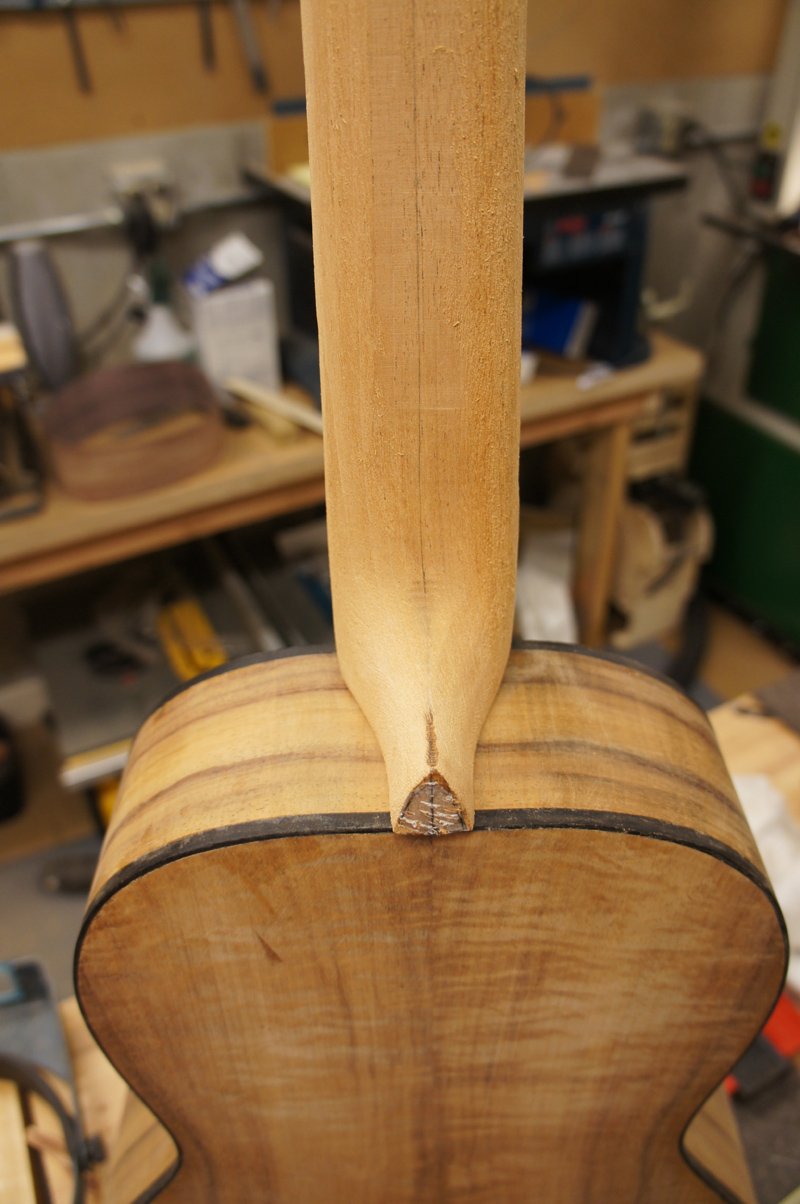
The guitar was nearing completion I found the correct size barrel or cross dowel nut and bolt, I made a template to drill the holes in the tenon. If only I had tested the jig and noticed that I went off center slightly when I routed the channel
I drilled right through the side of the tenon
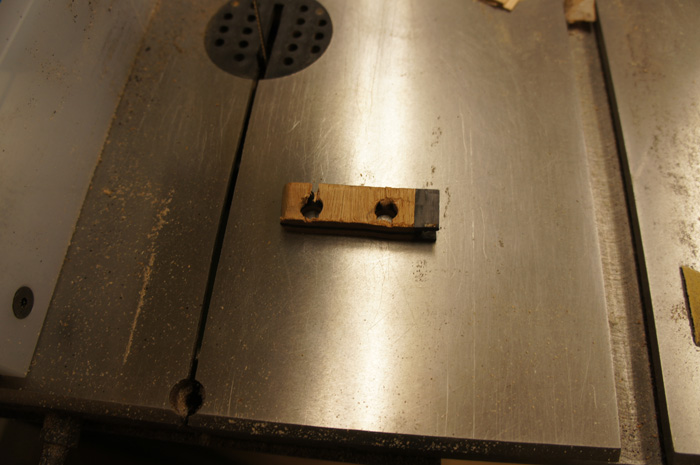
My first thought was I can fix this. So I cut off the the tenon and epoxied on a new tenon and also epoxied in some 1/8 inch dowels for support of the joint. It did work, but I got to thinking that I hit my error budget on that neck and decided to just make a new one, chocking up the first neck to experience and practice.
It did work, but I got to thinking that I hit my error budget on that neck and decided to just make a new one, chocking up to first neck to experience and practice. I cut out a new blank and started the process again.
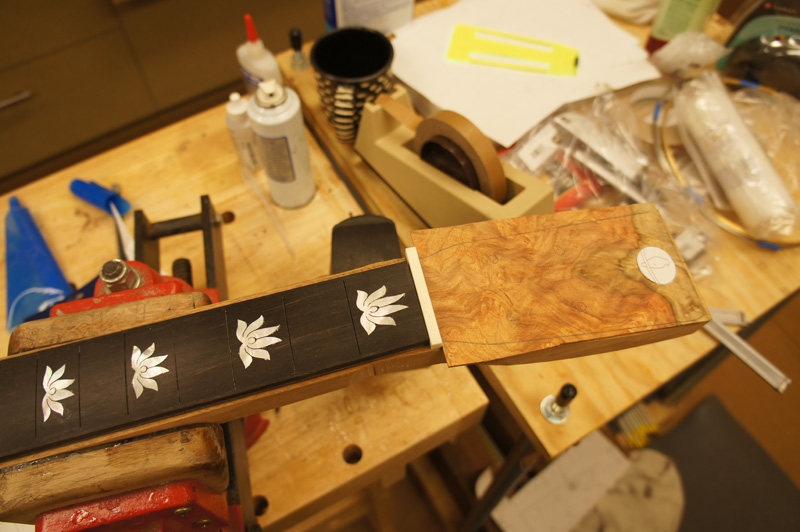
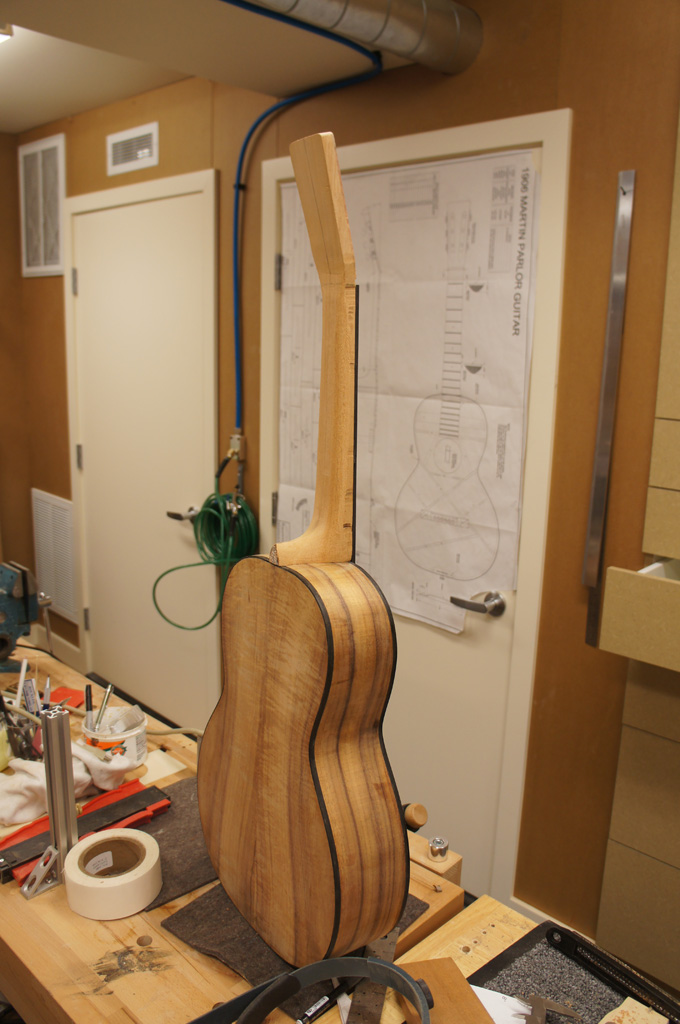
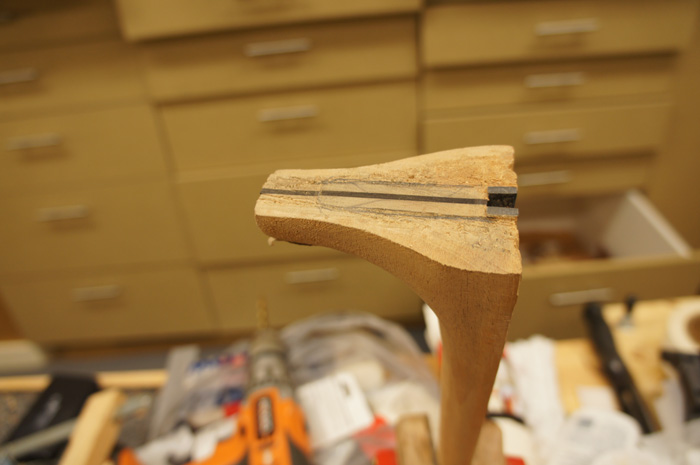
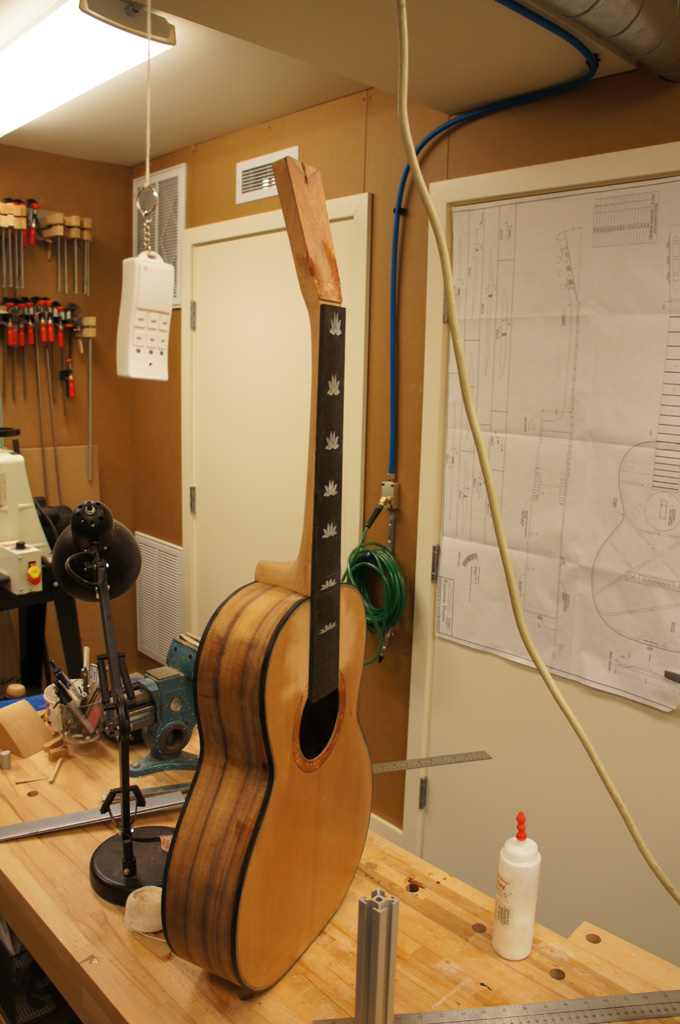
It has been quite a few days but I am very happy with the shape of the new headstock and the book matched amboyna burl veneer. I switch from a ½ inch tenon to a ¾ inch wide tenon, but I carefully laid out the heel shape to get the classic look with the narrow long tail. The new neck, while it still needs a bit of cleanup after I glue on the fretboard, is by far my best yet.

I drilled right through the side of the tenon
My first thought was I can fix this. So I cut off the the tenon and epoxied on a new tenon and also epoxied in some 1/8 inch dowels for support of the joint. It did work, but I got to thinking that I hit my error budget on that neck and decided to just make a new one, chocking up the first neck to experience and practice.
It did work, but I got to thinking that I hit my error budget on that neck and decided to just make a new one, chocking up to first neck to experience and practice. I cut out a new blank and started the process again.
It has been quite a few days but I am very happy with the shape of the new headstock and the book matched amboyna burl veneer. I switch from a ½ inch tenon to a ¾ inch wide tenon, but I carefully laid out the heel shape to get the classic look with the narrow long tail. The new neck, while it still needs a bit of cleanup after I glue on the fretboard, is by far my best yet.
-
Darryl Young
- Posts: 1685
- Joined: Fri Jul 30, 2010 6:44 pm
- Location: Arkansas
Re: whoops!!! on to second neck for the Koa Parlor Guitar.
John, that neck looks awesome!!! It looks perfect for that guitar in the next to last picture. I'll try a neck one day. I actually want to do it........it just takes me so long to build a guitar without a neck, I hate to add additional delay! Ha!
Your skills are getting better and better.
Your skills are getting better and better.
Slacker......
-
johnnparchem
- Posts: 2354
- Joined: Sat Apr 10, 2010 10:50 pm
- Location: Seattle
- Contact:
Re: whoops!!! on to second neck for the Koa Parlor Guitar.
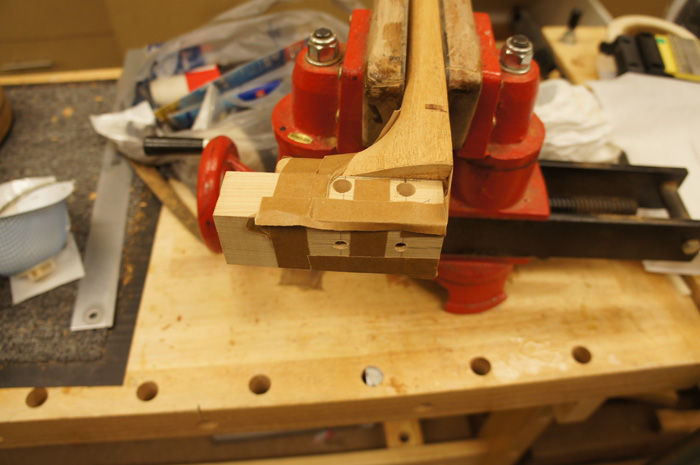
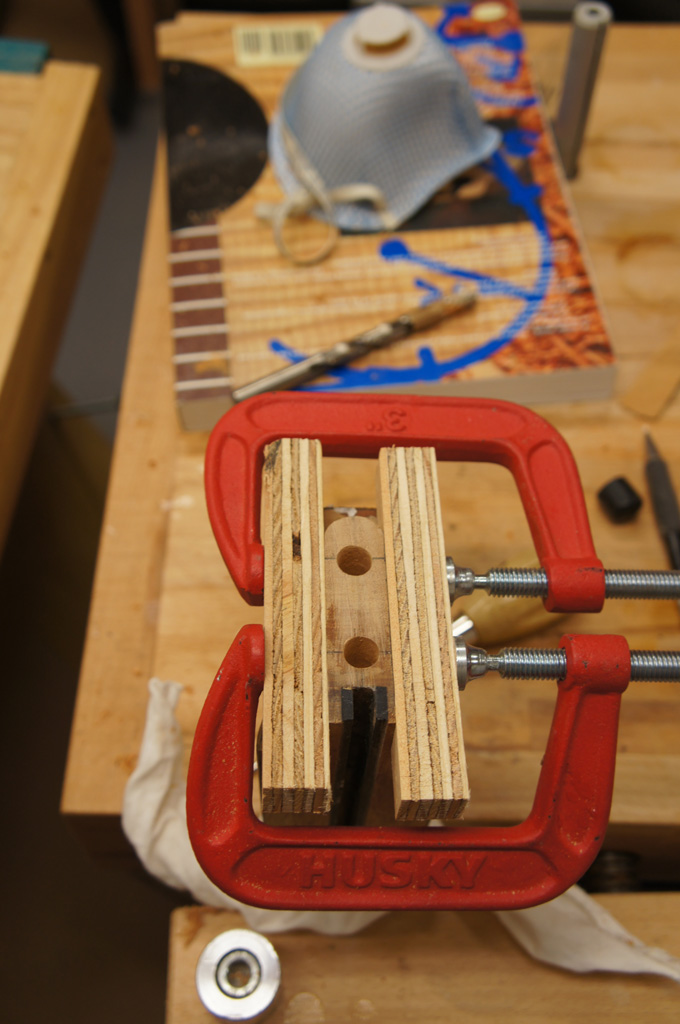
To prevent spiltting out anouter neck tenon, I clamped some ¾ plywood strips to support the tenon through the whole process.

Before inserting the inserts I put in some hole centers and drive them into the neck block to make an indent. In the last picture I put a little pencil mark in the indents to make them visible.


I drilled the holes for the bolts, but before I drilled the inserts I checked to make sure that I had the holes for the inserts deep enough to allow the bolt to fit without bottoming out.
I put the clamped strips back on and set the inserts.


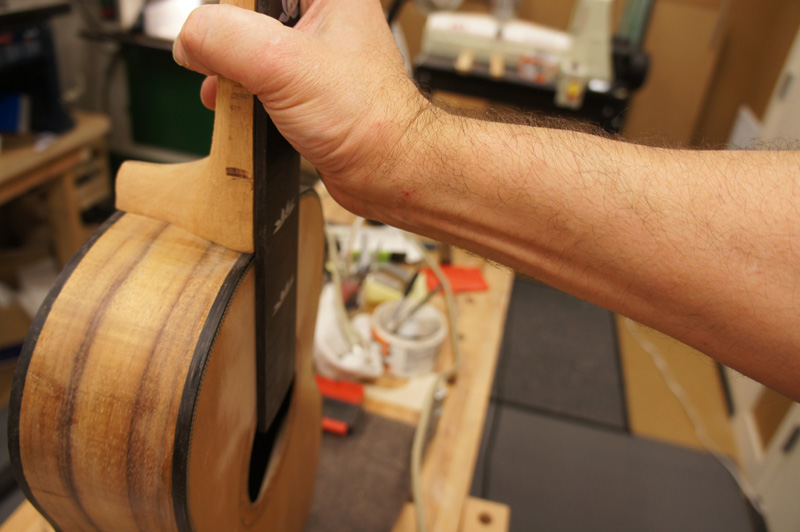
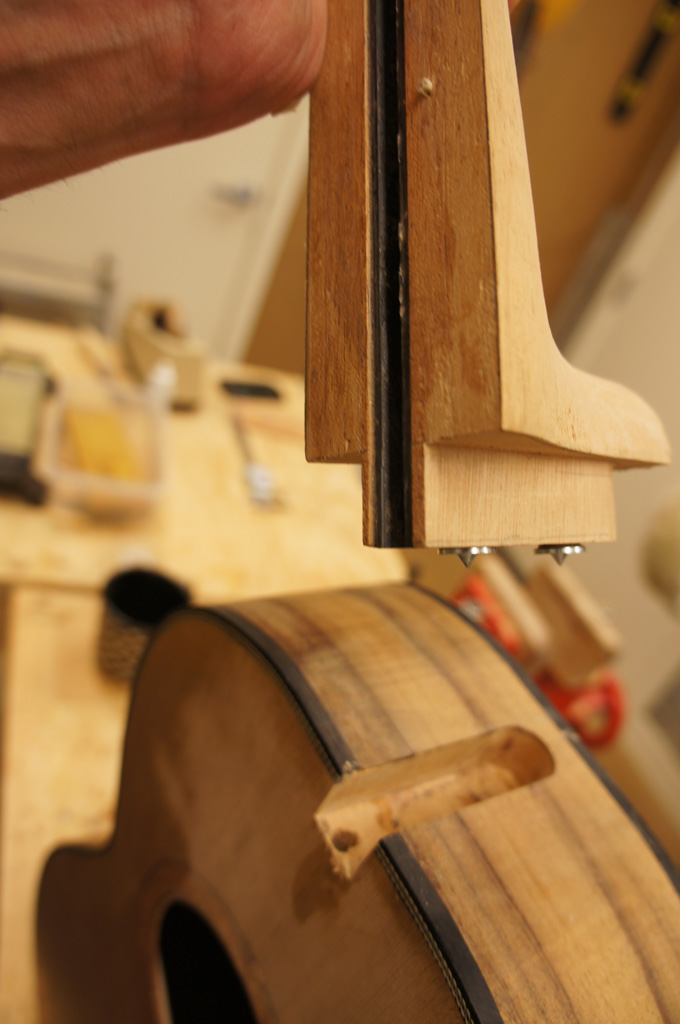
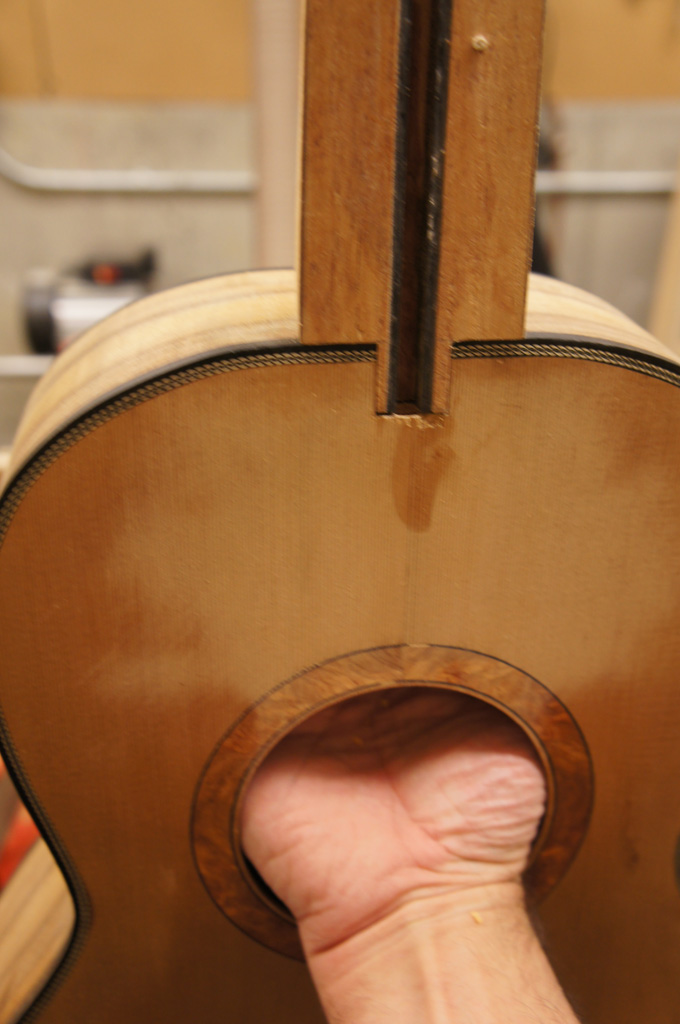
One of the nice things with a Woolson neck jig is that you can set the angle perfect for the geometry that you want and have a nice clean neck to body joint with no need to set the neck angle. For me once I touch the cheeks all bets are off. The next 2 pictures are with the neck bolted on. I am just above the bridge with the straightedge on the fret board.


Before inserting the inserts I put in some hole centers and drive them into the neck block to make an indent. In the last picture I put a little pencil mark in the indents to make them visible.
I drilled the holes for the bolts, but before I drilled the inserts I checked to make sure that I had the holes for the inserts deep enough to allow the bolt to fit without bottoming out.
I put the clamped strips back on and set the inserts.
One of the nice things with a Woolson neck jig is that you can set the angle perfect for the geometry that you want and have a nice clean neck to body joint with no need to set the neck angle. For me once I touch the cheeks all bets are off. The next 2 pictures are with the neck bolted on. I am just above the bridge with the straightedge on the fret board.
-
Kevin Sjostrand
- Posts: 4121
- Joined: Sat Feb 09, 2008 8:06 pm
- Location: Visalia, CA
Re: Back on track with my Koa Parlor Guitar.
Nice job John. I do something similar to locate holes, only I drill the holes in the neck block first, then place the neck tenon in the mortise and insert bolts that I have ground to a point through the neck block holes and press them into the tenon for marks for the inserts. I also clamp blocks on either side of the tenon while screwing in the inserts. Best to be safe, right?
Question, do you after routing the tenon and shaping your neck heel, relieve the cheeks a little back to the tenon so only a small part of the cheek is making contact with the guitar body?
Kevin
Question, do you after routing the tenon and shaping your neck heel, relieve the cheeks a little back to the tenon so only a small part of the cheek is making contact with the guitar body?
Kevin