Been a while since I posted anything up on cello, and I've made a considerable amount of progress. Other than losing camera, motivation, and having troubles with getting auto ban from the forum somehow, which just got figured out today, I've been unable to update much of it.
Here's some pictures.
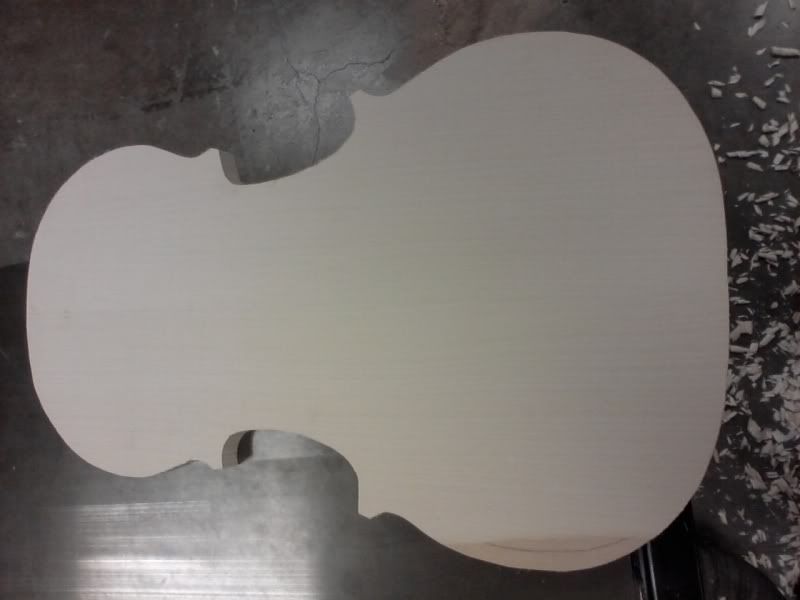
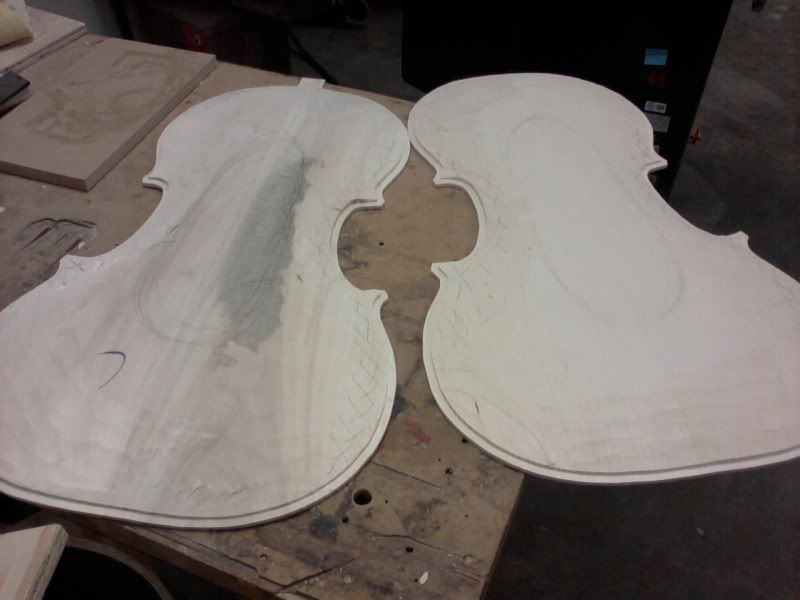
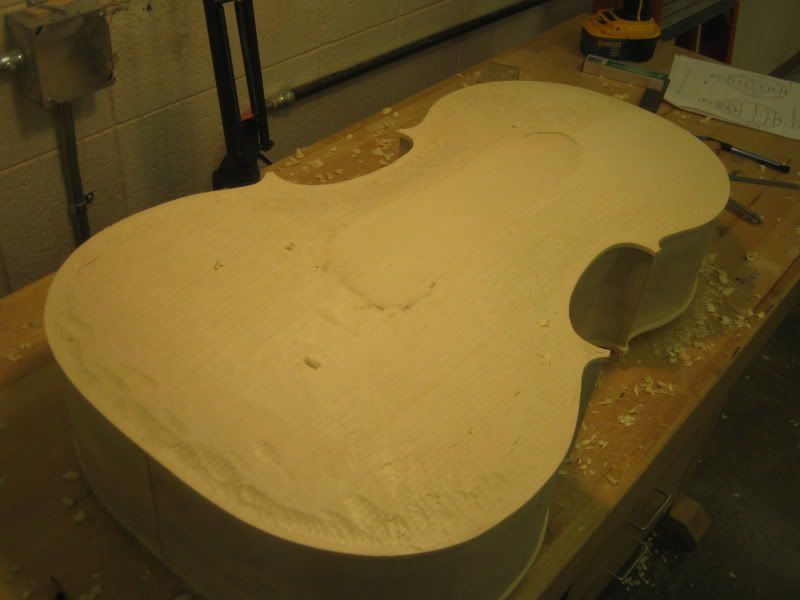
Before rough arching.
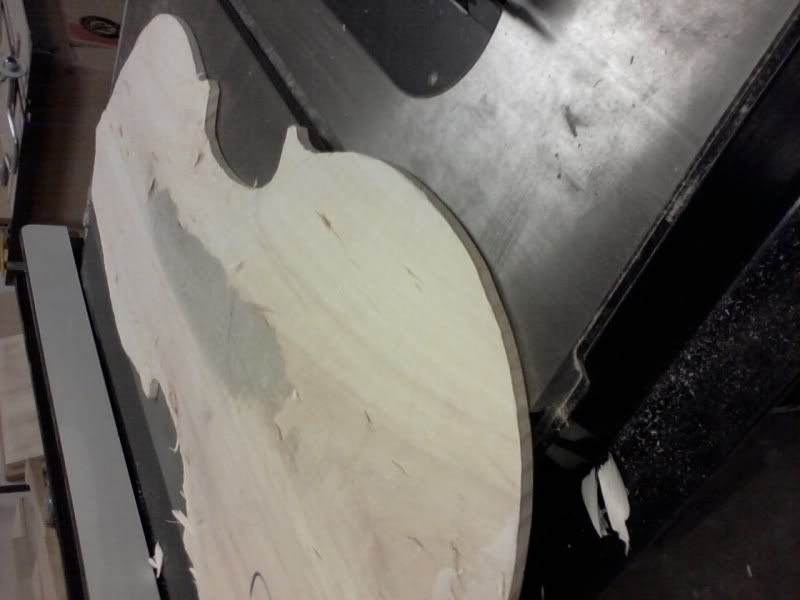
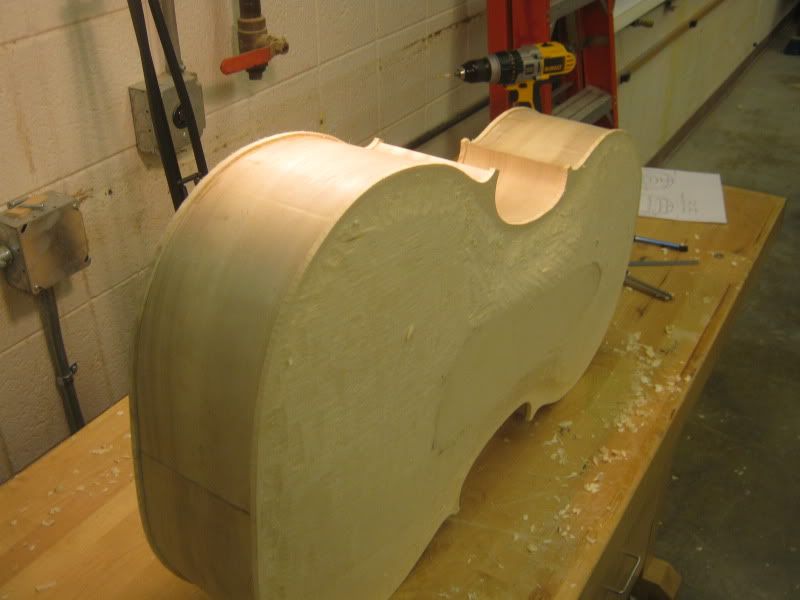
Rough arched back
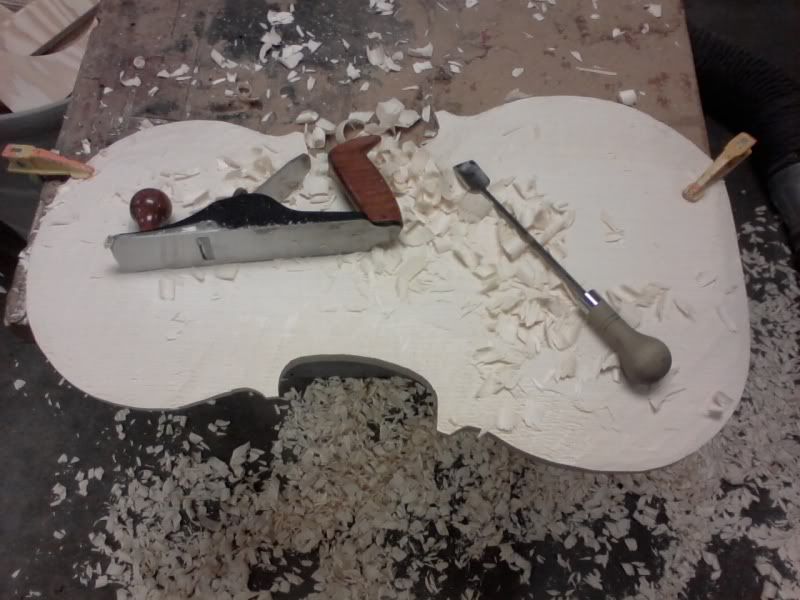
Tools used for rough arching
Alot of wasted tops right? :p
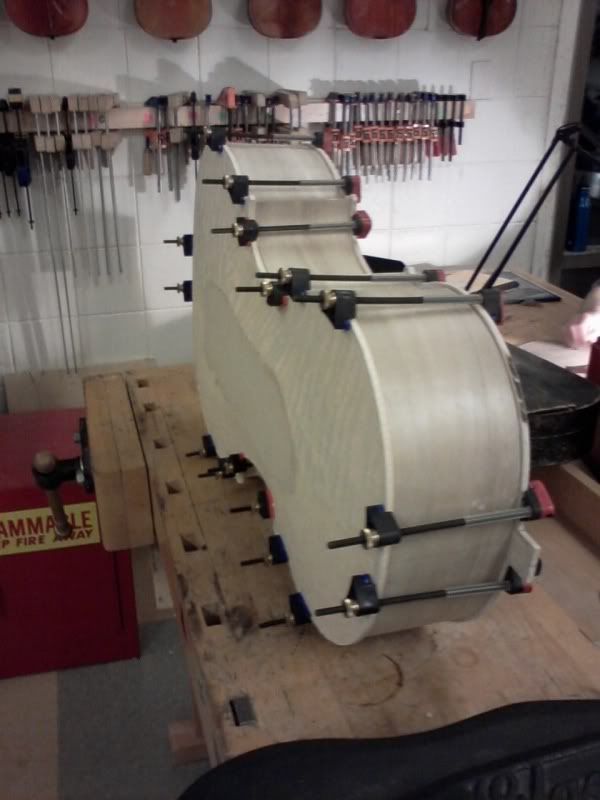
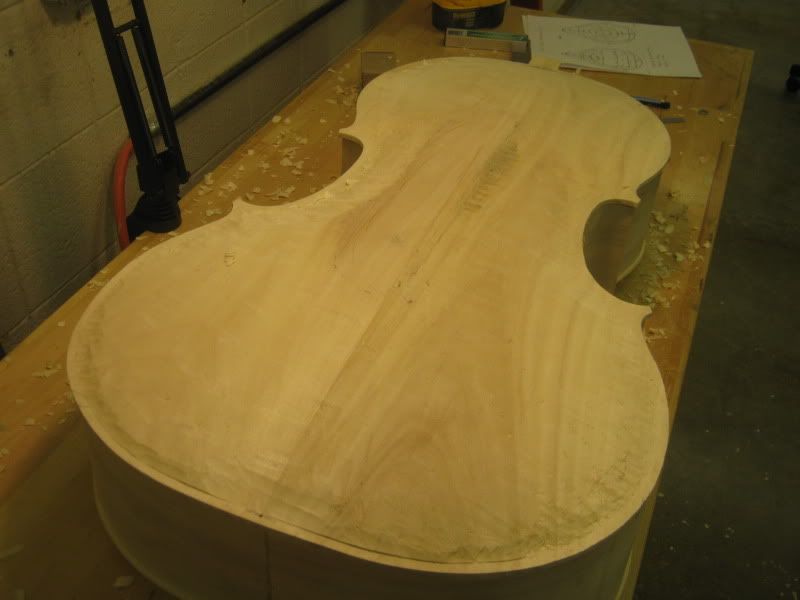
Purfling ledge routed to final thickness.
Second rough arching is to get the arch flush to the purfling channel.
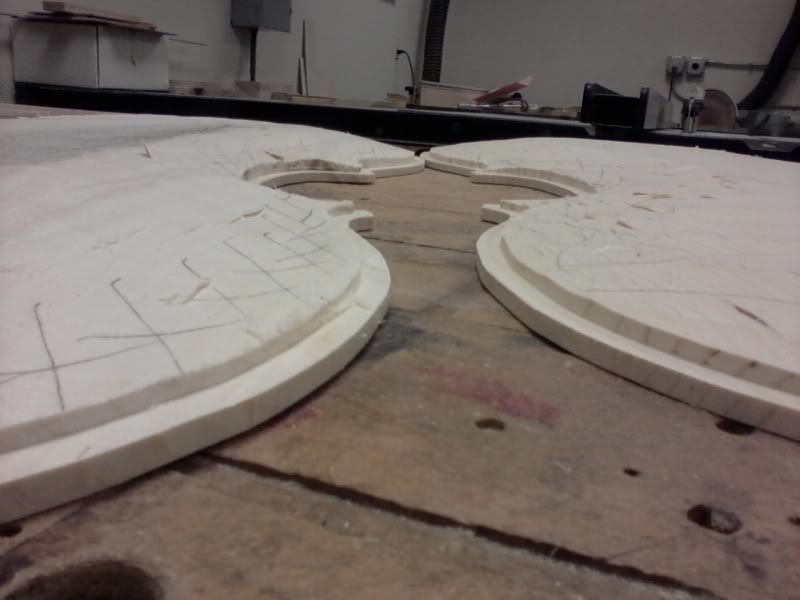
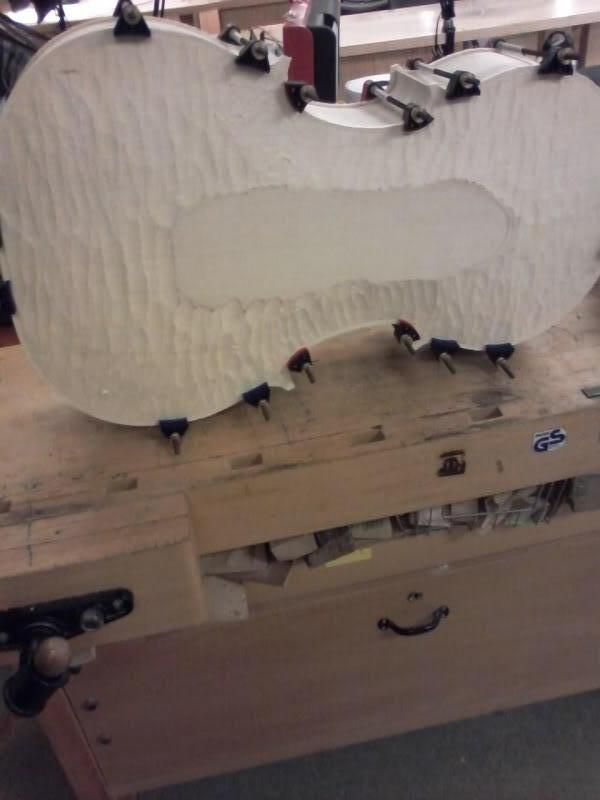
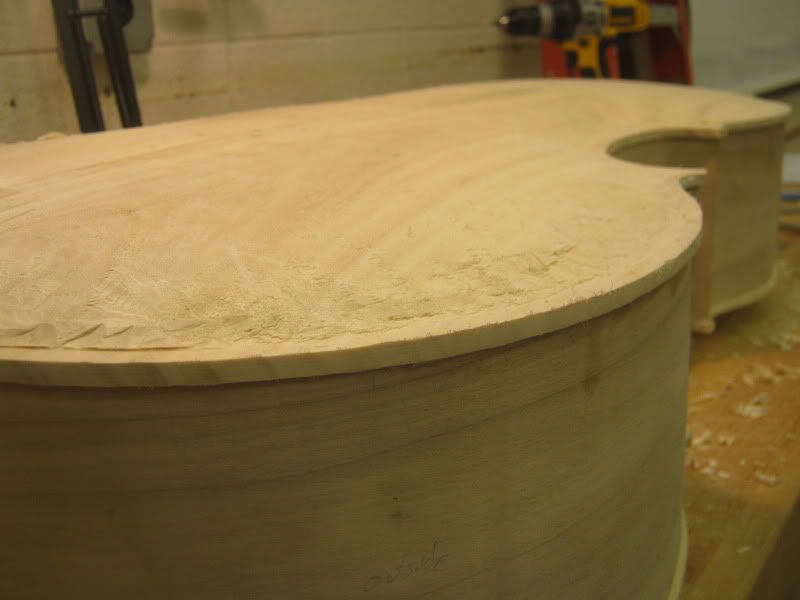
Spot glued plates to get margins even all around and cut corners to shape.
Corners finished, margins even all around, and arches cleaned up quite a bit.
as they say looking good . It takes special talent to make a carved top
John Hall
Blues Creek Guitars Inc
Authorized CF Martin Repair Center
president of Association of Stringed Instrument Artisans http://www.bluescreekguitars.com
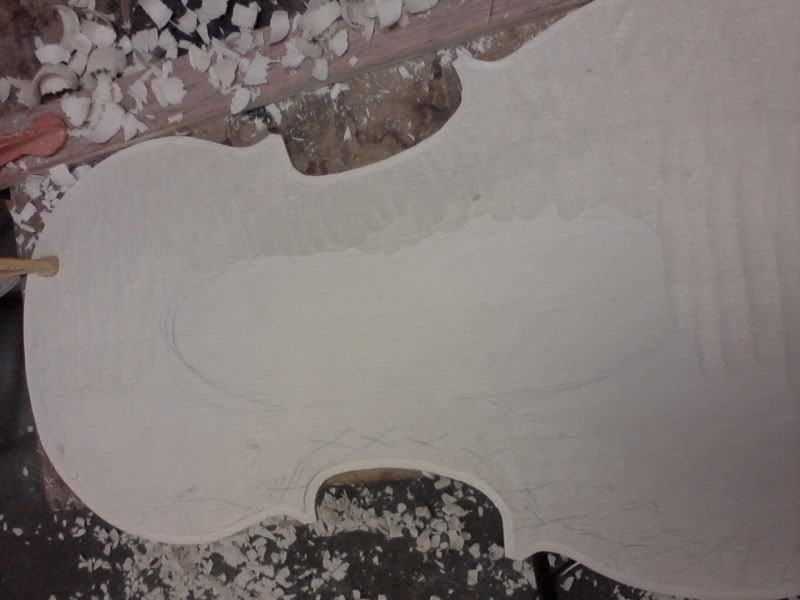
Yep, basically spooned away. The back was thicknessed to 25mm and the top to 27mm, basically meaning that's the final arch height, for the most part. Then with a compass, it was adjusted to draw a line to mark 6-7mm all the way around from the bottom surface. 6mm everywhere except corners, c bouts and button is 7mm.
Then for first rough arching with the arching gouge (plenty sharp) you just spoon out the wood until you get down to the line drawn at 6-7mm. Notice in the pictures there's an oval on the top of the flat which is a do not touch area. So you graduate from the 6mm to the oval and that's the first arch. That plane there is a scrub plane with a rounded blade like a finger plane and that just hogs the material off of there like it's nothing, and for the cello it was just the corners and C bouts that I even used the arching gouge. Because the plates are so big I was able to get in just about everywhere with that plane, where as how my violin was a different story and most of it was done with the arching gouge.
Then the purfling ledge is routed to 4.5-5mm all the way around, which is the final thickness for the edges, and then the step left in there from routing it out needs to be taken down, so the second rough arching consists of arching enough away to get down to that 4.5mm ledge just routed in there, because that step can't be there when doing the purfling.
So I don't have pictures, but I got holes drilled for locating pins, and the margins are done all around, so I popped the plates back off of the ribs, and now I have to finish the arches, and then graduate the inside of the plates. It's a long process, but once that's finished, I'll be able to glue the plates on for good, and the body will be completely done.
The build process is slow, as one might imagine. I never realized how huge cellos were until I started building it. To see the finished project I expect to see it that big, but seeing how big the size difference is in depth from the arch top guitars even, it's almost twice the rib height than the Benaendetto arch tops. Anyhow, I am slow to update it, but I am shooting to varnish this cello in mid-may. So by June I'm am hoping to have it completely finished and strung up. That might be a bit optimistic, but being cynical doesn't build instruments ;D
There's alot more information on the process, I'm a bit behind on pictures, but more indepth details typed out, along with violin progress pictures as well, starting from the beginning at my violin/cello building blog.
you should send this article to GUITARMAKER Magazine for an article. Lots of people would benefit from this.
John Hall
Blues Creek Guitars Inc
Authorized CF Martin Repair Center
president of Association of Stringed Instrument Artisans http://www.bluescreekguitars.com