My process for establishing NECK ANGLE for scratch neckbuild

What're You Doing?
Dan Bombliss
Posts: 219
Joined: Wed Jan 30, 2008 11:36 pm

My process for establishing NECK ANGLE for scratch neckbuild

Post by Dan Bombliss »

A while back I posted a thread about NEH. (Neck extension height). Basically all that amounts to is the bridge height with out the bridge of fingerboard in place. Which is what your neck angle should be. The degree from flush at the neck joint to the NEH (height at bridge with out bridge or fingerboard) would be the desired neck angle.

So in this thread I put the formula for NEH, along with some thoughts on projecting settle in on acoustic guitar tops. Granted, take settle in as you will. Different people say different things, some factor it, some don't. The numbers I posted are similar to what Cumpiano does on his guitars.

LINK TO NEH FORMULA: viewtopic.php?f=5&t=4983

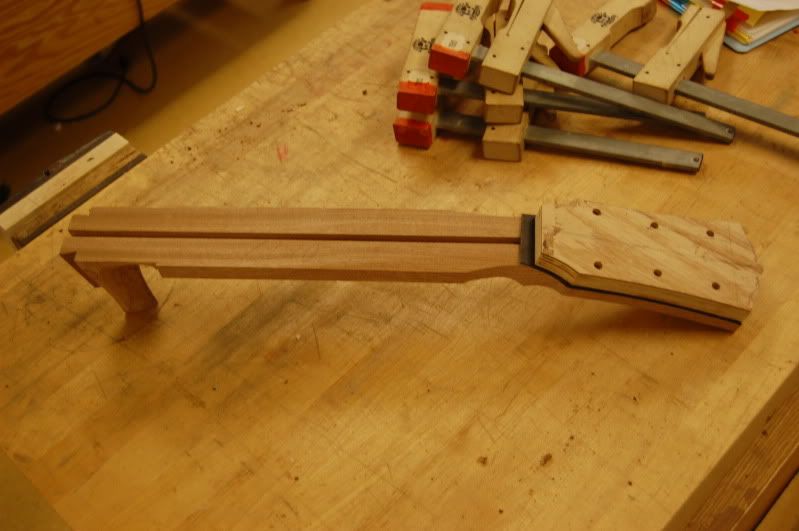
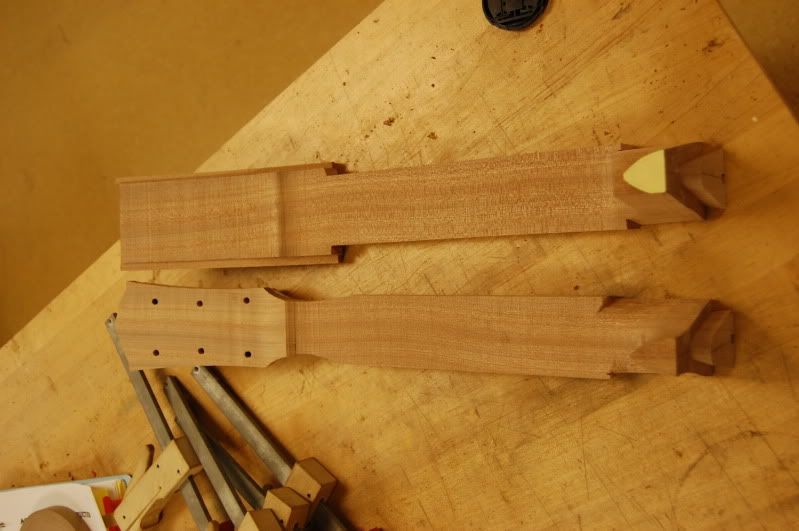
Anyhow, here's a pictorial:

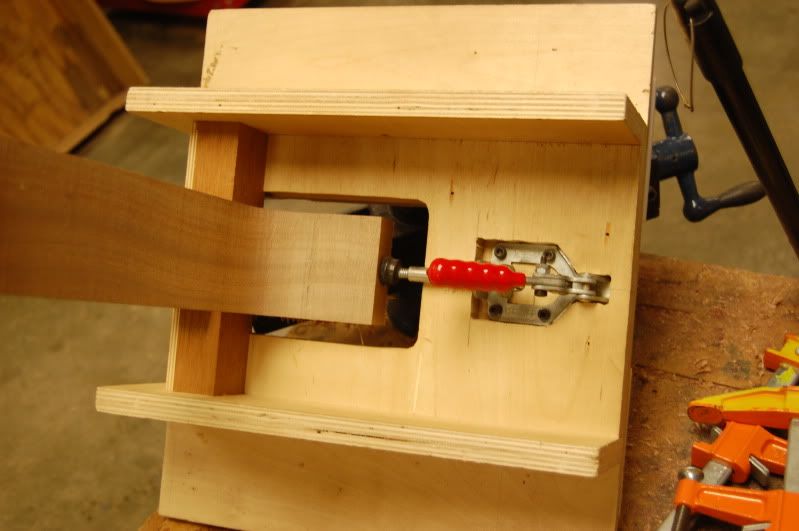
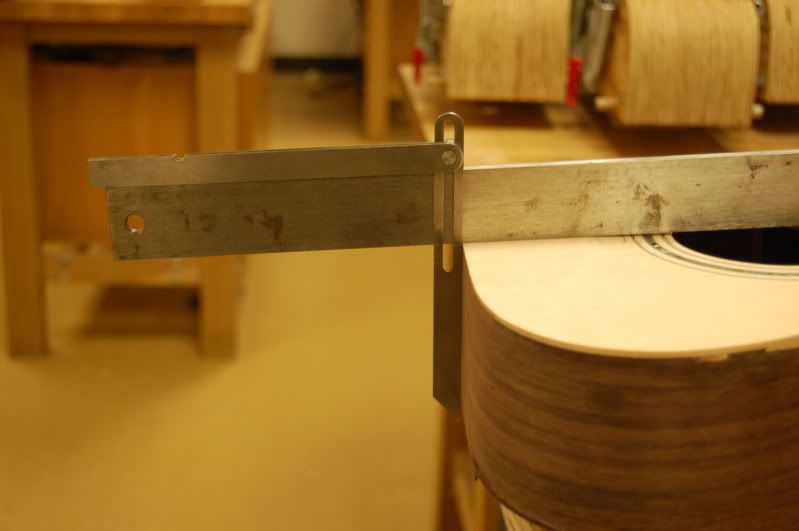
With the NEH formula, put a shim at the bridge location, and use a straight edge with sandpaper at the end to sand that angle into the body.
Image

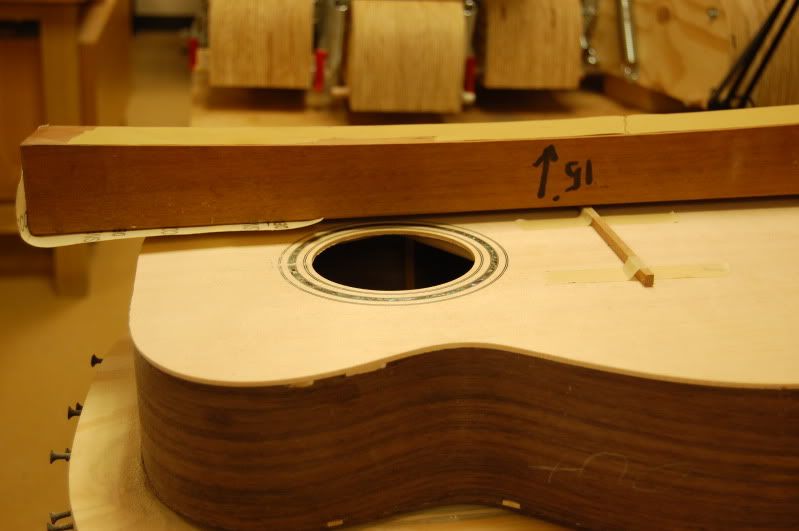
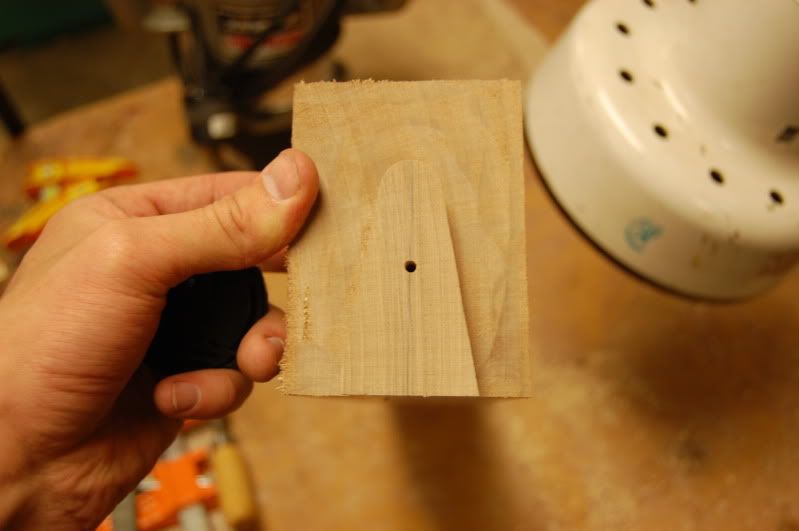
Use pencil for reference as to how much of the top has the correct angle into it. This picture here is pretty close to what you need. I went about half way into the pencil mark on this one. Some angles will be easy to get to the rosette. I don't let my top get top get thinner than 1/16" or so at the neck block. Also when you do this, blend the sanding into the upper bouts so you don't have trenches when you spray finish. Try to keep it smooth.
Image

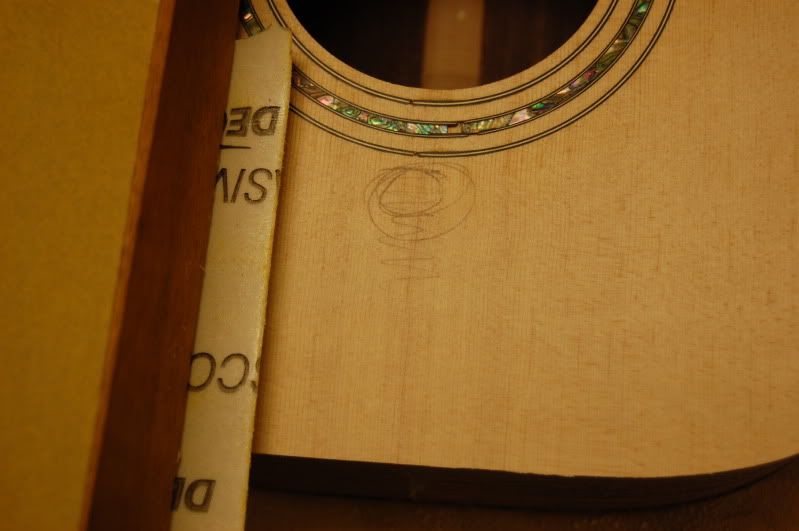
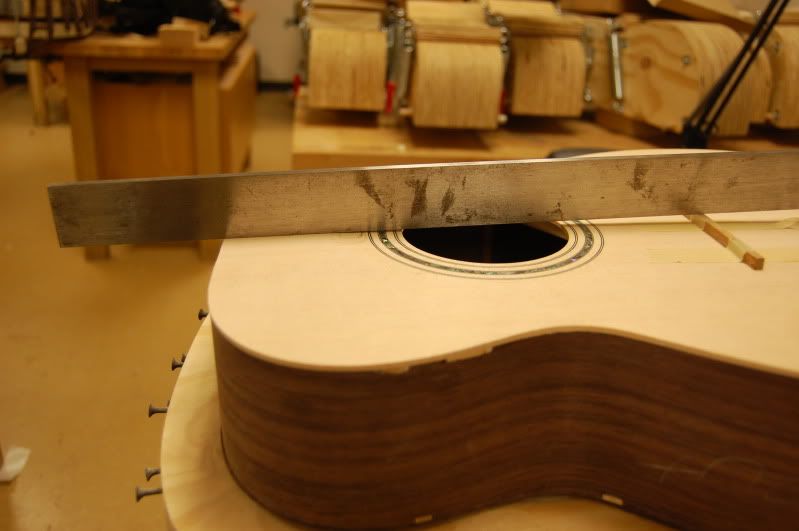
So once the angle is sanded into the top, lay a straight edge onto the top, with the shim still in place to check the ramp in the body to see how you did.
Image

When it looks good, use gauge of some sort to copy the angle. With this tool, it's pretty straight forward. The one part lays against the straight edge, as the bottom of it gets pushed to the neck end of the body. There you have it, that's your neck angle. (BE SURE TO SAND THE NECK END VERY FLAT PRIOR TO THIS.) If you sand the neck after the fact, it could change with just adds time to the fitting process later.
Image

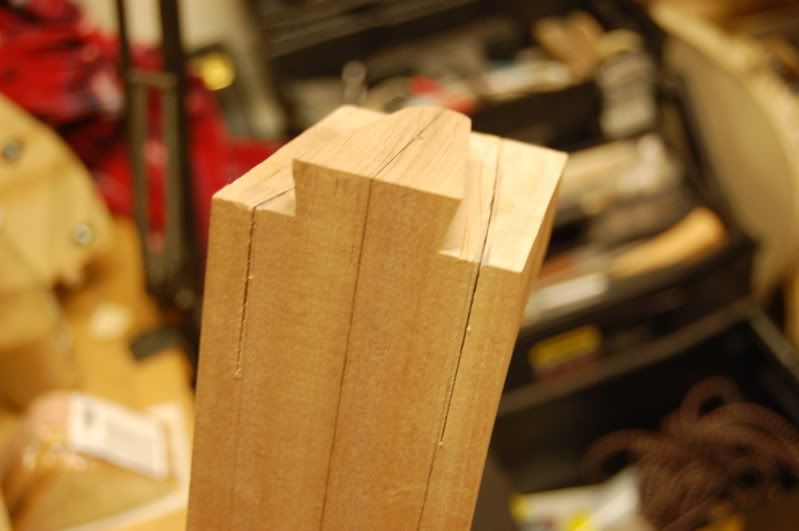
Next up, take a scale length template to mark out your body joint. Lining up the nut, since this is a 14 fret to the body, I'm marking out the 14th fret.
Image

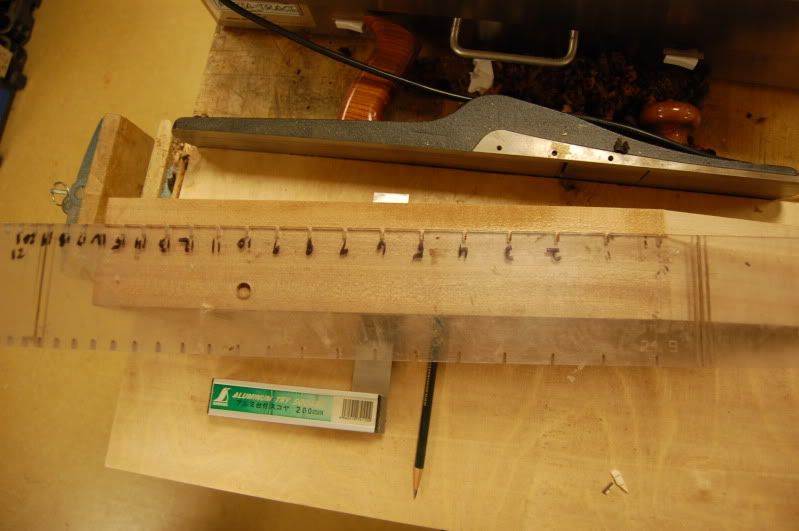
Then use a sqaure to draw the line across. BE SURE TO ADD THE LENGTH OF THE DOVETAIL (Or tenon). If you draw a line and cut it off right on the 14th fret, your neck is firewood.
Image

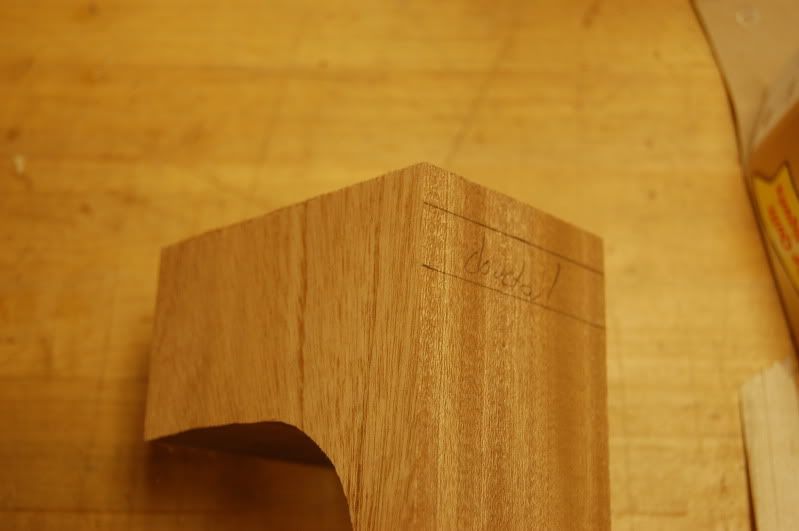
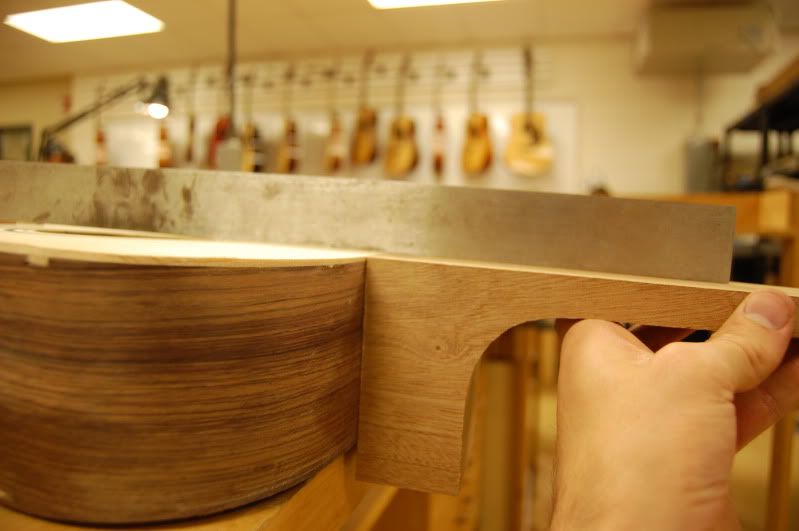
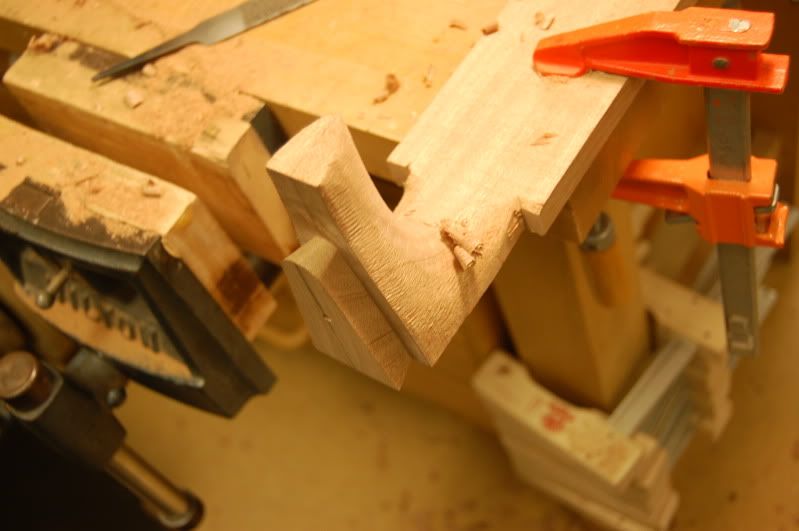
Take the gauge with your angle on it, lay it up flush to the top of your neck block, lined up with the END OF YOUR DOVETAIL (Not 14th fret line) and trace that line down. Now the neck angle is traced directly onto the neck block.
Image

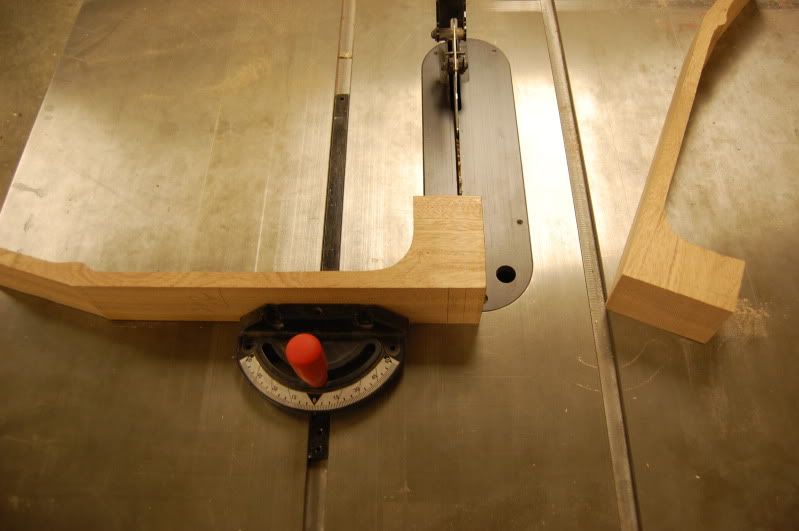
Set the miter on the table saw, or possibly a miter saw for that matter, and cut it off to that angle. I wouldn't personally use bandsaw because the blades don't seem to cut as clean for something like this, but it doesn't mean you can't.
Image
Last edited by Dan Bombliss on Fri Apr 27, 2012 12:24 am, edited 3 times in total.
Dan Bombliss
Posts: 219
Joined: Wed Jan 30, 2008 11:36 pm

Re: My process for establishing NECK ANGLE for scratch necks

Post by Dan Bombliss »

There you have it, now by putting a template flat to your body, you can route out your dovetail with out worry about any kind of angles with the body. Just route it square. Now that the angle is already established at the end of the neck, the same applies. Bolt it directly to a template and route it out. If all was done right it's going to be pretty dead on to your neck angle to your specific guitar. (The neck angle will vary drastically from one to another, I actually learned this more now than ever, as the neck angles from each of these guitars were different by about 1/8"... Builders fault.) Well, the angles are the same, as in bridge height, but the neck of each body varies. So the necks are not interchangeable.

As you can see, with the shim at the bridge location, still in place, with the straight edge on, the neck fits the body very well, and no daylight on the straight edge side either, meaning I did alright.
Image

Now for routing the dovetail into the neck, here's the jig I use.
Image

Bolts flush down to the back of the template.
Image

Bolts in the back for supporting different necks with different angles. Once the necks clamped in, those should be adjusted to support it just right.
Image

The other side of the jig to the screws in the last picture. Along with the screw keeping it centered, this clamp holds it very secured, and like I said, those screws get adjusted to the angle of that neck.
Image

Just the screw hole, drilled on center. With out this, that jig doesn't work...
Image

Necks mocked up on the bodies. Ideally, when it comes time for the dovetail neckset, it should be a huge time saver, as the hard work should already be done. If everything works out like it never does, you should have little to no twist, the neck angle should be pretty dead on, and the neck to body fit shouldn't take much work. The dovetail to the guitar in this pictorial took all but 20 mins from starting the fit to gluing it in, which from my memory is a whole lot quicker than the kit guitars I had done it on.
Image

Once dovetails routed, draw out the lines for your fingerboard taper, and the lines for the width of your heel (on the inside of the dovetail) Then saw them out by hand so you can start shaping the heel. I shape the heel and then sand it out to 220, and then glue it to the guitar. By the way DONT FORGET YOUR TRUSS ROD :) I didn't mention it in this pictorial. I shape my heel with a chisel to hog off material, and then a rasp to rough in the shape.
Image
Image
Image

Last bit of this process is to rough cut your headstock on the bandsaw, follow the taper of the neck (over sized) maybe a couple frets up the body (1-3 frets). Then flush trim to you're headstock shape.
Image
Image
Image

There you have it. All there is involved in making a neck from scratch. I don't shape my neck until my fingerboard is glued on either. I just like the idea of shaping the neck after the fingerboard is on there with the fret compression. I also clamp it very flat as I shape it, to get and keep my neck as straight as possible.

-Dan
darren
Posts: 794
Joined: Sun Apr 19, 2009 9:26 pm
Location: Williams Bay, Wi
Contact:

Re: My process for establishing NECK ANGLE for scratch neckb

Post by darren »

good post Dan, thanks.
Darren
Darryl Young
Posts: 1668
Joined: Fri Jul 30, 2010 6:44 pm
Location: Arkansas

Re: My process for establishing NECK ANGLE for scratch neckb

Post by Darryl Young »

I like everything about this........except thinning the soundboard to get the correct angle. Ideally, I would prefer my sides to have that angle incorporated into them by some method (sanding angle into a flat top, radiusing the sides, etc.) and have the top curve to accomadate that angle while at full thickness. Since the upper bout is where most of the stress of the string tension is carried, it doesn't give me a warm fuzzy to thin it. Not saying you can't thin it some or thin it minimally if needed.......but ideally, I wouldn't thin it at all.
Slacker......
Dan Bombliss
Posts: 219
Joined: Wed Jan 30, 2008 11:36 pm

Re: My process for establishing NECK ANGLE for scratch neckb

Post by Dan Bombliss »

Basically the only thinning happening is slim to none directly over the block. If you were figure the number of degrees for the angle in this process, you could draw it out and 3" into the soundboard would be next to nothing. I take probably 1/32" off maximum at the very end of the top right over the block. If you followed that angle up, that tapers to nothing pretty quickly. With the upper transverse brace and graft right there immediately after, I'm confident there's nothing to worry about, assuming you don't over do it.

Geometrically speaking, the profile of the sides, prior to bending them is potentially shaped to accommodate the projected neck angle. Even if I were able to nail in a way to get the angle predetermined into the sides, I personally would still do the sanding process to ensure it's a very consistant smooth angle. If you get the sides preset to the angle, sanding would take off no material, as the sanded part of the top would immediately touch where you'd like.

Since that isn't really something you can count on everytime, this is the process you can use to get the angle in the top if it's not already there.

I recommend trying this process with a straight edge. Shim your bridge height where it should be, and see how your ramp looks. If you nailed it, then that's great, but you can get an idea for how off it can and most likely will be at times.

-Dan
tippie53
Posts: 7127
Joined: Fri Mar 03, 2006 7:09 pm
Location: Hegins, Pa
Contact:

Re: My process for establishing NECK ANGLE for scratch neckb

Post by tippie53 »

that is simple enough. You shouldn't remove too much wood. If you are looking for a 1/2 inch string height at the front of the bridge using a .350 bridg for a .150 saddle I am looking for .090 height off the top at the point of the saddle . If you do over set a neck that can over torque a top. This is with Martin style bracing.
What height are you looking for Dan? Also what bracing pattern you using? It is simple and I like simple
John Hall
Blues Creek Guitars Inc
Authorized CF Martin Repair Center
president of Association of Stringed Instrument Artisans
http://www.bluescreekguitars.com
nkwak
Posts: 714
Joined: Sat Nov 13, 2010 9:55 pm
Location: Pittsburgh PA suburbs

Re: My process for establishing NECK ANGLE for scratch neckb

Post by nkwak »

Thanks for this timely post. I'm trying to muck my way through this step right now and I'm finding it a bit daunting.

BTW, looking back I wish I'd used a handy jig like yours to route the tenon on my neck blank. Instead I've been cutting and filing and chiseling - and there was a router table sitting across the room. I'm kind of afraid of it...! :o/
~ Neil
Dan Bombliss
Posts: 219
Joined: Wed Jan 30, 2008 11:36 pm

Re: My process for establishing NECK ANGLE for scratch neckb

Post by Dan Bombliss »

The bridge height I'm using is 3/8ths. Fingerboard is 1/4"+1/32"frets. With settle in factored in, I shot for a 5/32" at the bridge location (with out bridge or fingerboard).

So the shim I have there is 5/32". So then with that leveling board with sand paper, it's taking off a minimal amount of wood, sanding that angle into the top. Since the block is close to 2" thick, you have some leeway there.

It is simple indeed. As far as sanding too much wood, use your best judgement. If it looks like too much, it probably is.

-Dan
tippie53
Posts: 7127
Joined: Fri Mar 03, 2006 7:09 pm
Location: Hegins, Pa
Contact:

Re: My process for establishing NECK ANGLE for scratch neckb

Post by tippie53 »

that may be a tad much. I like to see the top of the fret plane to fall about .050 above the bridge. What bracing pattern you using?
John Hall
Blues Creek Guitars Inc
Authorized CF Martin Repair Center
president of Association of Stringed Instrument Artisans
http://www.bluescreekguitars.com
Dan Bombliss
Posts: 219
Joined: Wed Jan 30, 2008 11:36 pm

Re: My process for establishing NECK ANGLE for scratch neckb

Post by Dan Bombliss »

Well John,

With the NEH formula (bridge height+settle in - (fingerboard+frets))

so bridge height is 3/8"+1/16" for settle (That's what I set it to based off of the specs and options in the other thread) - (1/4"fingerboard+ 1/32" frets)

12/32+2/32 - (8/32+1/32)

14/32" - 9/32" = 5/32"

So when the fingerboard and the bridge are all set up, the neck angle is projecting .0625" (1/16") above the bridge, which isn't a strech from your numbers, John. On the NEH thread, there are different specs that potentially change settle in, and guestimations on by how much. Granted it's all just trying to account for it.

-Dan
Post Reply