Here it is fellas, Cello Scroll

What're You Doing?
Post Reply
Dan Bombliss
Posts: 219
Joined: Wed Jan 30, 2008 11:36 pm

Here it is fellas, Cello Scroll

Post by Dan Bombliss »

Alright, been a while since I've posted anything on this, and there's been alot of progress, but here's a thread for the process to rough in a scroll from a scratch neck block.

(Excuse any stupid wording, I just started typing some of the processes and I'm so tired I can't think.) :P
Image

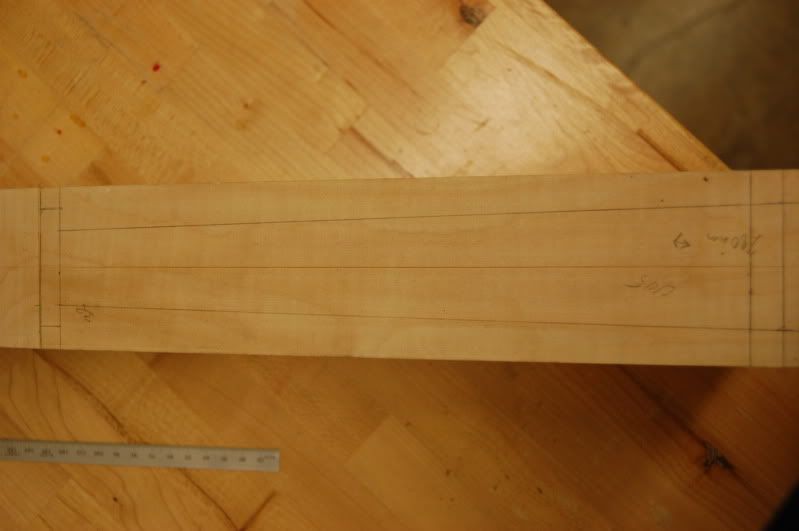
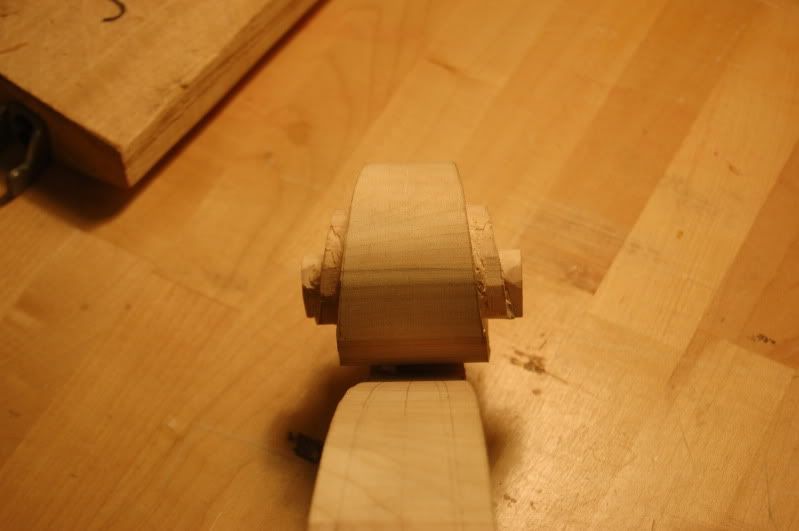
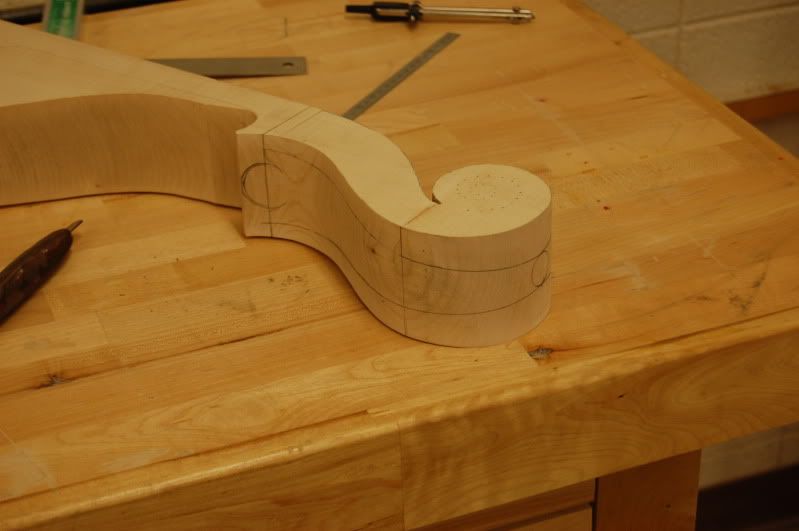
Draw a line at the nut location, and use a square to connect it to the other side, for reverence to have templates in same spot on both sides. Be sure the top edge of the neck block is square so that the template can be flush to the edge and you know it's all square and true, as this surface stays until the end.
Image
Image

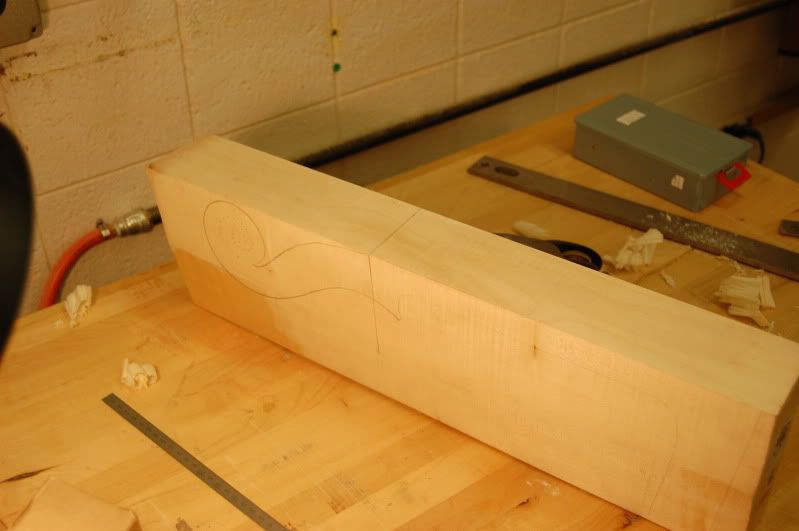
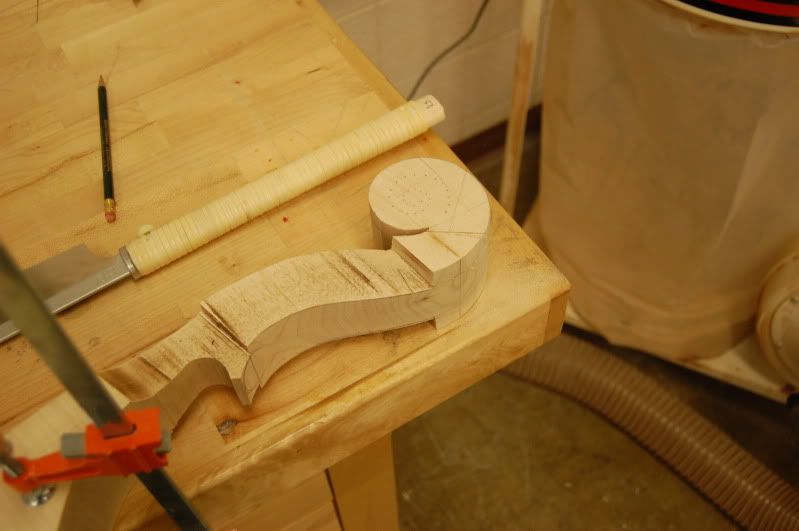
When you've connected the line across to the other side, you can trace the template on the opposite side as well.
Image

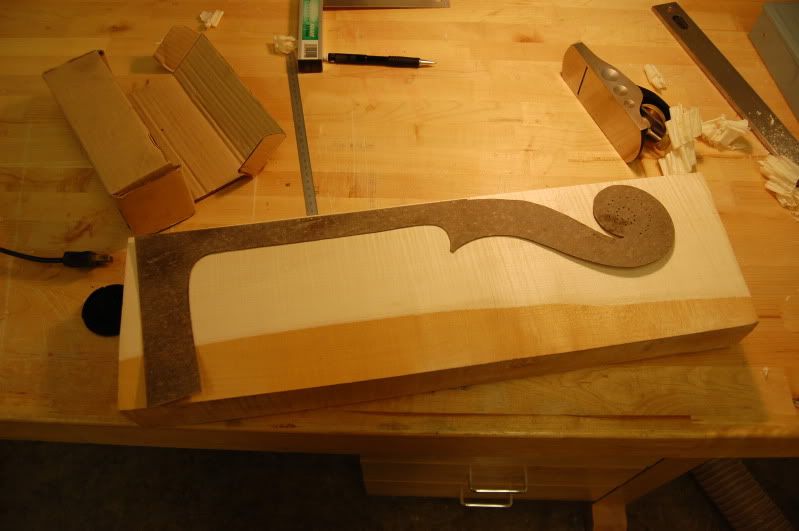
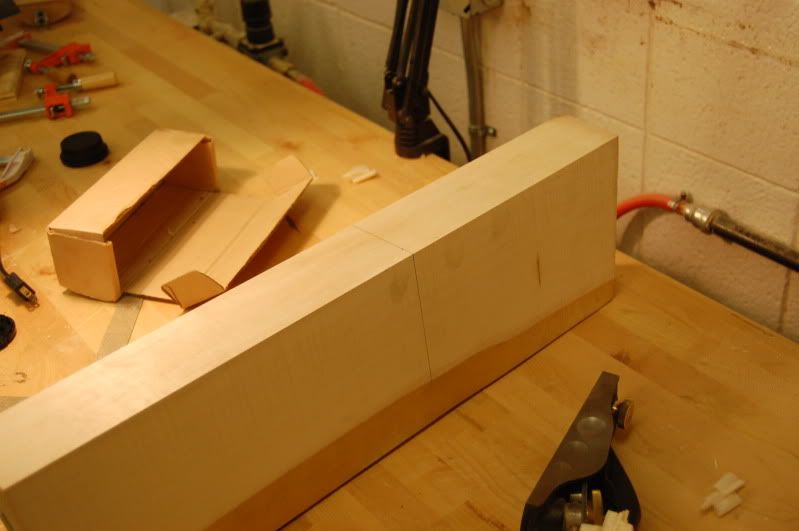
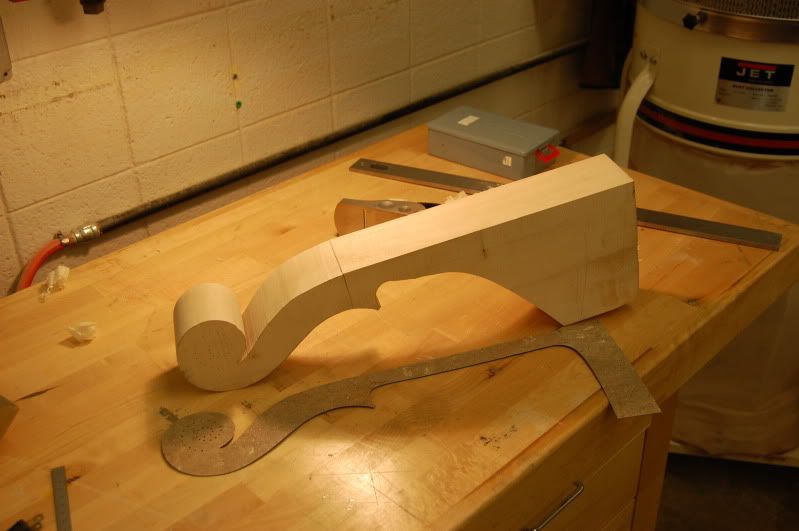
At this point you've got the template traced on both sides, lined up to the nut. Do what you can to manipulate your bandsaw to get it roughed out. Leave the wood at the heel like I have shown, it helps keep the neck from warping or moving. (More likely to happen in wetter wood)
Image

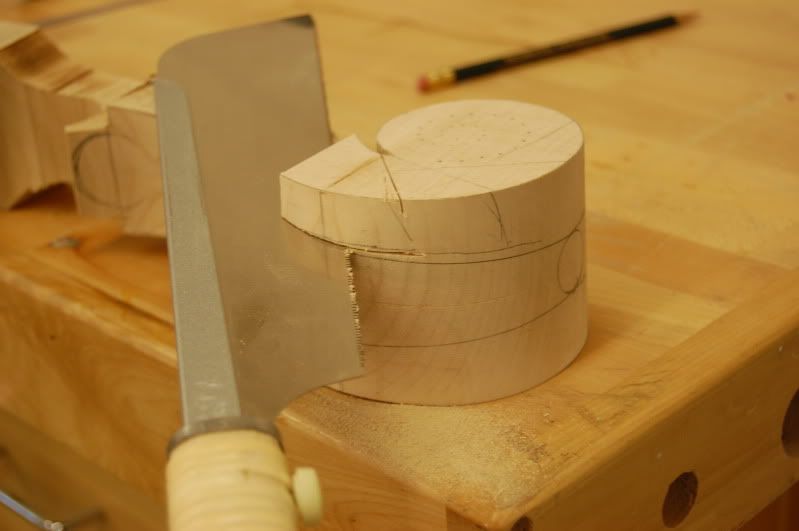
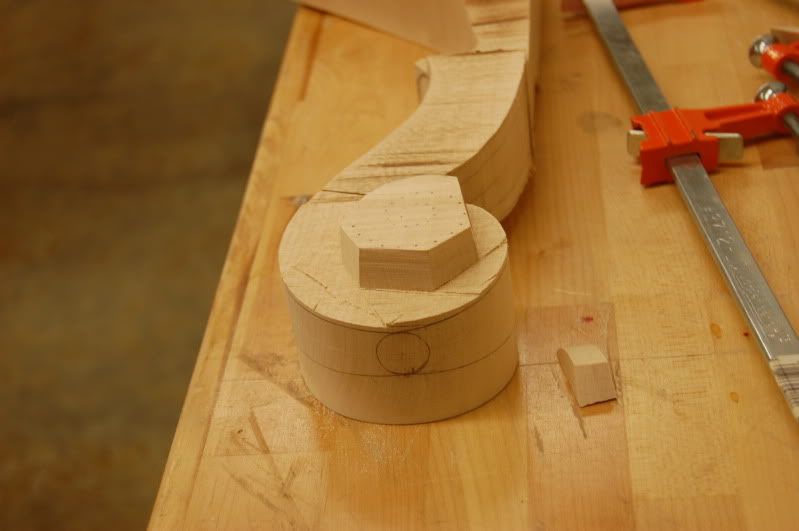
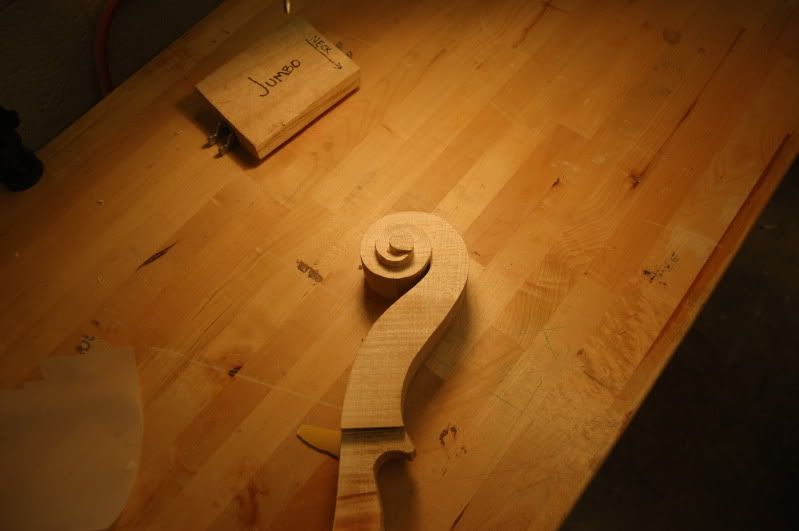
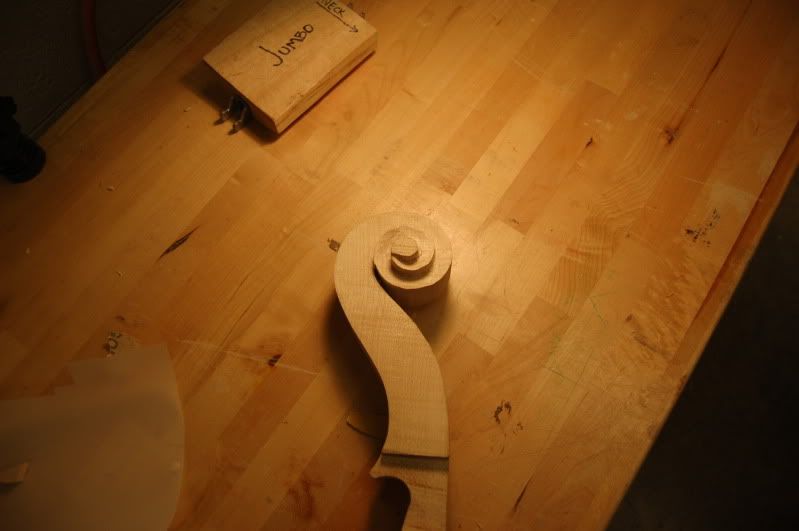
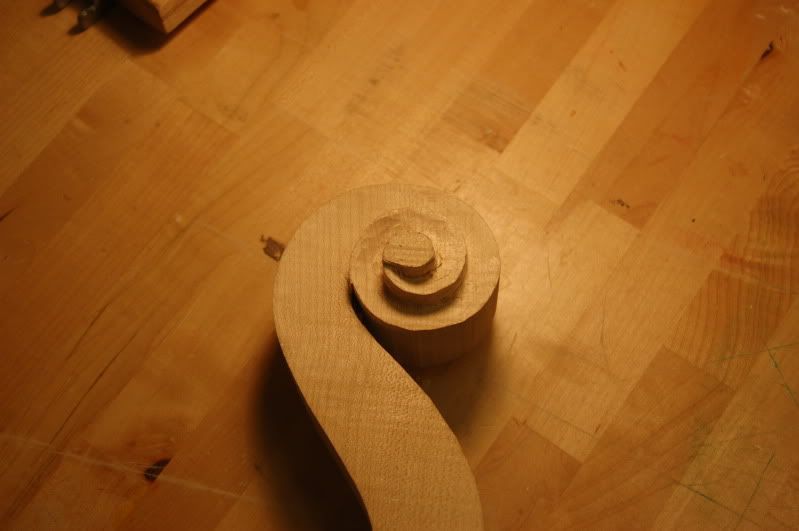
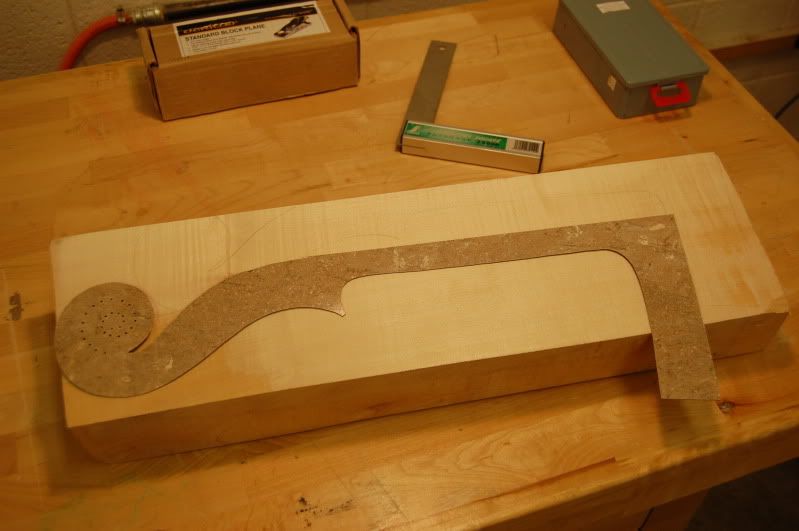
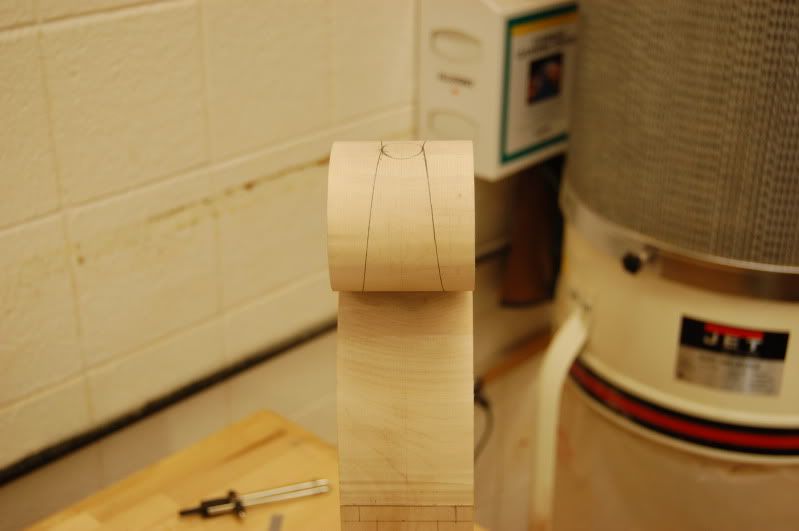
Find the dimensions of the scroll you want to copy and measure out 2 reference points from the front to the top or so, (measurements from center out) and use a flexible piece of plastic or something of that nature with a trued edge, to bend and connect the dots to let you trace them. The very top center will be connected with a circle where the tapers meet and widen again. (Really bad wording... I can't think, hope pictures help)
Image
Image
Image
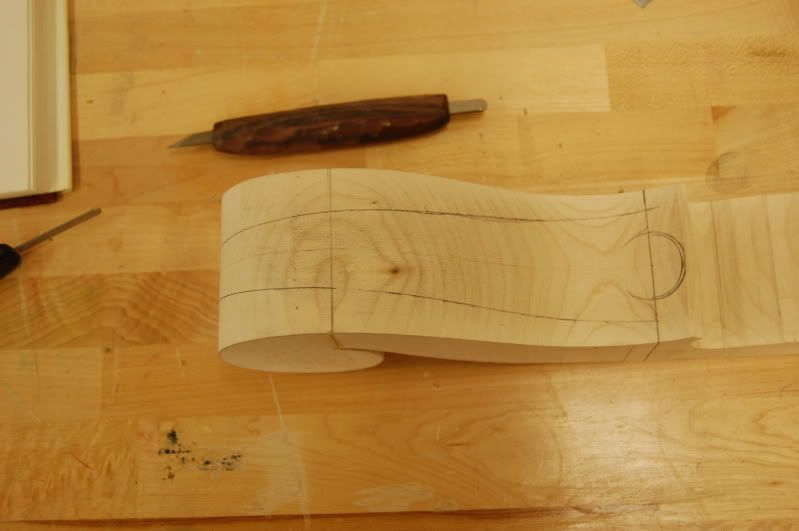
(also draw in neck taper dimensions, neck length, net width ect...)
Image
Dan Bombliss
Posts: 219
Joined: Wed Jan 30, 2008 11:36 pm

Re: Here it is fellas, Cello Scroll

Post by Dan Bombliss »

Cutting the scroll:

So with it all mapped out, it's pretty simple. First off cut out the flat sides of the scroll, and carefully plane them and chisel them to being flat, and connecting the lines on both top and back. Also, cut past the nut spot and cut the taper into the neck a little ways, to get some of that wood out of the way.
Image

It helps a little to connect the dots and draw the scroll in. What you do is cut down on a line, not touching the mapped out scroll, and then cut in from the side, not hitting those lines of the side of the scroll. Here's a series of the pictures to show the cuts quickly.
Image
Image
Image
Image
Image
Image

So now that the first step of cutting is done, you need to round out the shape of the scroll, which you do with a gouge concave side controuring the circular shape of the scroll (Helps make smooth curved cuts when roughing it in) Also use a gouge to start the ramping process. The scroll is kind of like a road, it starts flat on the sides, and then around the curves starts to angle... The tighter the curve, the steeper the angle so your car doesn't drive off.
Image
Image

The pictures kind of skip a spot... Basically those 2 things is a 3 step process. You do the chunk shown in the first bit of pictures, and then you clean up and round them out. Then you do a second series of cuts, and then smooth and clean them up a bit. The pictures I just posted above are actually the "clean up" version of the second series.

Next up is the final pass. Don't get too close to the final cut of the wings of the scroll at the end of this cutting process. Give yourself room to shape, and play it safe. I don't have a picture of what I mean, but you can see by the shape of my scroll, that last step is a bit oversized.

Here are the pictures of where I have my scroll to right now, and it may sit like this a bit as i have other things to take care of as well.
Image
Image
Image
Image
Image

There you have it, a scroll. (Still has to be sqaured and trued up visually, this is ROUGHED in)

-Dan
johnnparchem
Posts: 2354
Joined: Sat Apr 10, 2010 10:50 pm
Location: Seattle
Contact:

Re: Here it is fellas, Cello Scroll

Post by johnnparchem »

Cool, thanks for posting this. I am interested in seeing out you finalize it and the tools you use.
Dan Bombliss
Posts: 219
Joined: Wed Jan 30, 2008 11:36 pm

Re: Here it is fellas, Cello Scroll

Post by Dan Bombliss »

Everything to that point is only the saw shown, a #5 sweep gouge (varying sizes are helpful for tighter curves), and a scraper.

That should basically finish it out also.
tippie53
Posts: 7127
Joined: Fri Mar 03, 2006 7:09 pm
Location: Hegins, Pa
Contact:

Re: Here it is fellas, Cello Scroll

Post by tippie53 »

nice pictorial
John Hall
Blues Creek Guitars Inc
Authorized CF Martin Repair Center
president of Association of Stringed Instrument Artisans
http://www.bluescreekguitars.com
Post Reply