How I make and install a wood rosette.
Posted: Sat Jan 14, 2012 10:27 pm
I believe there is a thread somewhere started a while back on how they made their rosette. This is not entirely new to many of you, but I use a twist that many of you may not be doing. I'll explain later as I go along.
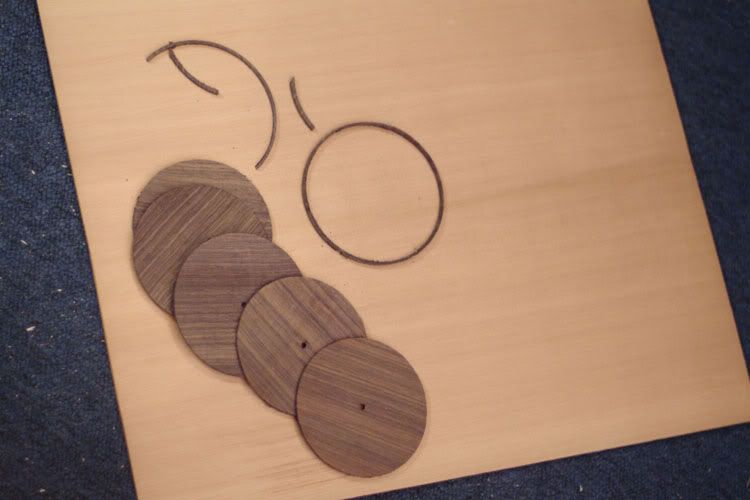
First, I took a block of Cocobolo that I would use for knife handles. It is about 5" long x 1 1/5" wide x 1" thick. I have about 100 of these so I picked out one that had lots of color variation and swirly grain. I cut this into 1/8" slices getting 6. I trued up the edges, and butt joined 4 of them, no in any particular order, and then glued a 5th along one edge of the 4, because 5" was not wide enough for my rosette. I don't show a picture of cutting the block or gluing it up, but you see the structure as I ran it under my drill press safety planer to bring the thickness down to about .080". The I ran it through my thickness sander and brought it down to .070". I then use spray adhesive and glue some paper to a board that is alittle bigger than the rosette blank, and spray glue the blank to the paper. The purpose of the paper is to hold the blank steady while I rout the rosette, and then it makes for separating the the rosette from the back up board easy. I locate the center and drill a 1/8" hole for my circle cutting jig.
I then get my top on the bench and also drill a 1/8" hole in the center of the sound hole. Nothing new so far.
I have my rosette design planned out and drawn on paper. It is a 3/16" ring of cocobolo trimmed on the inside and outside with .060" BWB purfling. This is where what I do makes this a near fool proof installation for fit. I use a bit for dremel that is sized for the purfling I'm installing, in this case a .055" spiral bit. By using this bit, I will be cutting out the wood ring, and at the same time providing for the purflings in the top.
I set the circle jig for the inside cut of the rosette, make about a 1/3rd depth cut, then take the dremel to the top and make the same cut. I continue to rout both the wood ring and the top until I've reached my desired depth. Now I set the jig for the outside of the wood ring, and do the same thing. When done, I should be just cutting through the wood ring down to the paper that it is glued on. I use a putty knife slid under the paper to lift the ring from the back board and there I have my rosette ring. Now I rout out between the two cuts on the top for all the parts. What I have done is duplicated in the top the width of the ring plus the width of the inside and outside purflings. When I insert them in the routed out area, the fit is perfect! What makes this work is the purfling is not really .060" although they say it is made with .020" each of the black, white, black fiber. It mics out at about .058" so I end up with just enough room for the glue. I bevel the bottom edge of the purfling so it is guided in nicely around the wood ring. It if is a little bit tight, I just use a small bit of sandpaper and run it around the outside and inside of the routed out area. I use white LMI glue to glue it all in.
This might be one of those "DUH" things, but I didn't even realize I could do this on my first two rosettes. You can purchase the correct size bits for your dremel or router to match the size purfling you are using. Easy, and easy to get a nice tight clean fit of your rosette.
This works good for me because I like to make my own rosettes and I like making them out of wood.
I hope this helps someone out there who hasn't yet done their own rosette but wants too.
Kevin