Page 1 of 1
Saga LJ-10 Kit
Posted: Tue Feb 02, 2016 1:35 pm
by MadLabLogs
I have played guitar/bass since '85. I have taken many apart, fixed them, broke them (haha) etc.. and I am starting to get into building my own. I thought as a good first project I would put one together.
I found the Saga LJ-10 on sale at amazon on black friday and thought, for that price... even if it's a total piece of crap, it will be something fun to do and put up on the wall if it's not a "player". To my surprise, the almost finished product actually plays better than some of my "production" guitars! I will post the process here, followed by my review of the product.
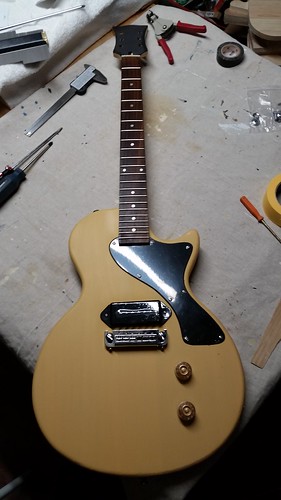
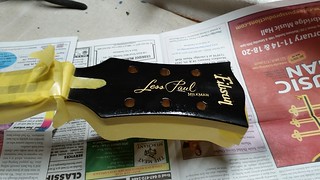
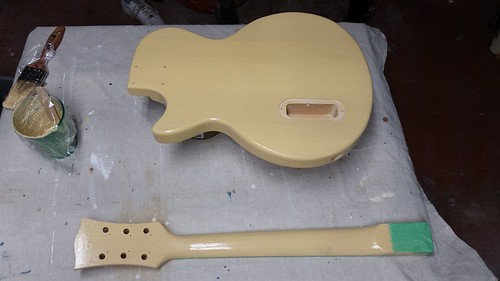
1st pic - just outta the box pretty impressed with the quality of both the body and the neck.
 20151227_114345
 by
Sean Macdonald, on Flickr
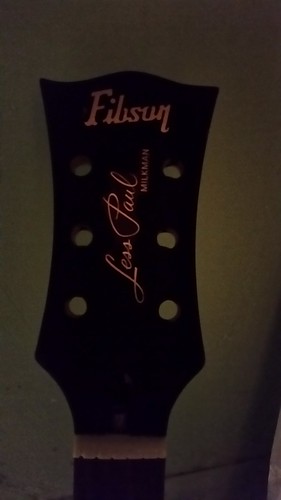
and the teaser - almost done (needs a good setup and final electronics connections)
 20160110_155906
 by
Sean Macdonald, on Flickr
more to come!
Re: Saga LJ-10 Kit
Posted: Tue Feb 02, 2016 4:01 pm
by johnnparchem
Looks great! I made a sega les paul. I replaced all the electricals but I was quite happy with the guitar.
Re: Saga LJ-10 Kit
Posted: Tue Feb 02, 2016 4:11 pm
by MadLabLogs
johnnparchem wrote:Looks great! I made a sega les paul. I replaced all the electricals but I was quite happy with the guitar.
I will likely do the same, but it actually sounds pretty good as is.
Re: Saga LJ-10 Kit
Posted: Tue Feb 02, 2016 4:33 pm
by MadLabLogs
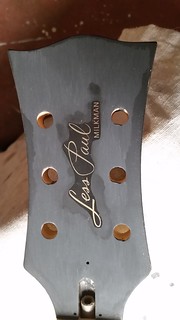
Early on I decided to try using milk paint for this project. My wife has painted several pieces of furniture with it and I really like the semi-flat beat up look you can get with it. "Miss Mustard Seed" has a "mustard seed yellow" that kind of looks like a TV Yellow (full disclosure, I am color blind so.....) that's what we used.
here is the body and neck being painted up.
 20151227_140454
this was actually a joint venture with my wife, here she is painting!
 20151227_144724
Re: Saga LJ-10 Kit
Posted: Wed Feb 03, 2016 10:20 am
by MadLabLogs
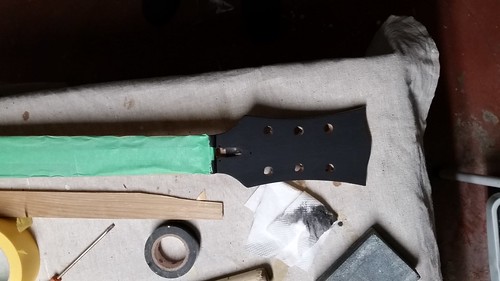
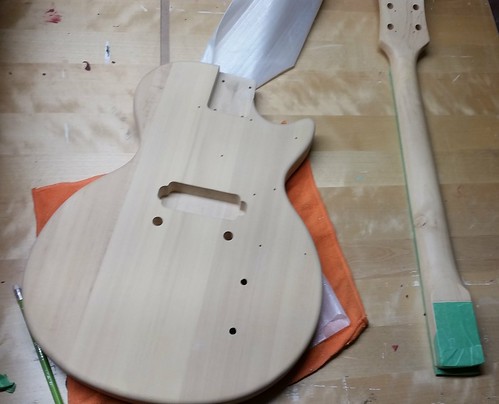
the parts arrived filled and sealed (far as I can tell). Milkpaint works best on bare wood but we gave it a shot and painted them as is. The body worked out very well, but once the paint started to dry on the neck, it started peeling all over the place.
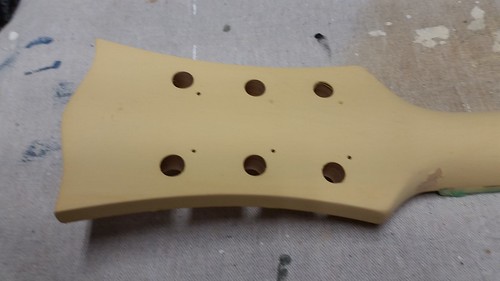
I sanded it all down and mixed in some bonding agent with the milk paint. As a bonus, I mixed the paint a lot thinner than my wife did and so I ended up with more of a stain look on the neck and it's a lot smoother now.
here is everything drying - in the background you can see some sweet mahogany blanks that will be used in some upcoming full build projects!

Re: Saga LJ-10 Kit
Posted: Wed Feb 03, 2016 10:29 am
by MadLabLogs
Re: Saga LJ-10 Kit
Posted: Wed Feb 03, 2016 4:53 pm
by Diane Kauffmds
you're doing nice work. it's looking good.
Re: Saga LJ-10 Kit
Posted: Wed Feb 03, 2016 8:18 pm
by MadLabLogs
Diane Kauffmds wrote:you're doing nice work. it's looking good.
Thanks this was a fun project
Re: Saga LJ-10 Kit
Posted: Thu Feb 04, 2016 11:01 am
by MadLabLogs
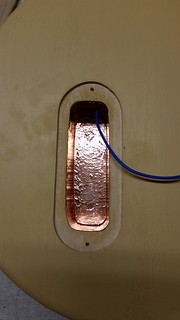
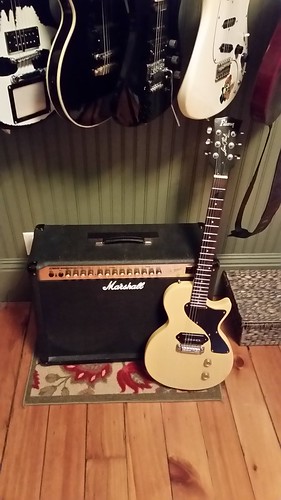
putting everything together was fairly easy. The wiring comes with quick connectors which will make things simple for folks that don't want to solder connections. Once I really decide if I like the sound I will do all the connections with a proper joint and remove some of the excess wire that fills up the control cavity.
one of the pots sticks up much higher than the other. I will fix that with some washers when I take it all apart again. In this pic you can also see the "ghost relic" work (haha). By using hemp oil in strategic spots on the body before painting, the milk paint will not stick to those areas and flake off. It's pretty subtle at the moment as the bare wood is light but as it darkens up this will become more noticeable. I like the "beat up" look.
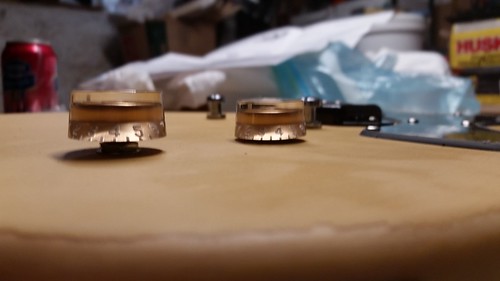
everything went together ok, the control cavity cover was a little big and will need to be trimmed but it's very minor. All of the routing on the body was super clean so it's just the plastic itself.
here is everything all put together