
Very nice John, your work impresses me.
I am going to make and set the rosette on my next one and I want to follow the same procedure that RD showed you (thanks for sharing that with us). Oh yeah, by the way, I have a slight problem accomplishing this procedure, I don't have a thickness (drum) sander, would it be much bother to get you to loan me yours for a minute? (I promise I'll return it)
David L
Finished construction on my Koa Parlor Guitar.
-
David L
- Posts: 1319
- Joined: Thu Jan 06, 2011 8:04 pm
- Location: Slidell, La
-
Kevin Sjostrand
- Posts: 4121
- Joined: Sat Feb 09, 2008 8:06 pm
- Location: Visalia, CA
Re: Koa Parlor Guitar for niece.
Mmm, mmmm, mmmmm. Nice rosette!
Kevin
Kevin
-
tippie53
- Posts: 7178
- Joined: Fri Mar 03, 2006 7:09 pm
- Location: Hegins, Pa
- Contact:
Re: Koa Parlor Guitar for niece.
When I am doing a wood rosette , I use duco cement. It will glue wood well and it won't add water to the wood for better joints. I am sorry but I can't see any advantage to a sealed and CA application. It adds a process that you don't need.
John Hall
Blues Creek Guitars Inc
Authorized CF Martin Repair Center
president of Association of Stringed Instrument Artisans
http://www.bluescreekguitars.com
Blues Creek Guitars Inc
Authorized CF Martin Repair Center
president of Association of Stringed Instrument Artisans
http://www.bluescreekguitars.com
-
johnnparchem
- Posts: 2354
- Joined: Sat Apr 10, 2010 10:50 pm
- Location: Seattle
- Contact:
Re: Koa Parlor Guitar for niece.
You are welcome to come by and use it anytime!David L wrote:... I don't have a thickness (drum) sander, would it be much bother to get you to loan me yours for a minute? (I promise I'll return it)
David L
-
johnnparchem
- Posts: 2354
- Joined: Sat Apr 10, 2010 10:50 pm
- Location: Seattle
- Contact:
Re: Koa Parlor Guitar for niece.
Finally with my new shop together I am building guitars again. I had a fun holiday weekend working in the shop Friday through Sunday. Most of Friday I was still setting up but Saturday ...
I had some cut-off from a plastic place I stopped at last month so I used it to make a body and neck template for a Martin 1905 Parlor guitar.

I fit the previously bent side into the rim. I was really happy with the way the sides book matched. I was not really thinking about book matching when I cut and bent the sides, but .. As I had an accurate side profile I was very carefull to mark and line up the the waist. Also when I cut out the sides I cut them together on the bandsaw. What I was really after was to have the side profile actually come close to matching the 15' dish, I ended up with perfecty book matched sides. Learn something new everyday.

I went ahead and profiled the sides in a 28' and 15' dish and glued in the kerfling. I used reverse kerfling on the top for the first time.


I thicknessed the top and back on the drum sander. I tried tap tuning as I was taught. I thinned the top tapping as I got close to the desired thickness. At one point the top really rang out. As I was taught I kept going (with the thought that the top will get stiffer with the braces.) At the point the top started to sound a bit chaotic I stopped. I ended up with the western red cedar redwood at .110" actually, actually 2.8 mm (I my heart I am a classical guitar builder.)
I got to use my handy dandy new template to mark out the braces on the back of the top.

I have a bunch of master grade redwood strips from the top that I ruined, so I used one as the center strip of the Koa back.

I am pretty excited about the Koa, This is obviously the inside. I picked the best for the outside.

I noticed some people glue the braces on first and then fits the back strip in between the braces. I thought about it, but for me doing the strip first allows me to glue up against a straight edge assuring the strip is in a straigt line.

While waiting for the glued up back braces to cure I roughed out all of the braces I need for the top.

I finished the back. Next weekend I should be able to close the box.

I had some cut-off from a plastic place I stopped at last month so I used it to make a body and neck template for a Martin 1905 Parlor guitar.
I fit the previously bent side into the rim. I was really happy with the way the sides book matched. I was not really thinking about book matching when I cut and bent the sides, but .. As I had an accurate side profile I was very carefull to mark and line up the the waist. Also when I cut out the sides I cut them together on the bandsaw. What I was really after was to have the side profile actually come close to matching the 15' dish, I ended up with perfecty book matched sides. Learn something new everyday.
I went ahead and profiled the sides in a 28' and 15' dish and glued in the kerfling. I used reverse kerfling on the top for the first time.
I thicknessed the top and back on the drum sander. I tried tap tuning as I was taught. I thinned the top tapping as I got close to the desired thickness. At one point the top really rang out. As I was taught I kept going (with the thought that the top will get stiffer with the braces.) At the point the top started to sound a bit chaotic I stopped. I ended up with the western red cedar redwood at .110" actually, actually 2.8 mm (I my heart I am a classical guitar builder.)
I got to use my handy dandy new template to mark out the braces on the back of the top.
I have a bunch of master grade redwood strips from the top that I ruined, so I used one as the center strip of the Koa back.
I am pretty excited about the Koa, This is obviously the inside. I picked the best for the outside.
I noticed some people glue the braces on first and then fits the back strip in between the braces. I thought about it, but for me doing the strip first allows me to glue up against a straight edge assuring the strip is in a straigt line.
While waiting for the glued up back braces to cure I roughed out all of the braces I need for the top.
I finished the back. Next weekend I should be able to close the box.
Last edited by johnnparchem on Mon Nov 28, 2011 12:19 pm, edited 1 time in total.
-
Kevin Sjostrand
- Posts: 4121
- Joined: Sat Feb 09, 2008 8:06 pm
- Location: Visalia, CA
Re: Koa Parlor Guitar for niece.
Oh man John, that is going to be beautiful. Closest I've come thus far to Koa is binding. I will have to save up and find a nice set to build with. You got alot done this weekend too, I'm impressed.
Kevin
Kevin
-
johnnparchem
- Posts: 2354
- Joined: Sat Apr 10, 2010 10:50 pm
- Location: Seattle
- Contact:
Re: Koa Parlor Guitar for niece.
I made a bit of progress on the Koa guitar for my niece. The last few days I glued on most of the braces to the top. While waiting for braces to dry today and in between spraying my other parlor guitar I have the neck blank roughed out.
I made three sets of x-braces before I was happy with the fit and angle. The first was at the wrong angle. The second was close but the slot on one was angled so one brace leaned. If you look closly at the picture you will see the preview to my next mistake. I drew the face brace line from the mark I had for the lower bridge. You can see the correct mark under the line.

I did finally on my third try get the face brace glued in the correct position and not backwards.

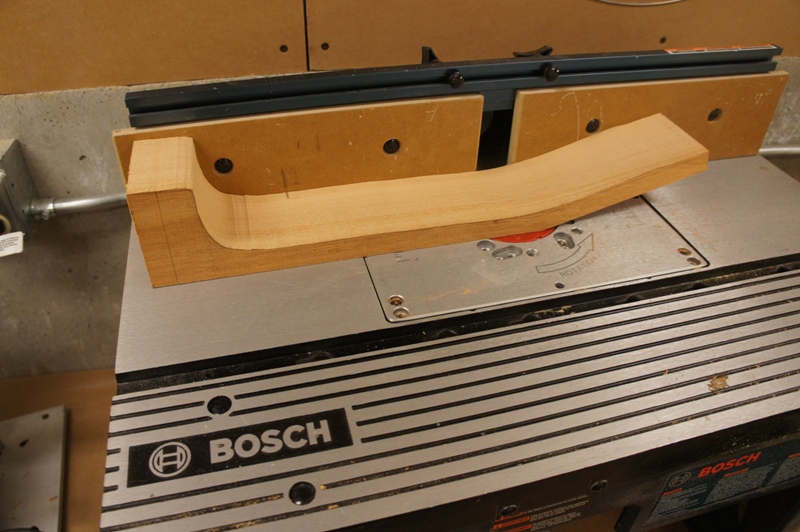
I used my bandsaw to cut out the neck blank a little oversized.

I have a Veritas low angle jointer that cleaned up the faces quickly allowing me to establish the line for the nut, and 12th fret.

I used a 1/2 inch end mill on my router table and cut a channel for the carbon rods and the truss rod.
I used a half inch chisel to clean out the channel and made sure the carbon rods and the truss rod were slightly below the neck face.

I epoxyed in the carbon rods using the truss rods as a clamp.

I finished the day cutting and gluing down the maple bridge plate

I made three sets of x-braces before I was happy with the fit and angle. The first was at the wrong angle. The second was close but the slot on one was angled so one brace leaned. If you look closly at the picture you will see the preview to my next mistake. I drew the face brace line from the mark I had for the lower bridge. You can see the correct mark under the line.
I did finally on my third try get the face brace glued in the correct position and not backwards.
I used my bandsaw to cut out the neck blank a little oversized.
I have a Veritas low angle jointer that cleaned up the faces quickly allowing me to establish the line for the nut, and 12th fret.
I used a 1/2 inch end mill on my router table and cut a channel for the carbon rods and the truss rod.
I used a half inch chisel to clean out the channel and made sure the carbon rods and the truss rod were slightly below the neck face.
I epoxyed in the carbon rods using the truss rods as a clamp.
I finished the day cutting and gluing down the maple bridge plate
-
deadedith
Re: Koa Parlor Guitar for niece.
What nice work, John. It gives me something to strive for.
-
Ken Hundley
- Posts: 608
- Joined: Mon Mar 13, 2006 12:34 am
- Location: Wilmette, IL
Re: Koa Parlor Guitar for niece.
That's looking spectacular, John! Very nice!
Ken Hundley
Nocturnal Guitars
http://www.nocturnalguitars.com
So, my big brother was playing guitar and I figured I'd try it too.
- Stevie Ray Vaughan
Nocturnal Guitars
http://www.nocturnalguitars.com
So, my big brother was playing guitar and I figured I'd try it too.
- Stevie Ray Vaughan
-
Kevin Sjostrand
- Posts: 4121
- Joined: Sat Feb 09, 2008 8:06 pm
- Location: Visalia, CA
Re: Koa Parlor Guitar for niece.
Awesome John. I like cutting out and using the one piece necks. I just did a two neck blank a couple of Saturdays ago. Had to go to a friends house to use his 17" Grizzly saw to do it. I like the looks of your Rikon. It is on my list.
Kevin
Kevin