
The second set of pictures, the ones of the old backstrip were actually taken after I inlaid the new backstrip, I simply flipped the top over and what you are looking at now is the inside of the top and what remains of the old backstrip.
I think that in most cases the sandwich method woud be easier. Realize that I had to build the backstrip, glueing the purfling to both sides of the walnut binding strip. If I was to do the sandwich type method for this the walnut would have had to be at least the same thickness as the back and instead of using storebought purfling where the B/W/B are already glued together, binding would have had to be used (because it's wider of course) and each strip of binding would have had to be glued individually to build up the pattern that is needed for the design that is desired. I will post pictures of my process tomorrow, batteries went dead on camera tonight.
David L
Sneak Peek at No. 2
-
David L
- Posts: 1319
- Joined: Thu Jan 06, 2011 8:04 pm
- Location: Slidell, La
-
Kevin Sjostrand
- Posts: 4143
- Joined: Sat Feb 09, 2008 8:06 pm
- Location: Visalia, CA
Re: Sneak Peek at No. 2
Kind of like the reversible sport coat I had in the 70's. You may have started something here for the kit suppliers, giving
the builder a choice of back strips...just turn it over and choose.
Kevin
the builder a choice of back strips...just turn it over and choose.
Kevin
-
David L
- Posts: 1319
- Joined: Thu Jan 06, 2011 8:04 pm
- Location: Slidell, La
Re: Sneak Peek at No. 2
I want royalties!!!
David L
David L
-
David L
- Posts: 1319
- Joined: Thu Jan 06, 2011 8:04 pm
- Location: Slidell, La
Re: Sneak Peek at No. 2
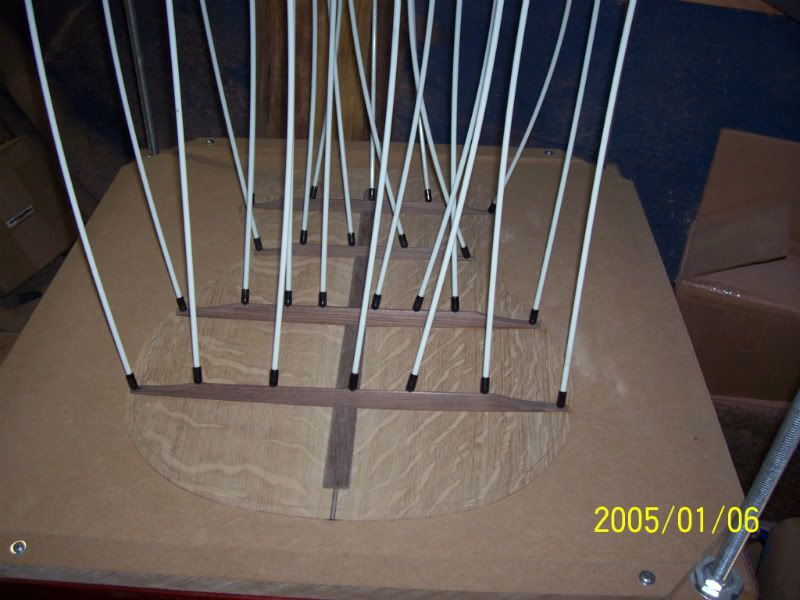
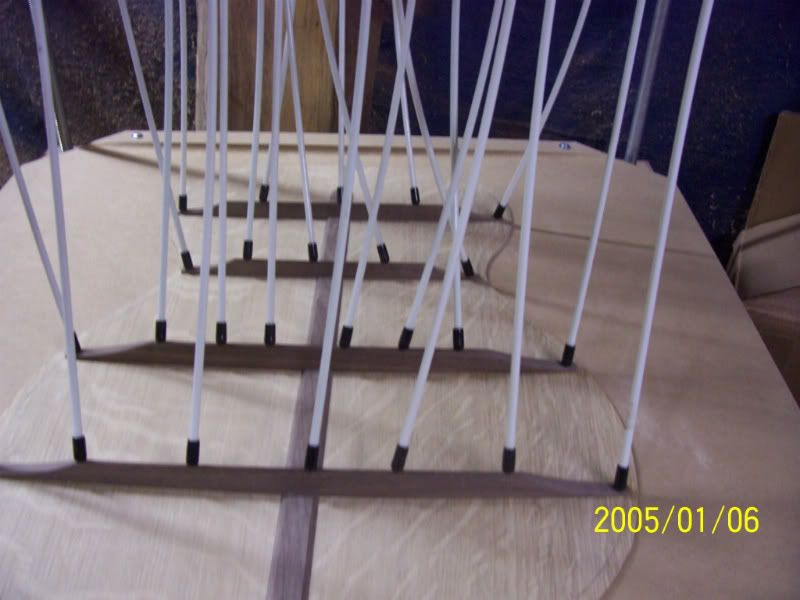
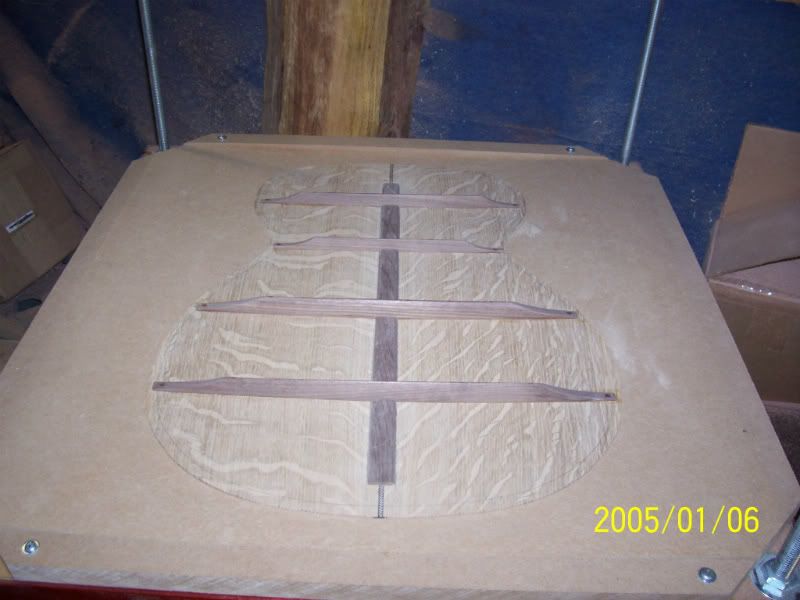
Finally got some humidity low enough to do some glue-ups. I got to break-in my new fangled gobar deck and it performed flawlessly. Notice that the gobar rods are seated on the peaks of pre-shaped braces and not one single rod slipped. Luck or skill? I'd rather be lucky any day! Maybe it's the quality of the rubber tips on the rods that I purchased from John at BCG. I have noticed that several people have had problems with rods slipping, sometimes with near devastating effects such as dents in softer woods like spruce tops or the domino effect where one slipped rod causes a chain reaction and several rods become projectile missles. This is the second guitar that I have built using the gobar deck with pre-shaped braces and I think (to the best of my recollection) I only had two rods slip on the first time around. Black walnut is the wood that I used for the braces and the center spline. Because the grain on the center spline runs length-wise, parallel with the grain of the back, I used flat-sawn material as opposed to quarter-sawn.
David L
David L
-
David L
- Posts: 1319
- Joined: Thu Jan 06, 2011 8:04 pm
- Location: Slidell, La
Re: Sneak Peek at No. 2
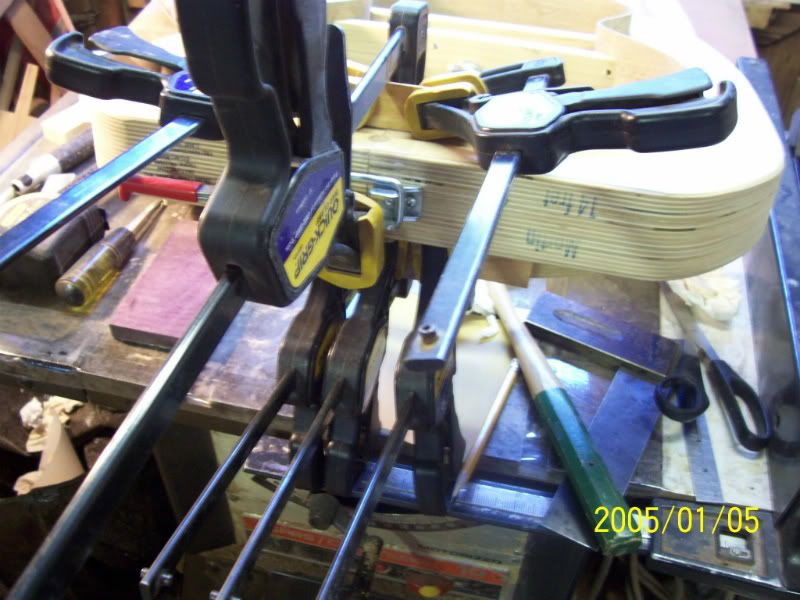
I glued the blocks to the sides, I prefer to do this "in" the mold.
David L
David L
-
tippie53
- Posts: 7192
- Joined: Fri Mar 03, 2006 7:09 pm
- Location: Hegins, Pa
- Contact:
Re: Sneak Peek at No. 2
nice
John Hall
Blues Creek Guitars Inc
Authorized CF Martin Repair Center
president of Association of Stringed Instrument Artisans
http://www.bluescreekguitars.com
Blues Creek Guitars Inc
Authorized CF Martin Repair Center
president of Association of Stringed Instrument Artisans
http://www.bluescreekguitars.com
-
Darryl Young
- Posts: 1685
- Joined: Fri Jul 30, 2010 6:44 pm
- Location: Arkansas
-
Kevin Sjostrand
- Posts: 4143
- Joined: Sat Feb 09, 2008 8:06 pm
- Location: Visalia, CA
Re: Sneak Peek at No. 2
It's because you are using white fiberglass rods. Only the black ones slip. I know, I have black ones!!
Looking good David, I prefer glueing the blocks on in the mold also.
Kevin
Looking good David, I prefer glueing the blocks on in the mold also.
Kevin
-
David L
- Posts: 1319
- Joined: Thu Jan 06, 2011 8:04 pm
- Location: Slidell, La
Re: Sneak Peek at No. 2
This thread will continue in the blog your project section, it is no longer a sneak peek.
David L
David L