Page 6 of 8
Re: Build #3: sitka/black walnut 000
Posted: Tue May 16, 2023 10:38 pm
by nkwak
I figure that this is partly like a kit so I can rely on the benefits of using serviced parts. Apart from the X bracing though, the rest don't appear to have an arced underside. That, the number of remaining braces, the lesser number of clamps than are required to glue them up and my lack of patience have motivated me to use my home made go bar deck:

I made it from MDF, a piece of bead board and various fittings from the hardware and plumbing sections of my local Home Depot. It cost less than $100 to make. The go bars themselves are actually fiberglass rods for running AV wires behind drywall. I find that the metal ends are better suited than previous experiences I've had with actual go bar rods with rubber end caps; they are less likely to slip. I trimmed of the male ends and place the trimmed ends in holes in the bead board to eliminate the risk of them slipping on that end.
PS: I also placed it on a carousel so that I can rotate the entire assembly while installing the go bars.
Re: Build #3: sitka/black walnut 000
Posted: Wed May 24, 2023 11:32 am
by nkwak
The end wedge is in. I almost screwed it up but I think it looks OK:

Re: Build #3: sitka/black walnut 000
Posted: Thu May 25, 2023 11:02 pm
by nkwak
The neck block is pre-mortised for a dovetail joint but today I opted to trim away the sides in that area to expose it for a test fit of the neck.


Re: Build #3: sitka/black walnut 000
Posted: Wed May 31, 2023 9:25 am
by nkwak
I'm prepping the sides to accept the top and back. The back is proving to be tricky because of the taper. I've made some mistakes that I hope the binding will be able to cover. In hindsight I should've chiseled the braces ends down lower before notching the rims. I really need to keep a journal so that the next one (which I hope to do relatively soon once this one nears completion) goes off with less mistakes.

Re: Build #3: sitka/black walnut 000
Posted: Wed Jun 28, 2023 4:19 pm
by nkwak
This build has been back burnered while I finished up my second build. I needed to take time away from racking my brain on how to glue on the plates and have some sense of accomplishment. Now I'm thinking I'm just going to screw an oversized plate into the top and back of the mold. The back has a 15' radius which requires more pressure to get a good bond on the tail block. Go bars don't exert enough force and I don't have enough cam clamps.
Re: Build #3: sitka/black walnut 000
Posted: Fri Sep 22, 2023 7:12 am
by nkwak
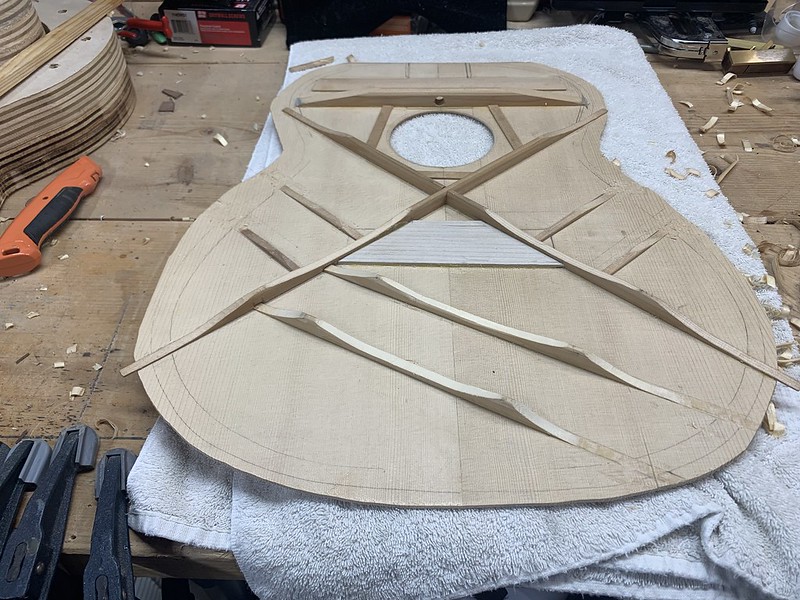
I've made some progress in the last couple of weeks. I ordered a 15' radius dish from John and got the back fitted. I opted to keep the top side flat even though the X braces have a 60' radius. Chalk it up to "wait and see" but I've dilly-dallied enough. In the meantime I also scalloped the braces and reinforced the lap joint with terry cloth and Titebond. The top has a nice ring to it when tapped, even after gluing it on to the sides.

Re: Build #3: sitka/black walnut 000
Posted: Sat Sep 23, 2023 6:52 pm
by Diane Kauffmds
You can always add "pinstripes" (purfling) around the sides, which may cover any problem you might encounter from the depth of the notches. I used to Notch through the sides, but it was this potential problem that made me decide to tuck the braces into the kerfing only, by notching only the kerfing.
Here is how it would look with side purfling. I used b/w/b .20-.20-.20 purfling.
PicsArt_04-29-08.23.49.jpg
Re: Build #3: sitka/black walnut 000
Posted: Sun Sep 24, 2023 10:08 am
by nkwak
I'm enjoying the progress I've made and am trying to maintain momentum so that I can close the box.
The top is on and there's not a lot of squeeze out at the kerfed lining. I've sanded all the braces smooth and added a terry cloth patch to reinforce the lap joint on the main X brace. I'm pleased with how resonant and clear the tap tone is, though I couldn't begin to describe it scientifically.
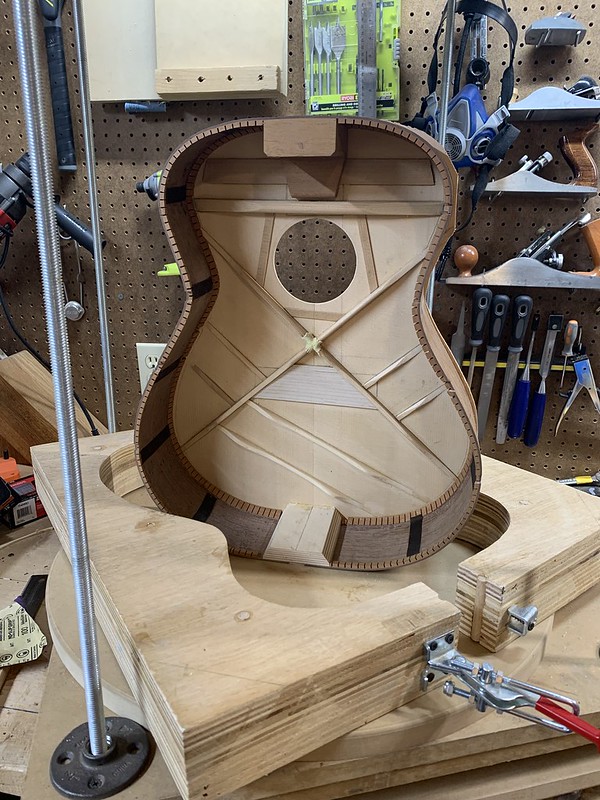
With that step, I consider this project to be at its halfway point. I know that there's a lot to go but the back and neck are all intact and awaiting to be fitted to the body.
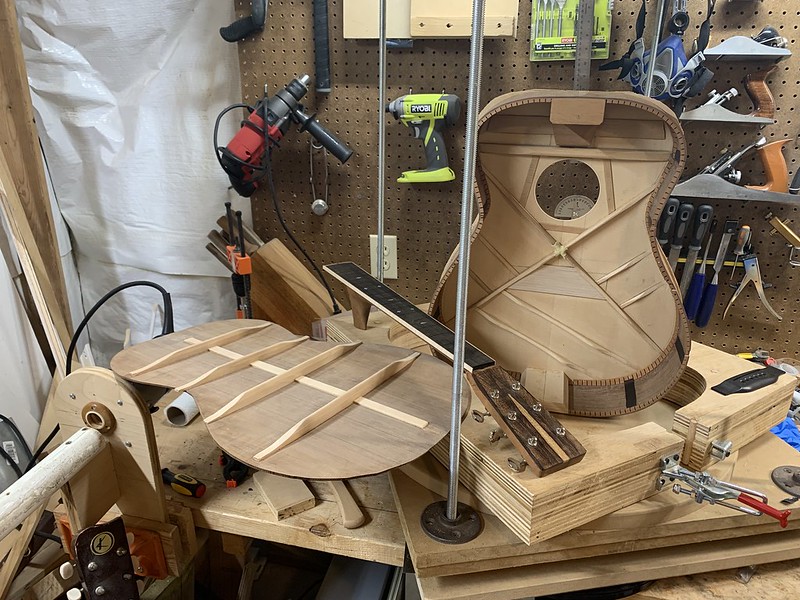
So, on to a dry fitting to ensure that the kerfed lining is properly sanded to match the dome of the back and that the notches are in the right positions so that the center strip is aligned with that of the body.
Thanks for the advice Diane. I'm trying not to get too far ahead and be intimidated by the upcoming routing and binding phase. So far it looks like the notches are quite that deep but visually I like the BWB on the side so I may take that route. I'm probably being too ambitious with the plan to put herringbone purfling on the top but don't plan to add any purfling on the back this time, just flamed maple binding. I need to focus more on the more important steps of setting the neck angle and installing and dressing the frets.
Re: Build #3: sitka/black walnut 000
Posted: Thu Oct 19, 2023 3:50 pm
by nkwak
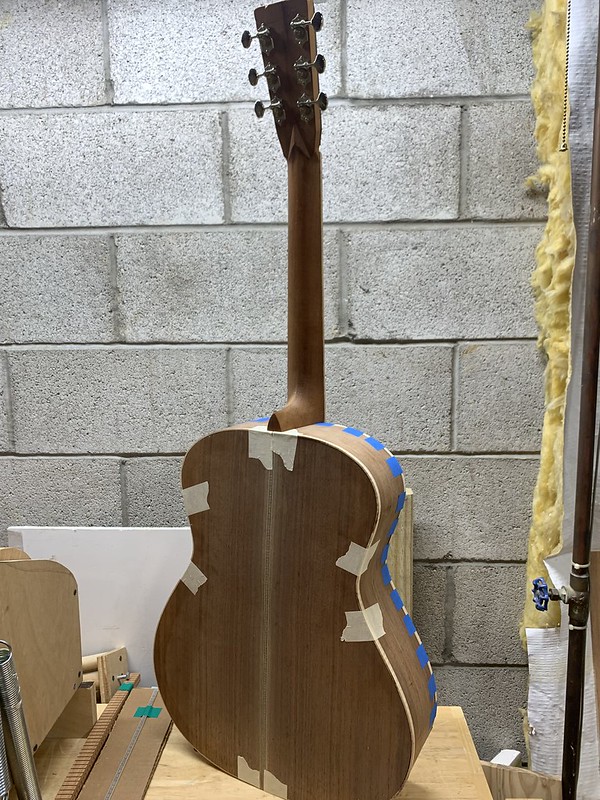
I closed the box last week. I’m leveling the sides in anticipation of my lease favorite step: routing binding channels. This will also have herringbone purfling which I admit is overly ambitious, but I won’t be putting any purfling on the back this time.
I’ve also bent the binding and partly fitted the dovetail joint. I think the center strip isn’t centered (it’s about 3/32” off) but this is only number 3 so it’s got to have some warts!
Meanwhile, I’m trying to set up my plywood binding cutting jig. I’ve already flush cut the top and back so I have had some practice with technique to avoid tearout. I think I’m going to rout the back first because like I said it won’t have purfling.


Re: Build #3: sitka/black walnut 000
Posted: Fri Nov 03, 2023 9:19 pm
by nkwak
I've been working on my least favorite step: binding. I'm still tweaking things but I'm 95% there. I'm just trying to get the miters at the end graft to work. The herringbone purfling is actually looking good.

No back purfling this time either, but the problem with the side purfling mitering is on the back portion of the end graft, not the top binding.