Page 1 of 3
First kit is finished
Posted: Sun Jul 26, 2015 9:05 am
by Danl8
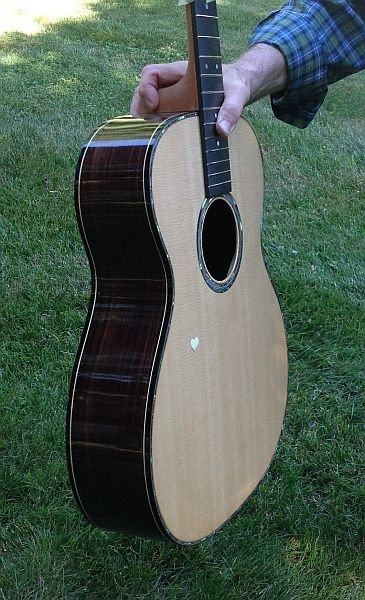
The kit came last year before I was aware of this website. Pretty much a standard kit (Martin) with rosewood and sitka, and with a Richlite board and bridge. I have never worked with plastic bindings, so I used ebony bindings with holly side strips - high contrast and also a touch of pearl around the top edge. I used top and back sanding discs (Blues Creek) -- hallelujah!! Never knew that could be so easy. The kit was made without some of the modern conveniences in construction and before John's recommendation to screw the blocks to the form. And I learned plenty; don't use a clamping caul with a nail head protruding and don’t drop the finished neck. Jeez, actually I made every rookie mistake in the book. Dang, I know I should be better! This was my second real dovetail which went in okay. Bracing the top has been the best fun yet. Used a trimming router and a set of bits from BCG to do the binding and pearl. This kit and the following practice projects (I'll post those later) were my first entry into power tools – way easier than my hand tool methods and I’m not going back.
This post should be in blog format and I'll do that working back up to the finished project including the five guitars also finished during this past year. On initial stringing this Friday, I was not disappointed with the sound. Yesterday it really improved and seems to be finding its voice.
-dan.
Re: First kit is finished
Posted: Sun Jul 26, 2015 9:36 am
by tippie53
looks like a great first guitar. I am sure it sounds good too.
Re: First kit is finished
Posted: Sun Jul 26, 2015 9:45 am
by Danl8
I should add that John Hall has consented to my joining a training class this fall something that I am really looking forward to.
-d.
Re: First kit is finished
Posted: Sun Jul 26, 2015 10:38 am
by johnnparchem
Wow, great looking guitar! Congratulations.
Re: First kit is finished
Posted: Mon Jul 27, 2015 2:58 pm
by Diane Kauffmds
It looks outstanding! Congratulations.
Re: First kit is finished
Posted: Mon Jul 27, 2015 6:47 pm
by RnB
That looks great. I like your version of a torch inlay...Abbreviated?
Re: First kit is finished
Posted: Mon Jul 27, 2015 9:18 pm
by Danl8
RnB wrote:That looks great. I like your version of a torch inlay...Abbreviated?
Thanks. This one is a version of the circa 1915 Larson Brothers Dyer harp guitar style 8. My favorite at the moment is a Harwood back of peghead inlay downsized about 15%. I'll post that in a follow-up to this thread in a few days.
Re: First kit is finished
Posted: Tue Jul 28, 2015 5:21 pm
by Danl8
Making my kit: a very short picture story
I started by making classical guitars in the early 1970s with a few hand tools and Irving Sloane's book. After completing four, I followed my music interests to the late renaissance/baroque period by building lutes. Lute building was fun especially participating in the discovery process for relearning historical luthier methods. In a few years, that devolved to an occasional activity in building resulting in a few instruments made over two decades. Last year, I got a private tour of the local guitar factory that fired up my interest in working again with tonewoods. Building two ukes copied from my vintage Martin helped seal the deal. Because of the tour, I decided to get a kit to see if I could do it and also decided to learn on broken rejected bodies from the factory otherwise destined to become azalea mulch. This approach would also be able provide rapid access to playable instruments, my ultimate objective. So now a little more than a year later, my kit is done -- a full year to get done -- and the rescued wood projects have helped me learn how to do things and have also turned out well at least from a player’s perspective. Best of all, each guitar has its own personality and is a delight to play. Below are pictures of my kit and the 'rescued' woods projects will follow in the next & final post.
Glimpse into my workshop.
Granite plate method of joining.

An old joining jig I’ve used for decades.
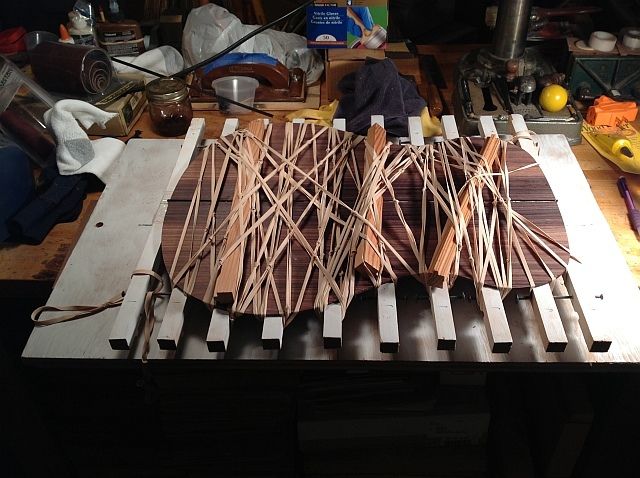
I don’t have a go-bar deck, yet. This could be called a go-bang deck, though.
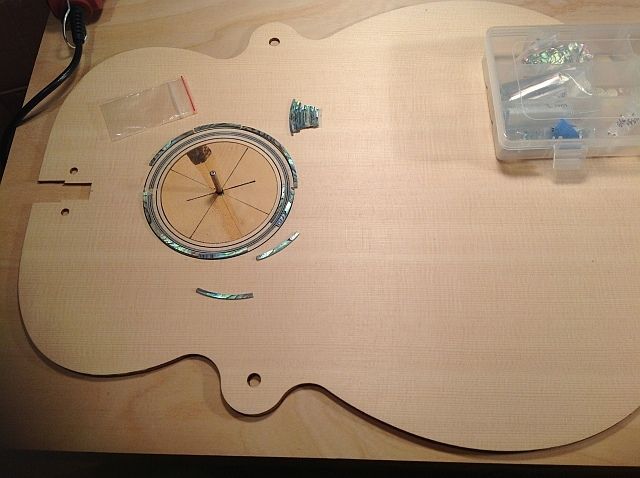
Experimenting with abalone; haven’t done this before.
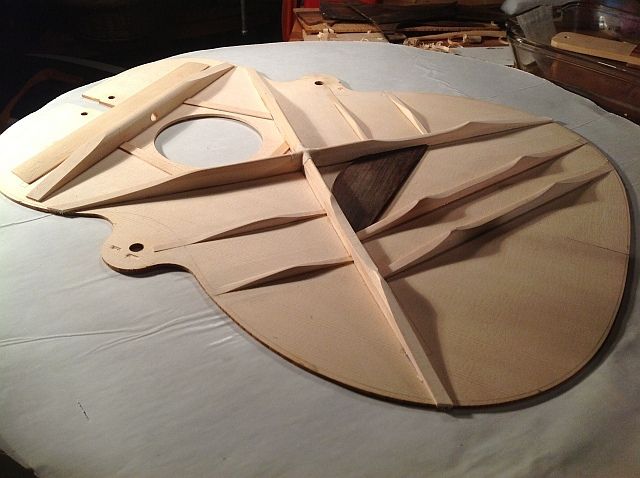
The bracing went ok. The kit bridge plate and braces didn’t fit the outline on the top so I made it work and used a scrap piece of Brazilian rosewood instead. Not going to use rosewood again.
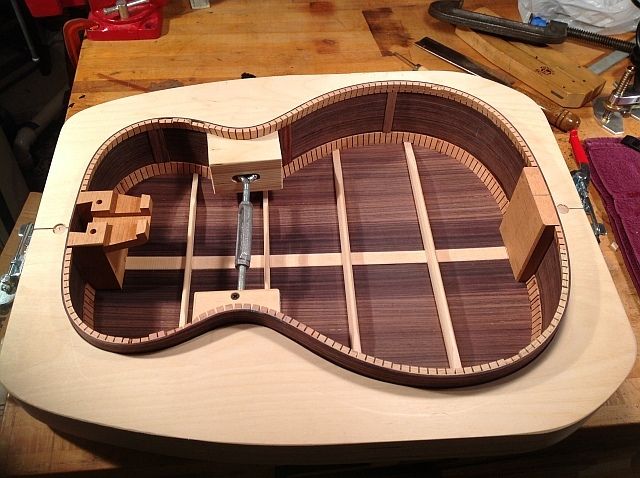
Wish I had John’s tip on screwing to the form handy on the glue up. The sides slipped a mm or so.
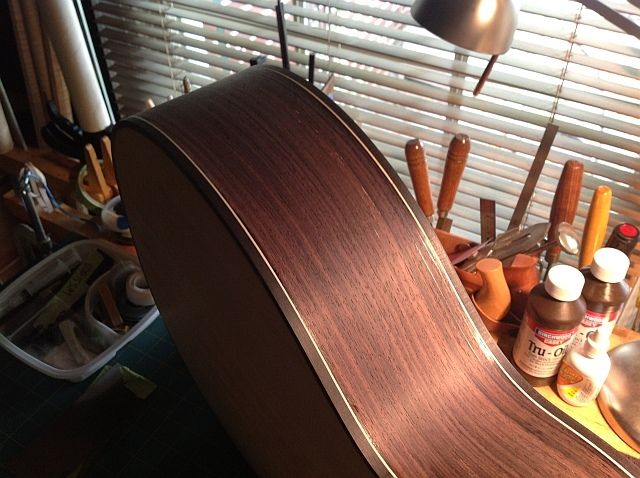
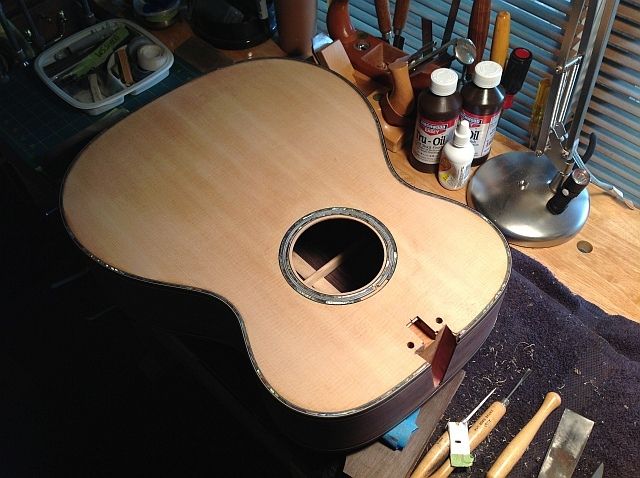
The binding is ebony with a holly strip, giving a striking contrast.
[/URL]
Just before neck attachment – you can see the tru-oil and French Polish.
Inlaying pearl on the outline.
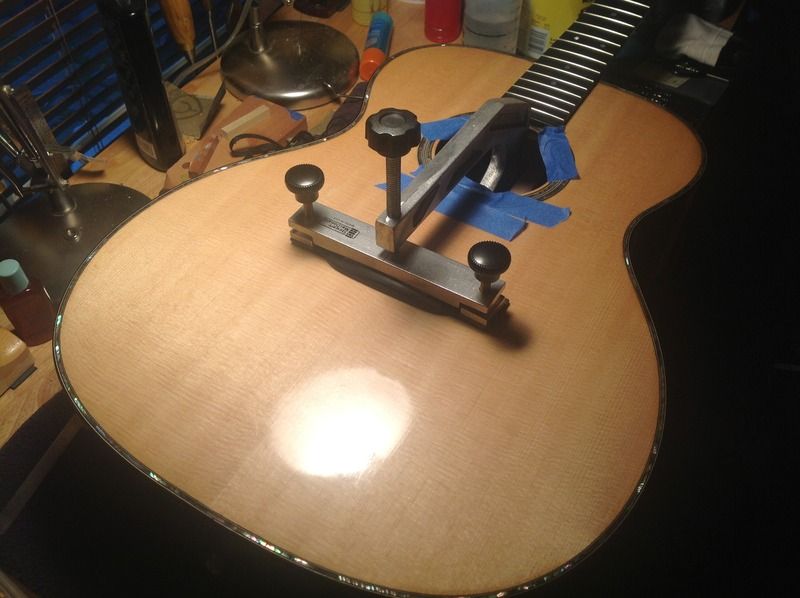
Bridge attachment with a Martin trick.
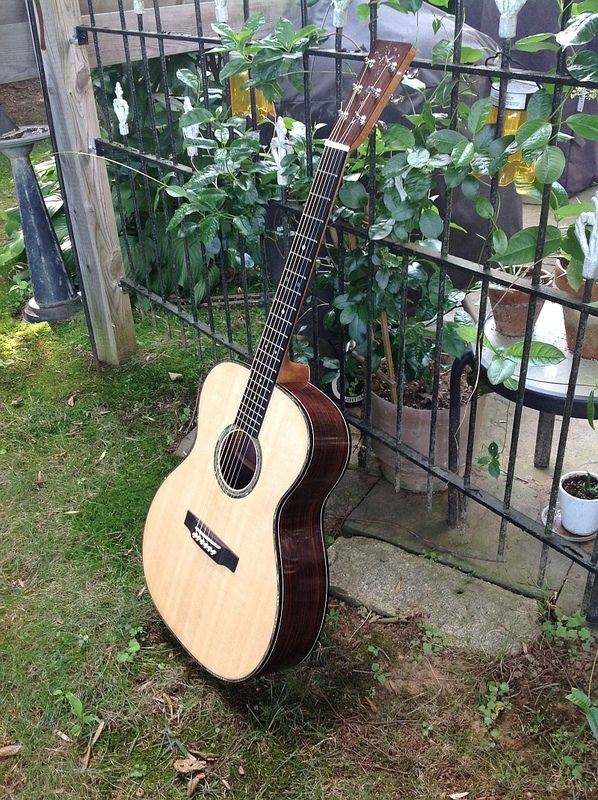
As as posted earlier the finished guitar.
Re: First kit is finished
Posted: Tue Jul 28, 2015 7:22 pm
by Diane Kauffmds
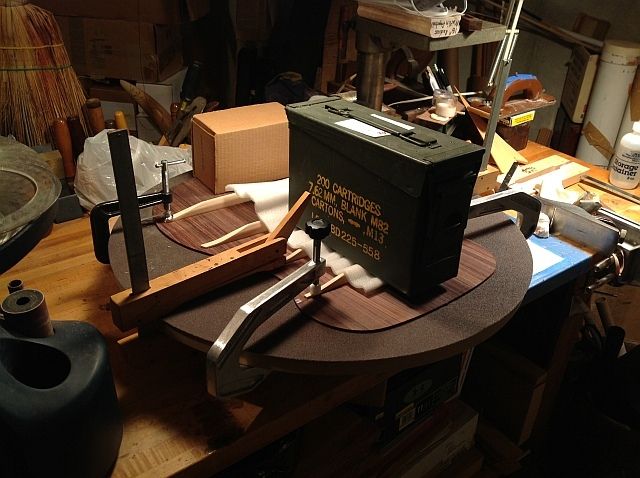
Love the ammo can weight! Lol
Re: First kit is finished
Posted: Tue Jul 28, 2015 8:09 pm
by tippie53
Gravity clamps my favorite