Cocobolo\Lutz 14 fret to the body 00

Take us through building your guitar step by step. Post pictures and tell us what you're doing.
johnnparchem
Posts: 2354
Joined: Sat Apr 10, 2010 10:50 pm
Location: Seattle
Contact:

Re: Cocobolo\Lutz 14 fret to the body 00

Post by johnnparchem »

It is always fun when I put the zpoxy on to fill the pores. I get to see all of the color and grain pop. I still need to make and install a logo, but I will be spraying this weekend.

Image

Image

Image

Image

whoops there goes another bottle of Everclear.
johnnparchem
Posts: 2354
Joined: Sat Apr 10, 2010 10:50 pm
Location: Seattle
Contact:

Re: Cocobolo\Lutz 14 fret to the body 00

Post by johnnparchem »

I have only a couple of more coats on the backs and sides and I am finished spraying. So far it all looks good. After 8 coats on the top I filled some gaps near the bindings and around the rosette, leveled the top some and sprayed 2 more coats. The back and sides were completely leveled during prep and pore fill so I have not leveled the back or sides while finishing but it looks really level and no gaps showing up so I will just sand level after the lacquer clears.

Cutting the pearl and ebony for the head stock when really well this time. The two pieces fit with no need for full.

Image

Image

Image

Image

Image

Image
Darryl Young
Posts: 1668
Joined: Fri Jul 30, 2010 6:44 pm
Location: Arkansas

Re: Cocobolo\Lutz 14 fret to the body 00

Post by Darryl Young »

It's beautiful John!
Slacker......
Phil
Posts: 238
Joined: Mon Aug 30, 2010 11:23 am
Location: Nova Scotia, Canada
Contact:

Re: Cocobolo\Lutz 14 fret to the body 00

Post by Phil »

What a beautiful guitar! That back is stunning!
johnnparchem
Posts: 2354
Joined: Sat Apr 10, 2010 10:50 pm
Location: Seattle
Contact:

Re: Cocobolo\Lutz 14 fret to the body 00

Post by johnnparchem »

Thank you Darryl and Phil,

While waiting for the finish to cure, I made the bridge. This bridge is basically from the Gore\Gilet Contemporary Acoustic Guitar Design and Build Build book. The shape is right from the Medium size Acoustic plan shipped with the book. The bridge is reinforced with carbon fiber fabric and I use it in combination with a 1 mm thick hardwood CF reinforced bridge patch. This gives me a very light bridge but one with good lateral stiffness from the two separated parallel carbon fiber sheets.

The first task is to rip a 12 mm Walnut bridge blank so that you end up with an 8 mm thick slice and a 3 mm slice. I clean up the gluing faces on each side with a plane and use epoxy to laminate them with a sheet of carbon fiber fabric in between. I let the epoxy cure over night.

Image

Image

I clean up the top edge with a plane, tape on a template and first cut very close to the template with a band saw. I clean up the profile of a belt sander. I use to route to the template, but I have been getting spooked shaping with the router. Also it just takes a moment to cut out the shape and clean it on the band saw. I also drill the bridge pin holes before removing the template.

Image

Image

Image

Image

With some drawn out guide lines I use my Luthier's Friend as a drum sander to thin the wings. I just keep my eye on the guide lines in the early cuts. Once the cut is deep enough it is easy to feel how far to go. Although my final target for the wings are 2 mm. I only take them down to about 4 mm or so at this stage. Ultimately I will end up with a 9-10 mm high with 2 mm or so thick wings.

Image

Image

I put a 16: radius on the top of my bridges. I use a wood radius block to sand the radius on to the top. I take a bunch of care not to over sand the sides and expose the CF on the top of the bridge.

Image

At this point the bridge is roughed out. I use stewmac bevel cutter to bevel the pin holes and then finished sanded the bridge. I ended up a bit tall and took 1.5 mm off of the bottom of this bridge and then radiused the bridge to match the 32 foot radius of the top.

Image

Image

Image

Image

Then the magic ebonizing solution. (1 quart apple cider vinegar, one 0000 steel wool pad, washed of any oil, and well rinsed to remove soap). After sitting in the vinegar for about a week it is good to go. The blackening is not a stain rather it is a chemical reaction between the tannin in the wood and the iron oxide in the solution. The wood is changed deep enough to allow for some finish sanding. Also no problem just putting on more.

Image

Image

Image
Kevin Sjostrand
Posts: 3727
Joined: Sat Feb 09, 2008 8:06 pm
Location: Visalia, CA

Re: Cocobolo\Lutz 14 fret to the body 00

Post by Kevin Sjostrand »

Pretty cool how that works
johnnparchem
Posts: 2354
Joined: Sat Apr 10, 2010 10:50 pm
Location: Seattle
Contact:

Re: Cocobolo\Lutz 14 fret to the body 00

Post by johnnparchem »

Thanks, Kevin I am taking a liking to the ebonized Walnut bridges.

I just pulled this guitar out of the spray booth this afternoon . I am going to wait until the morning until I start wet sanding and buffing out the finish. I think I am getting better with the spray gun as these pictures are the guitar 15 or so coats of EM6000 lacquer with no level sanding. Not a sag, orange peel, over spray or drip to be found.

Image

Image

Image

Image

Image

Image
Phil
Posts: 238
Joined: Mon Aug 30, 2010 11:23 am
Location: Nova Scotia, Canada
Contact:

Re: Cocobolo\Lutz 14 fret to the body 00

Post by Phil »

Looking good! May I asked what kind of spray gun you are using with the EM6000? I have used the EM6000 on a few projects now and I like the fact that I can spray it in my shop (I do not have a spray booth) without the health and safety hazards of traditional lacquers. My spraying skill isn't great and I think I spray coats on way too heavy, but to be fair I am using a $20 HVLP gun from Princess Auto (which might be equivalent to Harbour Freight in the US, not sure) and a hardware store 5 gallon compressor. Eventually I would like to upgrade to a better gun, although I don't want to have to spend a fortune on a gun either.

Maybe I should expand my question to, what is your spray setup (including compressor)?
johnnparchem
Posts: 2354
Joined: Sat Apr 10, 2010 10:50 pm
Location: Seattle
Contact:

Re: Cocobolo\Lutz 14 fret to the body 00

Post by johnnparchem »

Phil wrote:Looking good! May I asked what kind of spray gun you are using with the EM6000? I have used the EM6000 on a few projects now and I like the fact that I can spray it in my shop (I do not have a spray booth) without the health and safety hazards of traditional lacquers. My spraying skill isn't great and I think I spray coats on way too heavy, but to be fair I am using a $20 HVLP gun from Princess Auto (which might be equivalent to Harbour Freight in the US, not sure) and a hardware store 5 gallon compressor. Eventually I would like to upgrade to a better gun, although I don't want to have to spend a fortune on a gun either.

Maybe I should expand my question to, what is your spray setup (including compressor)?
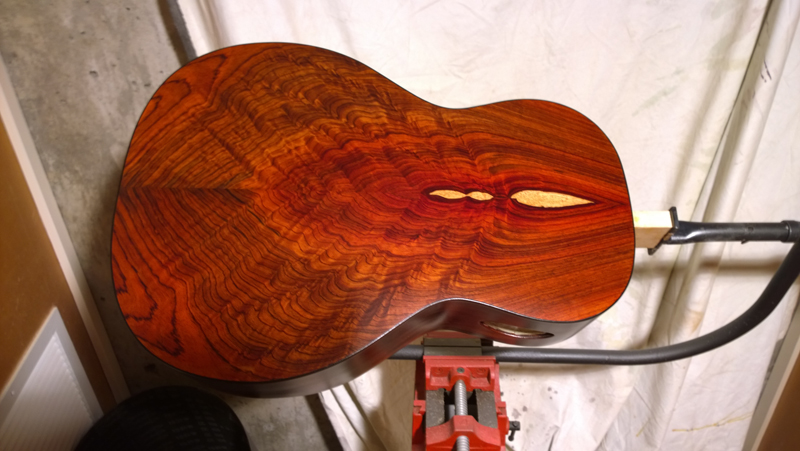
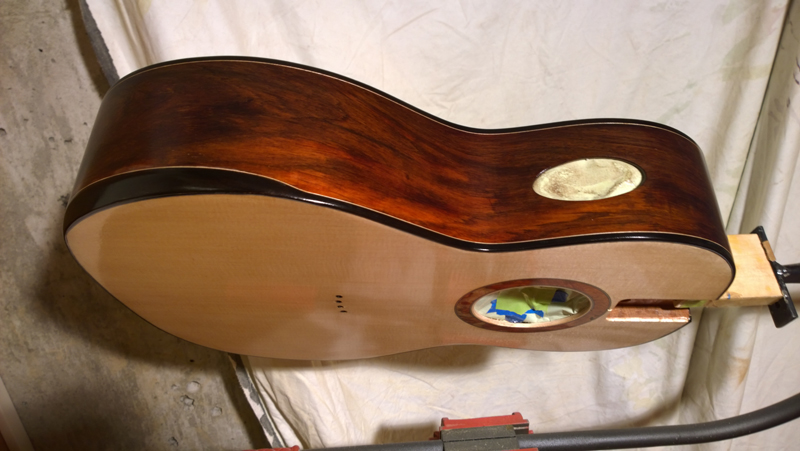
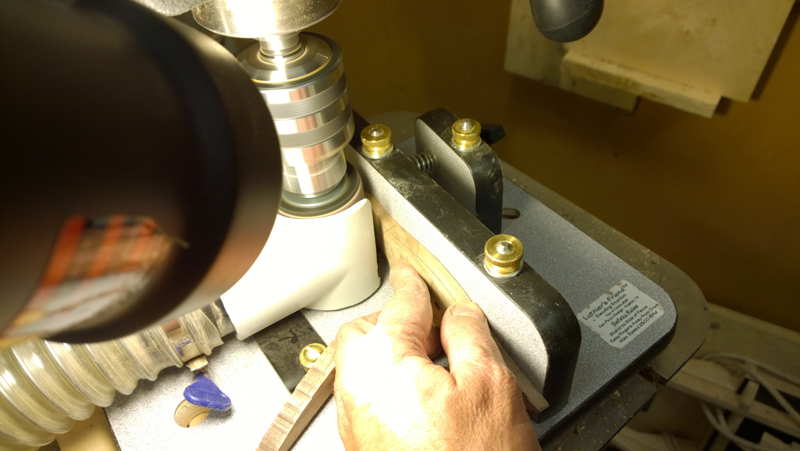
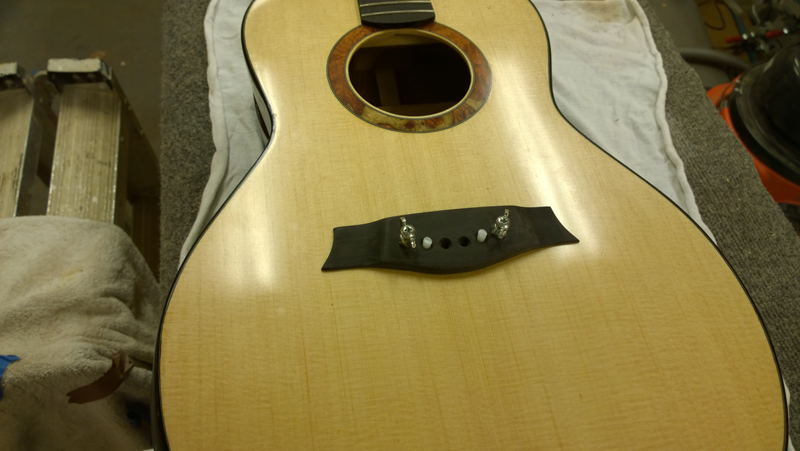
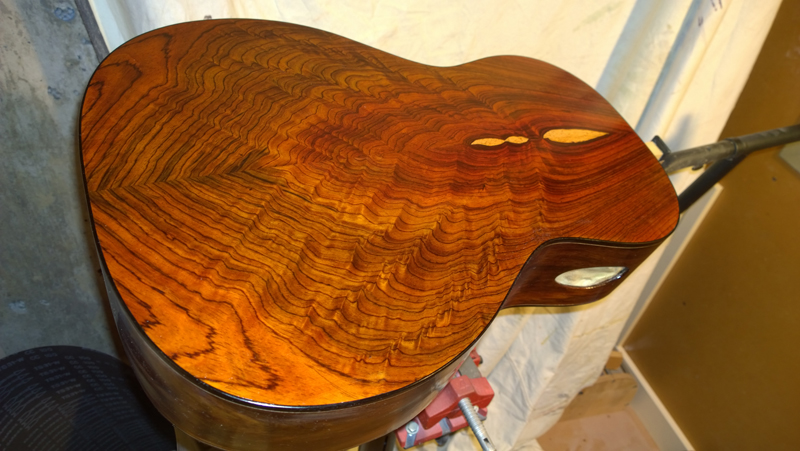
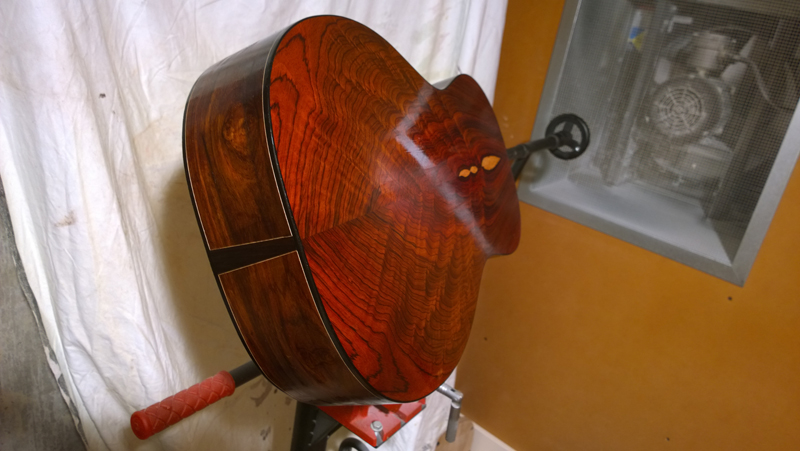
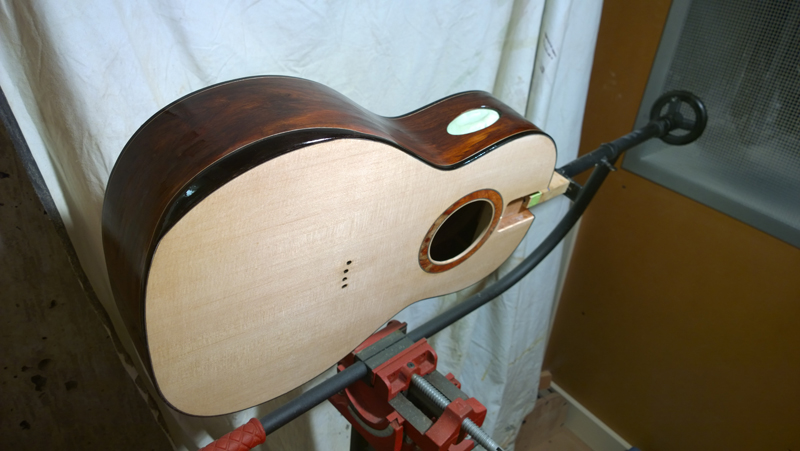
Thanks, I use a qualspray QS-125WB. It is considered a touch up gun, perfect size for a guitar. I am using 1.2 mm tip. I check the gun's set up each coat with a mil gauge before I spray. I try to stay around 3-4 mils wet. Until you get a feel and even afterwards the mil gauge is your friend; especially with EM6000. I just use a dewalts 15 gal compressor 5 SCFM at 90 psi, just enough to supply this gun.
You do not have the required permissions to view the files attached to this post.
johnnparchem
Posts: 2354
Joined: Sat Apr 10, 2010 10:50 pm
Location: Seattle
Contact:

Re: Cocobolo\Lutz 14 fret to the body 00

Post by johnnparchem »

While I impatiently wait for the bridge glue to cure I have some time to post a few more photos.

I fretted the neck, sanded and polished the guitar, installed the tuners and am current gluing on the bridge. All of this is pretty straight forward. I think the only thing that I do different than most is to not tape off the bridge. Taping the bridge with an undersized piece of tape would save me a bit of time, but I find it very easy to scrape the finish out of the middle of the bridge area. Working to get a clean edge is the same in either case. I position the bridge, screw it down tight and trace the bridge using a brand new scalpel blade. Once i clear the bulk of the finish out of the bridge area I use a sharp chisel to remove the finish right to my traced cut line. Some of it is in my pictures.

Oh by the, I am using the new LMI instrument glue for the bridge. My old procedure when using a vacuum clamp was to wait 10 minutes remove the clamp, clean up the squeeze out (it use to be soft but held together and easy to remove.) With the new glue the squeeze out was hard after 10 minutes, I used a bit of water to soften it and remove the squeeze out. It is a drag to be cleaning cured glue off the finish. I think I will clean up after 5 or so minutes now.

Image

Image

Image

Image

Image

Image

Image

Image
Post Reply