
Looks like it is right no John! Wait just a little longer.
Oops, that was suppose to be, Right ON!
Number 13 - EIR\Sitka Drednought -Finished
-
Kevin Sjostrand
- Posts: 3719
- Joined: Sat Feb 09, 2008 8:06 pm
- Location: Visalia, CA
Re: Number 13 - EIR\Sitka Drednought -The hardest step!
Last edited by Kevin Sjostrand on Tue Feb 25, 2014 2:50 am, edited 1 time in total.
-
RnB
- Posts: 210
- Joined: Wed Jan 25, 2012 1:44 pm
- Location: Bay Area
Re: Number 13 - EIR\Sitka Drednought -The hardest step!
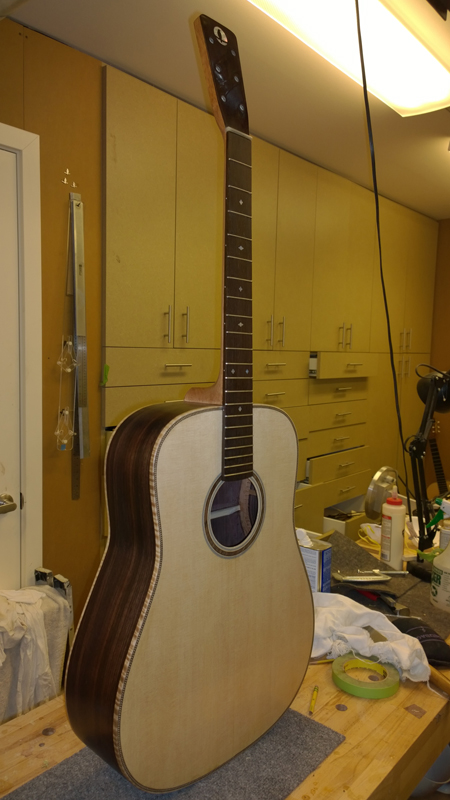
That's looking mighty fine John.Your neck angle appears to be just right. Is that daylight I see under the straightedge? It's hard to tell in the pic w/ my fading eyes. Wednesday's only 2 days away . . . :>)
-
johnnparchem
- Posts: 2354
- Joined: Sat Apr 10, 2010 10:50 pm
- Location: Seattle
- Contact:
Re: Number 13 - EIR\Sitka Drednought -The hardest step!
Thank you, Yes a bit of daylight, a bit more after I radiused the bridge.RnB wrote:That's looking mighty fine John.Your neck angle appears to be just right. Is that daylight I see under the straightedge? It's hard to tell in the pic w/ my fading eyes. Wednesday's only 2 days away . . . :>)
-
JVan
- Posts: 143
- Joined: Wed Jan 18, 2012 7:03 pm
- Location: White Pigeon, MI
Re: Number 13 - EIR\Sitka Drednought -The hardest step!
Great looking guitar John, Thanks for documenting it so well! I enjoyed it~
JV
JV
-
johnnparchem
- Posts: 2354
- Joined: Sat Apr 10, 2010 10:50 pm
- Location: Seattle
- Contact:
Re: Number 13 - EIR\Sitka Drednought -The hardest step!
Thanks JV. Most people around me do not understand how excited I get while building. So I really like posting the work.
I have waited long enough I will start sanding and buffing tomorrow. While I waited I did fret the neck, added the position markers and roughed out a nut.
Once buffed out I still need to place the bridge. I waited until the end on this guitar. I will slot the bridge while on the guitar. (living dangerously) I have filled and reslotted a bridge on an older guitar that needed a neck reset.
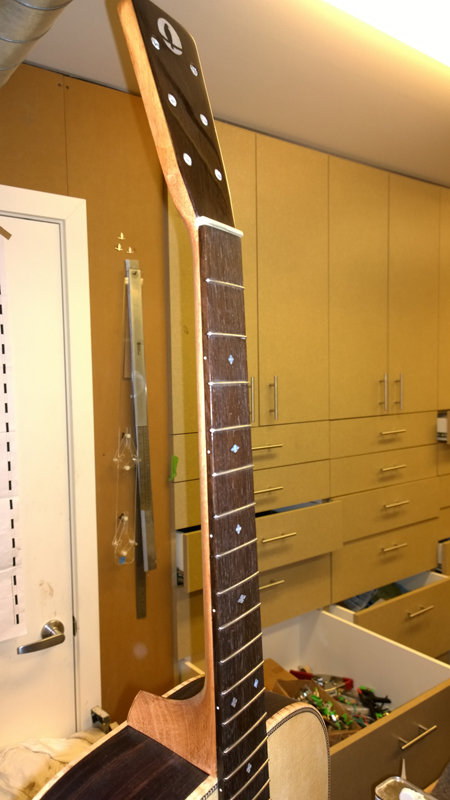
-
tippie53
- Posts: 7013
- Joined: Fri Mar 03, 2006 7:09 pm
- Location: Hegins, Pa
- Contact:
Re: Number 13 - EIR\Sitka Drednought -The hardest step!
nice one
John Hall
Blues Creek Guitars Inc
Authorized CF Martin Repair Center
president of Association of Stringed Instrument Artisans
http://www.bluescreekguitars.com
Blues Creek Guitars Inc
Authorized CF Martin Repair Center
president of Association of Stringed Instrument Artisans
http://www.bluescreekguitars.com
-
johnnparchem
- Posts: 2354
- Joined: Sat Apr 10, 2010 10:50 pm
- Location: Seattle
- Contact:
Re: Number 13 - EIR\Sitka Drednought -The hardest step!
Thanks John,
Thanks guys!
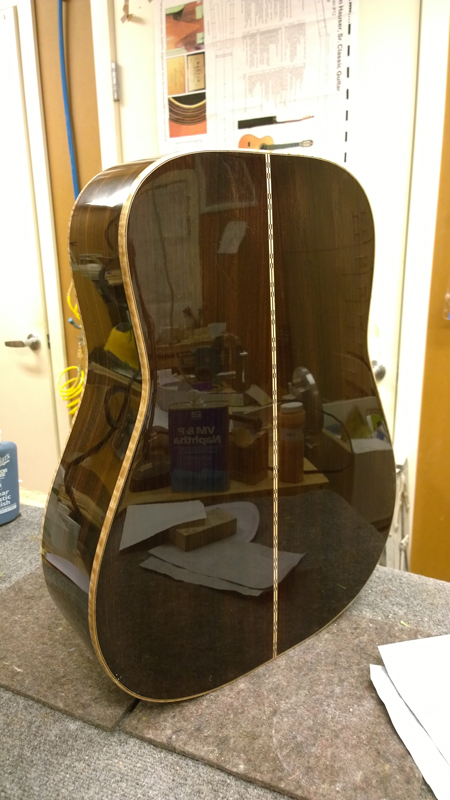
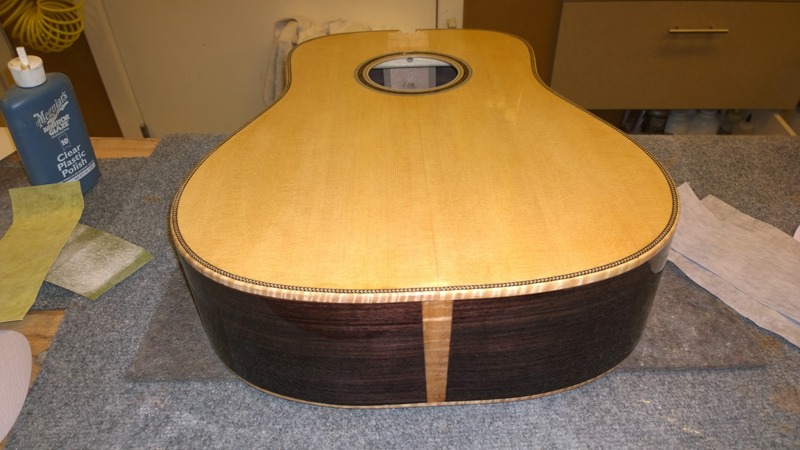
All buffer out, ready to start on the bridge.

Thanks guys!
All buffer out, ready to start on the bridge.
-
Kevin Sjostrand
- Posts: 3719
- Joined: Sat Feb 09, 2008 8:06 pm
- Location: Visalia, CA
Re: Number 13 - EIR\Sitka Drednought -All buffed out.
Ooooooo La la!
-
johnnparchem
- Posts: 2354
- Joined: Sat Apr 10, 2010 10:50 pm
- Location: Seattle
- Contact:
Re: Number 13 - EIR\Sitka Drednought -Finished
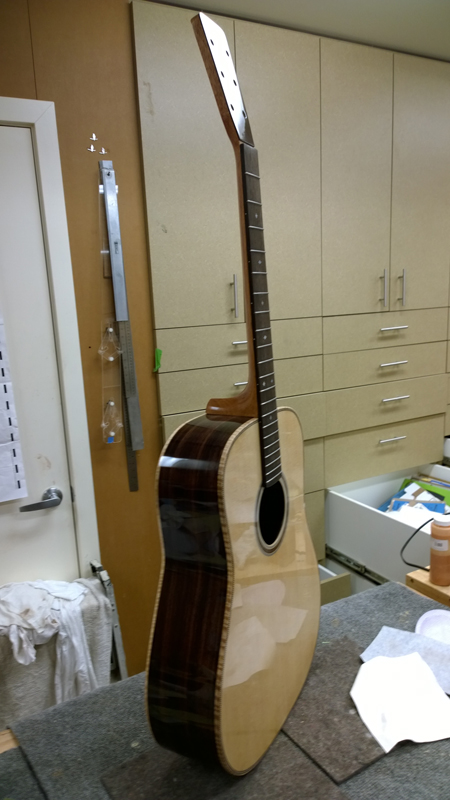
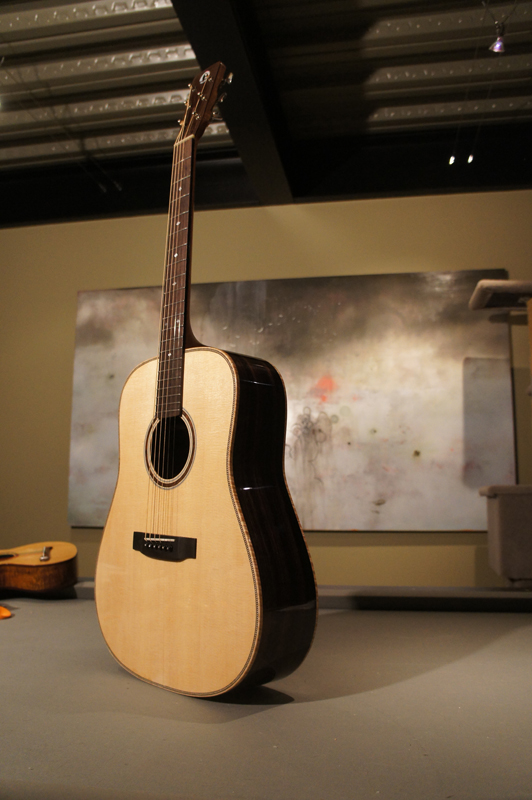
I never really closed out the build blog for the guitar. Here are the final set of pictures I had from the project.
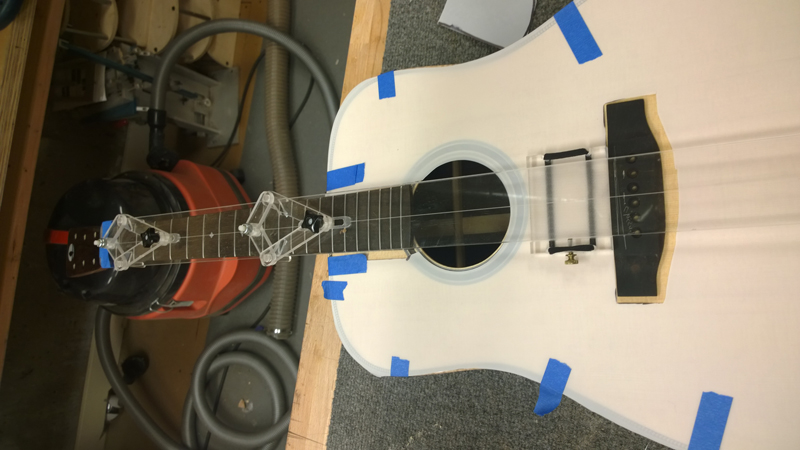
Each and every time I have changed when and how I deal with the bridge and the finishing process. I sprayed the body on this guitar without placing the bridge and I glued on the bridge without a slot. As you will see over all I am happy about the results of both changes.
I have always taped the area where the bridge was located with a patch either just a bit smaller or the same size as the bridge. In both of the above cases after the guitar was sprayed and polished I needed to trace the bridge again with a scalpel so that I could clean the remainder of the finish to the edge of the bridge or so that I could cleanly remove the full sized bridge tape. The first case really only saved me a little time over tracing and clearing the whole area of finish. I found the full sized patch left a small ridge of finish right next to where the tape was. Probably formed due to the bridging of finish between the taped area and the untaped top. No big deal but something to deal with.
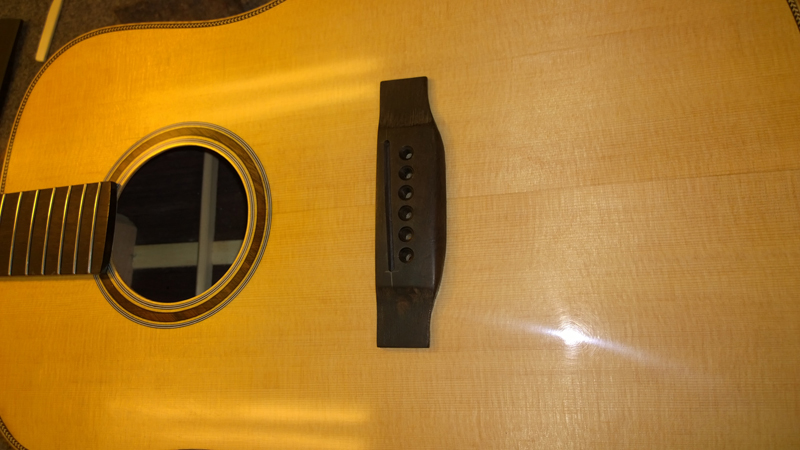
Setting the bridge after finish allow a clean continuous finish across the bridge area. I placed the bridge. Used bolts in the E strings and carefully traced the bridge from the corners in with a scalpel with a brand new blade. The results were the cleanest I have had so far. Here are the pictures.
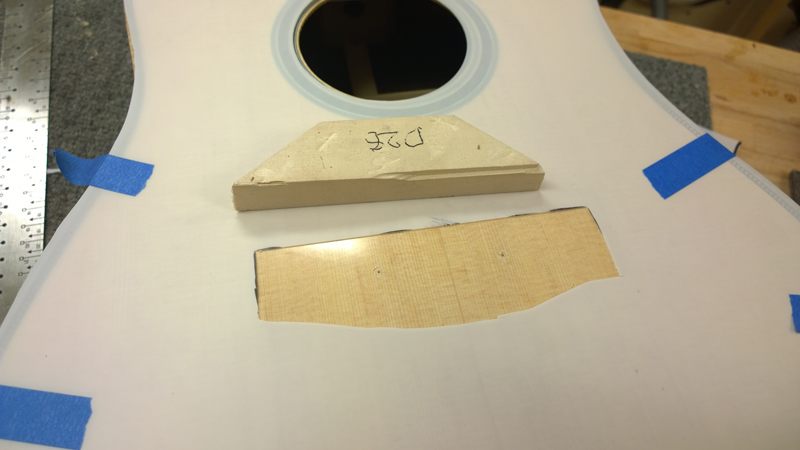
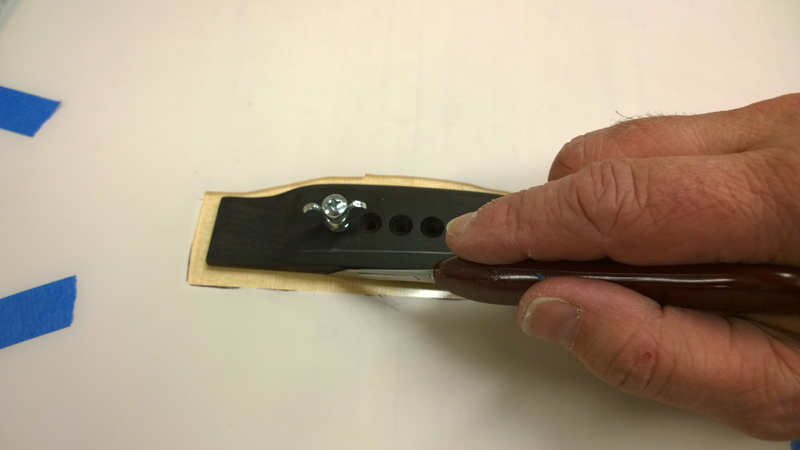
As I had no slot the best tool I had was the center finder jig. This tool assure that I had the bridge centered to the neck. I have marked off where I want the saddle. The back of the tool rests against the edge of the nut.
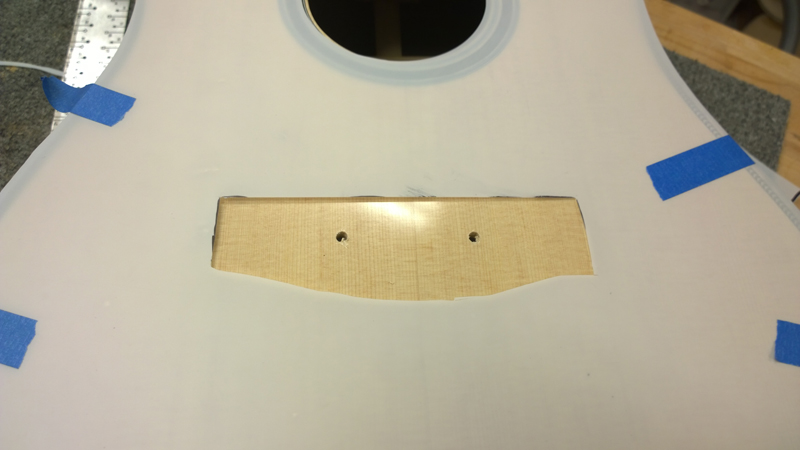
Using a brad point drill bit I marked out the centers for the E string holes and drilled them I believe with a 3/8 bit.
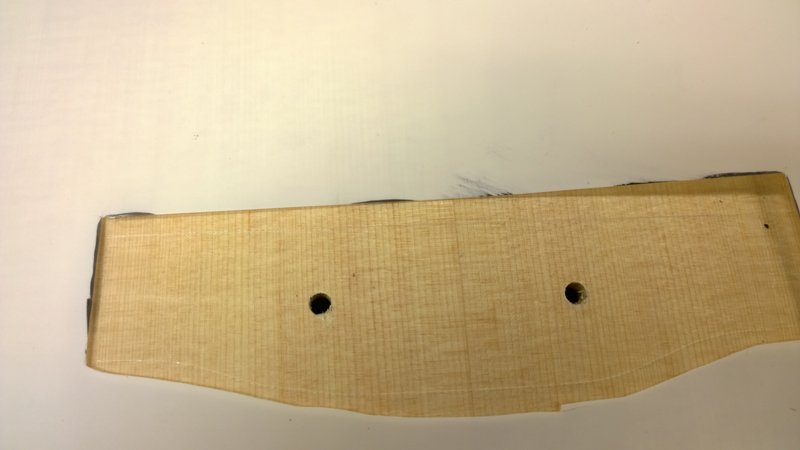
Traced the bridge location with a scalpel and used a combination of chisels, straight edge razor blades and sand paper to clean off all of the finish.
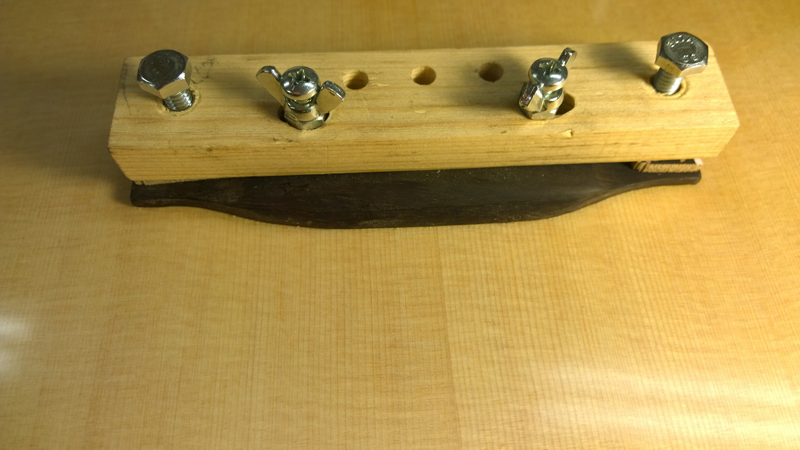
I used Kens bridge clamp to glue down the bridge. I have a vacuum clamp, but I have to say I find this clamp easier, more assured placement, easy to clean up squeeze-out, and it has no issues gluing down the bridge.
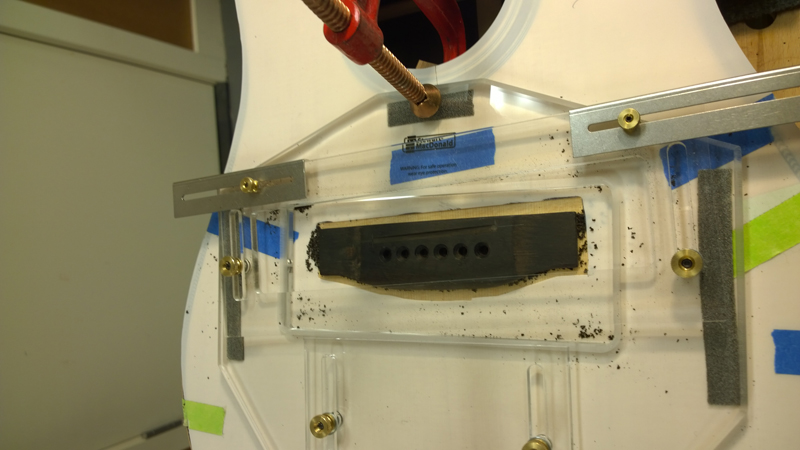
I recently did a neck reset on an older D28, as part of that I filled the saddle slot and routed a new slot. It was such a clean operation with the stewmac jig, I decided to use it on a new guitar. My idea was that I could get everything together, including the bridge and route the slot right where I wanted it. The operation went as smooth as it could go.
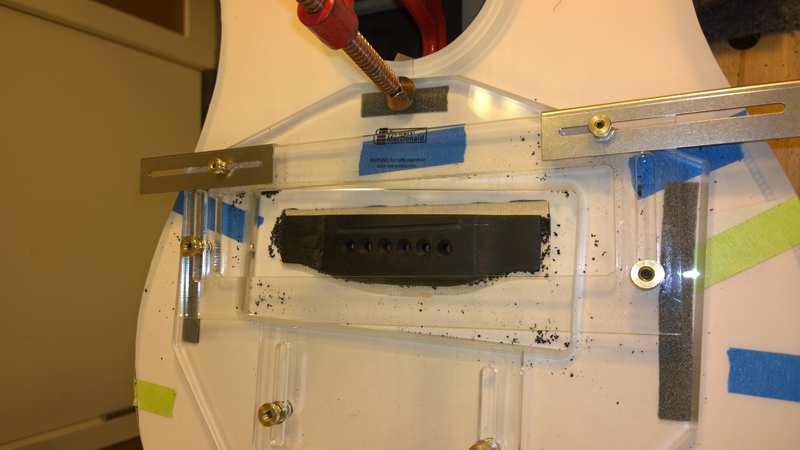
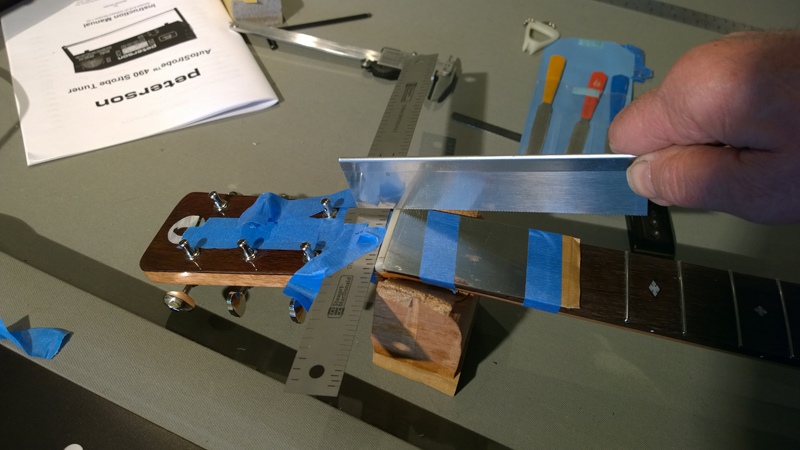
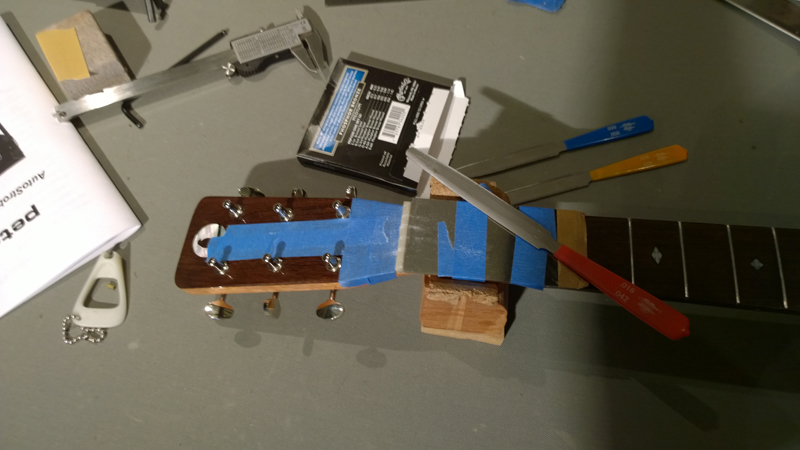
The last pictures just show how I rough cut and file the slots for the nut. This procedure leaves them a little high but in the range where I can start working them with the guitar strung up. I really want the slots to go almost to the zero fret position, this is scraper blade higher. When the saw and when the file hits the scraper I stop.
Following is the final Spectrum Analysis with the bridge, saddle and pins. My target was 95 for the Air and 170 for the top. So I am close. I am not right in the middle of two notes but I am not on one either so I am leaving it. I am not sure my target was correct as it is making the D28 more like a finger style guitar. But it does sound good overall.
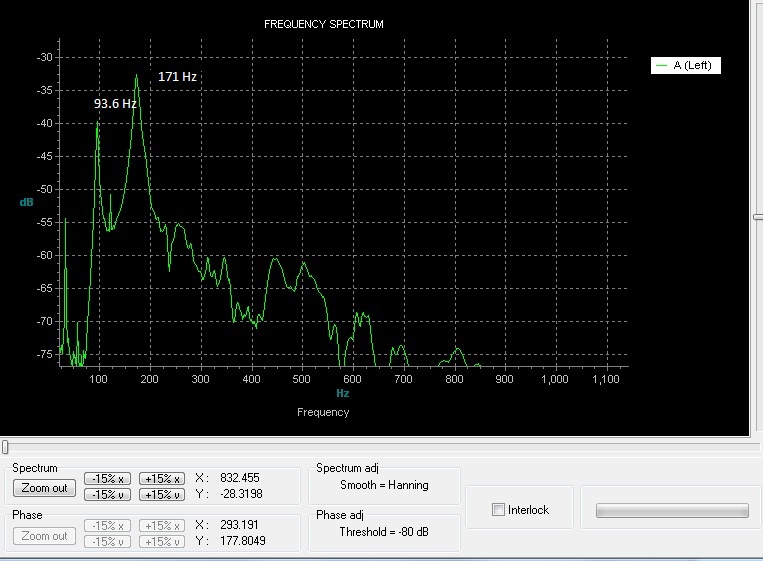
Of note I noticed nearly a 2 Hz drop in top frequency from no pins to having the pins. Just shows how sensitive the top is to weight.
Thanks for following the blog!
Each and every time I have changed when and how I deal with the bridge and the finishing process. I sprayed the body on this guitar without placing the bridge and I glued on the bridge without a slot. As you will see over all I am happy about the results of both changes.
I have always taped the area where the bridge was located with a patch either just a bit smaller or the same size as the bridge. In both of the above cases after the guitar was sprayed and polished I needed to trace the bridge again with a scalpel so that I could clean the remainder of the finish to the edge of the bridge or so that I could cleanly remove the full sized bridge tape. The first case really only saved me a little time over tracing and clearing the whole area of finish. I found the full sized patch left a small ridge of finish right next to where the tape was. Probably formed due to the bridging of finish between the taped area and the untaped top. No big deal but something to deal with.
Setting the bridge after finish allow a clean continuous finish across the bridge area. I placed the bridge. Used bolts in the E strings and carefully traced the bridge from the corners in with a scalpel with a brand new blade. The results were the cleanest I have had so far. Here are the pictures.
As I had no slot the best tool I had was the center finder jig. This tool assure that I had the bridge centered to the neck. I have marked off where I want the saddle. The back of the tool rests against the edge of the nut.
Using a brad point drill bit I marked out the centers for the E string holes and drilled them I believe with a 3/8 bit.
Traced the bridge location with a scalpel and used a combination of chisels, straight edge razor blades and sand paper to clean off all of the finish.
I used Kens bridge clamp to glue down the bridge. I have a vacuum clamp, but I have to say I find this clamp easier, more assured placement, easy to clean up squeeze-out, and it has no issues gluing down the bridge.
I recently did a neck reset on an older D28, as part of that I filled the saddle slot and routed a new slot. It was such a clean operation with the stewmac jig, I decided to use it on a new guitar. My idea was that I could get everything together, including the bridge and route the slot right where I wanted it. The operation went as smooth as it could go.
The last pictures just show how I rough cut and file the slots for the nut. This procedure leaves them a little high but in the range where I can start working them with the guitar strung up. I really want the slots to go almost to the zero fret position, this is scraper blade higher. When the saw and when the file hits the scraper I stop.
Following is the final Spectrum Analysis with the bridge, saddle and pins. My target was 95 for the Air and 170 for the top. So I am close. I am not right in the middle of two notes but I am not on one either so I am leaving it. I am not sure my target was correct as it is making the D28 more like a finger style guitar. But it does sound good overall.
Of note I noticed nearly a 2 Hz drop in top frequency from no pins to having the pins. Just shows how sensitive the top is to weight.
Thanks for following the blog!