
I am starting a new guitar for a 22 year old niece of mine. I have a waterfall bubinga back and side set and a sinker redwood top. My original plan was to have cocobolo bindings, rosette and head stock veneer. I also had some marquetry purfling that was a good color match to the bindings. But then I saw the book matched cutoffs from the back. So now I think I will go with a bubinga headstock veneer and rosette. I have posted pictures of both you guys can help me decide.
Martin Style 00 12 fret guitar now with strings!
-
johnnparchem
- Posts: 2354
- Joined: Sat Apr 10, 2010 10:50 pm
- Location: Seattle
- Contact:
Martin Style 00 12 fret guitar now with strings!
You do not have the required permissions to view the files attached to this post.
Last edited by johnnparchem on Mon Apr 15, 2013 1:13 am, edited 6 times in total.
-
darren
- Posts: 794
- Joined: Sun Apr 19, 2009 9:26 pm
- Location: Williams Bay, Wi
- Contact:
-
Ben-Had
- Posts: 1405
- Joined: Fri Sep 03, 2010 2:14 pm
- Location: Creedmoor, NC
Re: Starting Martin Style 00 12 fret guitar.
If you haven't used Sinker Redwood before you're going to love the sound. My top was a little brittle so be careful.
Tim Benware
-
johnnparchem
- Posts: 2354
- Joined: Sat Apr 10, 2010 10:50 pm
- Location: Seattle
- Contact:
Re: Starting Martin Style 00 12 fret guitar.
Thanks,
I used sinker once before and it is brittle really easy to split as well (don't ask me how I know this :)).
I went with the bubinga rosette and I will use it for the head plate as well.
I used sinker once before and it is brittle really easy to split as well (don't ask me how I know this :)).
I went with the bubinga rosette and I will use it for the head plate as well.
You do not have the required permissions to view the files attached to this post.
-
johnnparchem
- Posts: 2354
- Joined: Sat Apr 10, 2010 10:50 pm
- Location: Seattle
- Contact:
Re: Starting Martin Style 00 12 fret guitar.
Construction:
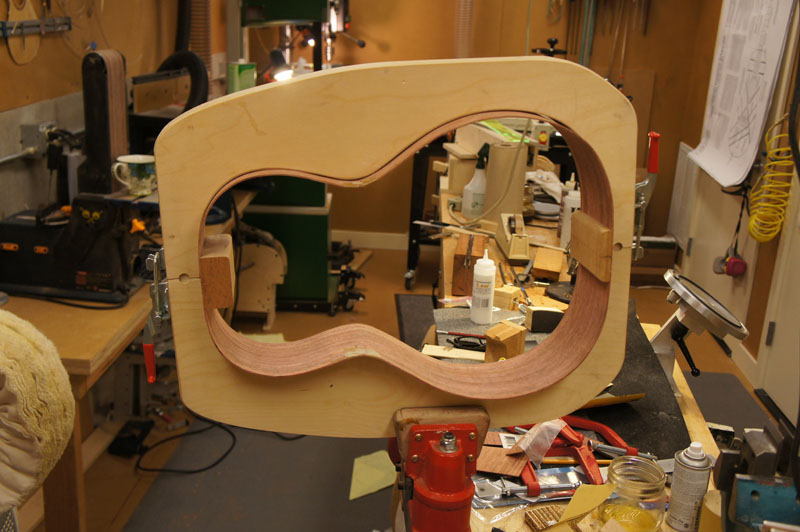
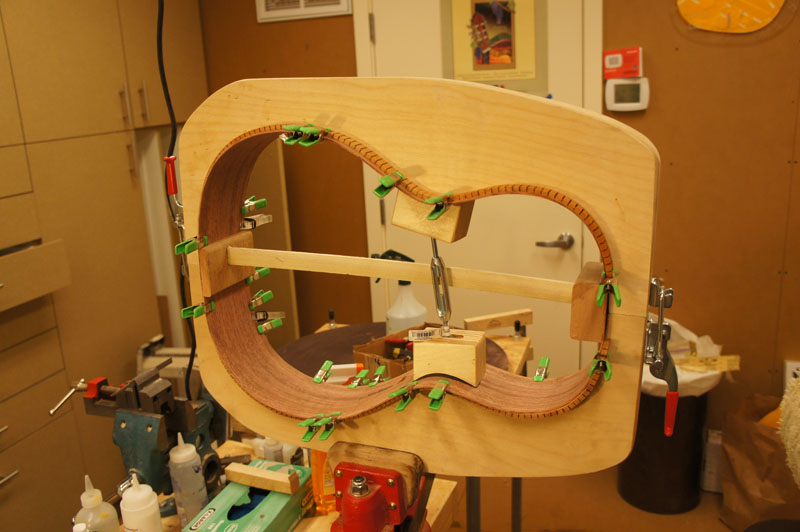
I had no issues at all bending the pre profiled sides on a fox style bender with a heat blanket. I was very happy as the sides once trimmed to size fit perfectly in the molds without needing to push it in place with spreaders. I am taking care to place the bend exactly where I want it so the bend matches the profile I cut also the if the sides are book matched I can control the match.
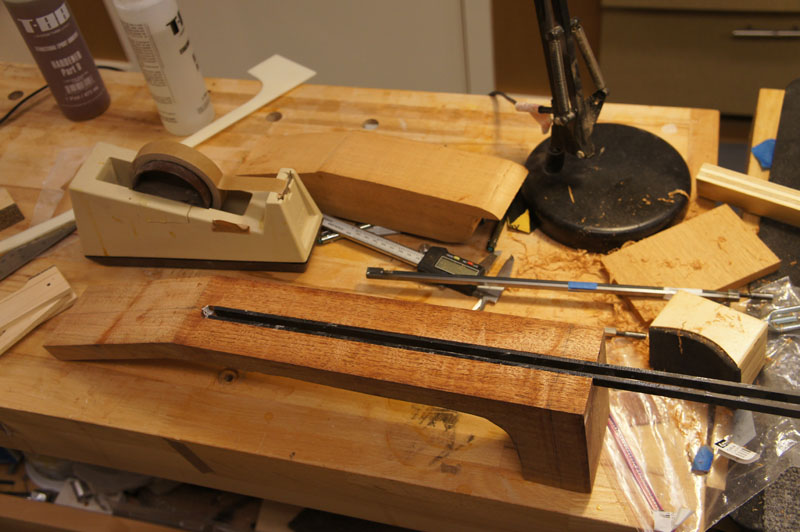
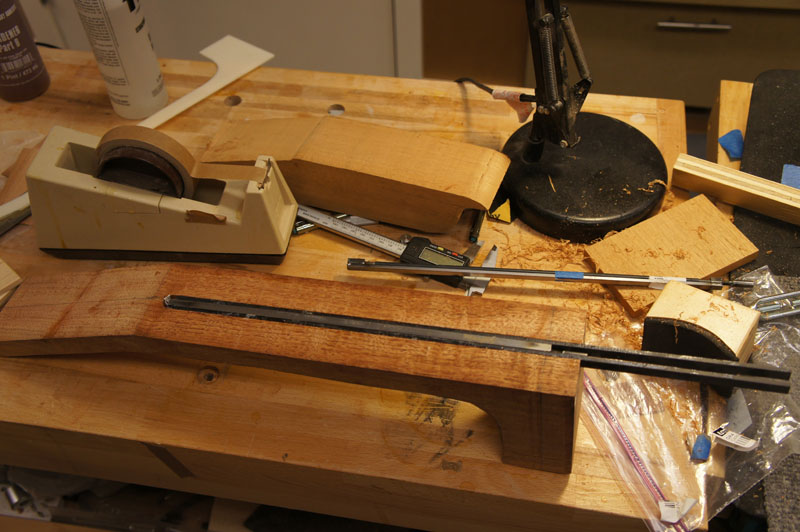
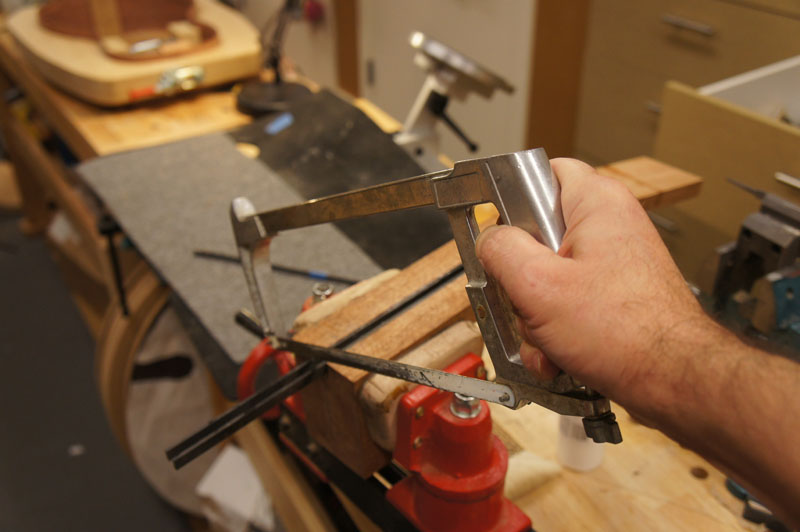
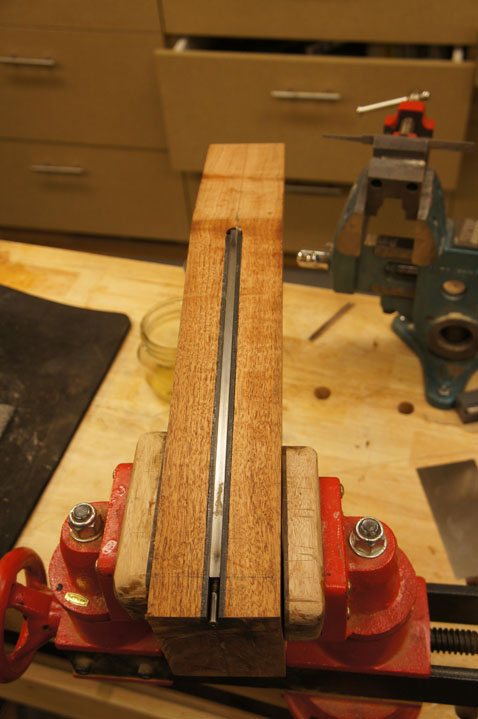
I also roughed out a neck blank on my band saw. I use a smoothing plane to square the surface of the fret board surface and the peg head surface. As you can see in the pictures I cut a 1/2" channel for the truss rod and then epoxy in two .125 * 3/8" carbon fiber rods for neck reinforcement. This leaves me with the proper 1/4 channel for the truss rod. I have seen people rout three different slots, but I see no advantage of spreading the carbon fiber rods. The farther they are spread the better chance you have of them showing when the neck is carved. When I epoxy in the carbon fiber I wrap the truss rod in wax paper and push it in the slot to push the carbon fiber rods against the channel. I DO NOT epoxy in the truss rod.
If you are using an outside mold, here is a trick I got from Gore's build book. Once the end blocks are glued on to the sides and before any profiling take the time to mark out a couple of reference lines.
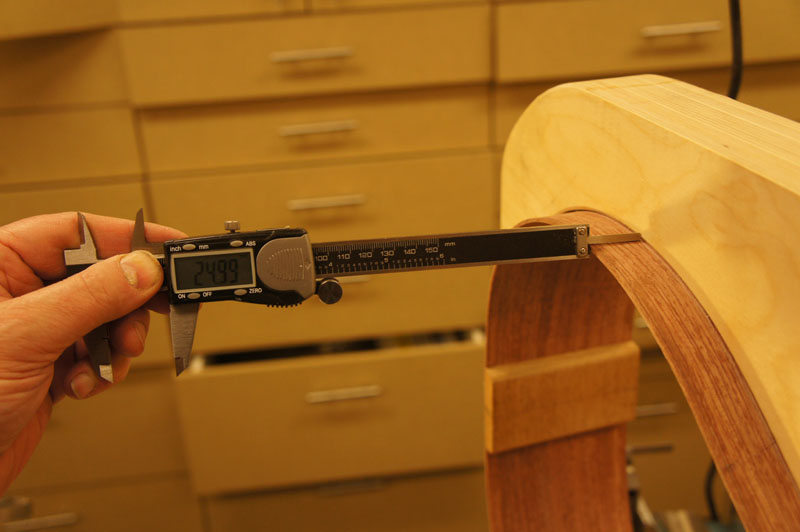
First adjust the rim on the top side of the guitar (mine top is flat at this time) so that it is straight in the mold, 25mm from the top to the mold all of the way around. Then use the mold as a guide and mark a line all of the way around the guitar. This line is a reference throughout the build process to put the rims back in the mold square. One the rims are sanded to the right profile there are no good other references to be sure that the rims are in the mold square.
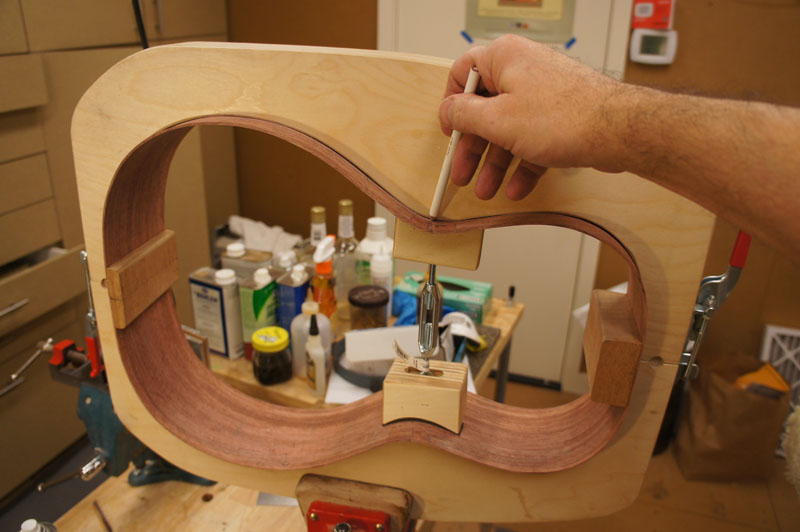
I used a plane to trim the rims on the back to they were very close to the correct profile. I use a 15' radius dish for the back and a 28' dish for the top to sand the profiles I want. I have found that if I carefully sand a 28" radius on the top I have the correct angle on the top. Before I glue the top on I check the angle to make sure it is correct.
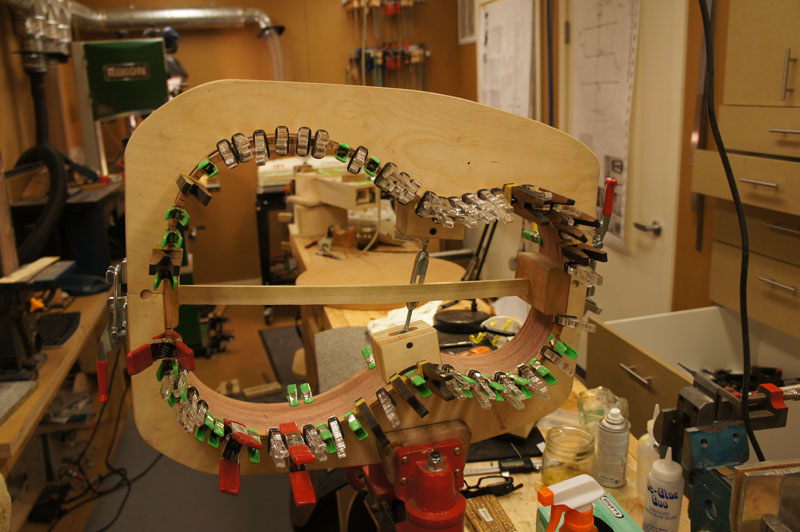
I completely profile the rims before I put the kurfed linings on with the linings just a bit proud. Before gluing on the linings I pre-bend reverse kerfling on the out side of the rims by spraying both sides of the kerfed linings with water and letting them dry in place.
I had no issues at all bending the pre profiled sides on a fox style bender with a heat blanket. I was very happy as the sides once trimmed to size fit perfectly in the molds without needing to push it in place with spreaders. I am taking care to place the bend exactly where I want it so the bend matches the profile I cut also the if the sides are book matched I can control the match.
I also roughed out a neck blank on my band saw. I use a smoothing plane to square the surface of the fret board surface and the peg head surface. As you can see in the pictures I cut a 1/2" channel for the truss rod and then epoxy in two .125 * 3/8" carbon fiber rods for neck reinforcement. This leaves me with the proper 1/4 channel for the truss rod. I have seen people rout three different slots, but I see no advantage of spreading the carbon fiber rods. The farther they are spread the better chance you have of them showing when the neck is carved. When I epoxy in the carbon fiber I wrap the truss rod in wax paper and push it in the slot to push the carbon fiber rods against the channel. I DO NOT epoxy in the truss rod.
If you are using an outside mold, here is a trick I got from Gore's build book. Once the end blocks are glued on to the sides and before any profiling take the time to mark out a couple of reference lines.
First adjust the rim on the top side of the guitar (mine top is flat at this time) so that it is straight in the mold, 25mm from the top to the mold all of the way around. Then use the mold as a guide and mark a line all of the way around the guitar. This line is a reference throughout the build process to put the rims back in the mold square. One the rims are sanded to the right profile there are no good other references to be sure that the rims are in the mold square.
I used a plane to trim the rims on the back to they were very close to the correct profile. I use a 15' radius dish for the back and a 28' dish for the top to sand the profiles I want. I have found that if I carefully sand a 28" radius on the top I have the correct angle on the top. Before I glue the top on I check the angle to make sure it is correct.
I completely profile the rims before I put the kurfed linings on with the linings just a bit proud. Before gluing on the linings I pre-bend reverse kerfling on the out side of the rims by spraying both sides of the kerfed linings with water and letting them dry in place.
Last edited by johnnparchem on Thu Dec 27, 2012 3:08 am, edited 1 time in total.
-
tippie53
- Posts: 7019
- Joined: Fri Mar 03, 2006 7:09 pm
- Location: Hegins, Pa
- Contact:
Re: Starting Martin Style 00 12 fret guitar.
Looks very good. I am looking forward to the end product.
John Hall
Blues Creek Guitars Inc
Authorized CF Martin Repair Center
president of Association of Stringed Instrument Artisans
http://www.bluescreekguitars.com
Blues Creek Guitars Inc
Authorized CF Martin Repair Center
president of Association of Stringed Instrument Artisans
http://www.bluescreekguitars.com
-
johnnparchem
- Posts: 2354
- Joined: Sat Apr 10, 2010 10:50 pm
- Location: Seattle
- Contact:
Re: Starting Martin Style 00 12 fret guitar.
Thanks John,tippie53 wrote:Looks very good. I am looking forward to the end product.
I should mention that the guitar mold, the bending form, the bending machine I used all came from John. When I get to the binding I am using a binding machine from John. He makes the best forms and jigs.
-
johnnparchem
- Posts: 2354
- Joined: Sat Apr 10, 2010 10:50 pm
- Location: Seattle
- Contact:
Re: Starting Martin Style 00 12 fret guitar.
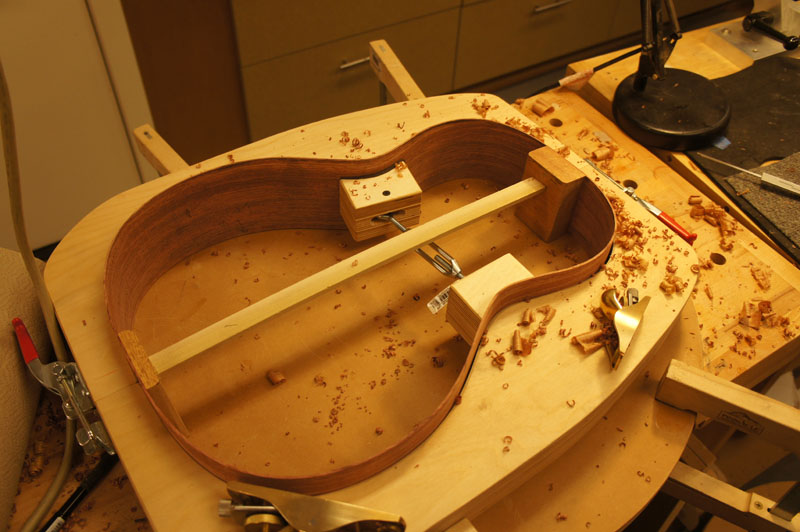
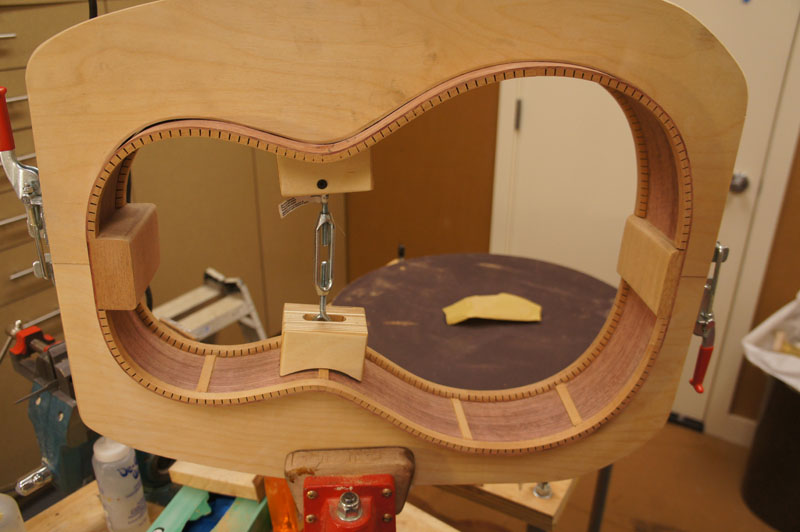
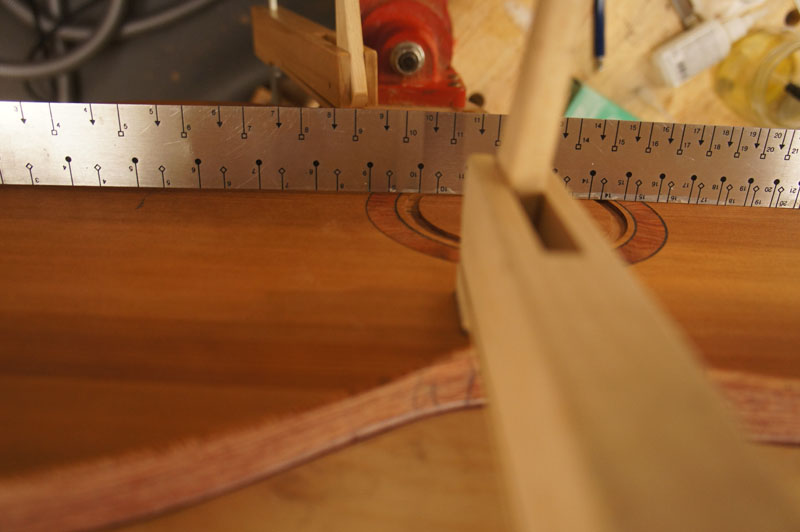
The rim is complete ready for a back and top. As I mentioned in an earlier post I do a rough check of the profile of the top by clamping the top on to the rim and placing a straight edge along the fret board and string path to see what I have for a gap at the saddle. I have almost exactly 1/16" gap now. I will also recheck with the braced and fitted top before I glue it on. At lease now I know I am close and can put the rims aside.
-
Darryl Young
- Posts: 1668
- Joined: Fri Jul 30, 2010 6:44 pm
- Location: Arkansas
Re: Starting Martin Style 00 12 fret guitar.
Looking good John!
I'm curious about the location of the carbon fiber. I would guess that once the fretboard is installed, the CF is positioned very near the neutral axis of the neck. So does it have much affect on resisting the bow created by string tension?
I'm curious about the location of the carbon fiber. I would guess that once the fretboard is installed, the CF is positioned very near the neutral axis of the neck. So does it have much affect on resisting the bow created by string tension?
Slacker......
-
johnnparchem
- Posts: 2354
- Joined: Sat Apr 10, 2010 10:50 pm
- Location: Seattle
- Contact:
Re: Starting Martin Style 00 12 fret guitar.
It sure is a lot harder to bow the neck with the carbon fiber than the wood it replaced. I can feel it when I use the truss rod. Are you saying that spacing them out further would increase the stiffness of the neck? Or setting them deeper? Or do you think they are a waste of effort. They are cool though!Darryl Young wrote:Looking good John!
I'm curious about the location of the carbon fiber. I would guess that once the fretboard is installed, the CF is positioned very near the neutral axis of the neck. So does it have much affect on resisting the bow created by string tension?