
First kit build - Martin dred
-
daviddrazen
- Posts: 20
- Joined: Sat Jun 25, 2022 7:35 am
Re: First kit build - Martin dred
It looks beautiful. I love the contrast in color between the top and sides.
-
rcplanefan
- Posts: 53
- Joined: Mon Nov 27, 2023 7:36 pm
Re: First kit build - Martin dred
Thank you, David. I feel like I got lucky with the wood in this kit. It does look very nice.daviddrazen wrote: ↑Mon Feb 12, 2024 9:48 pm It looks beautiful. I love the contrast in color between the top and sides.
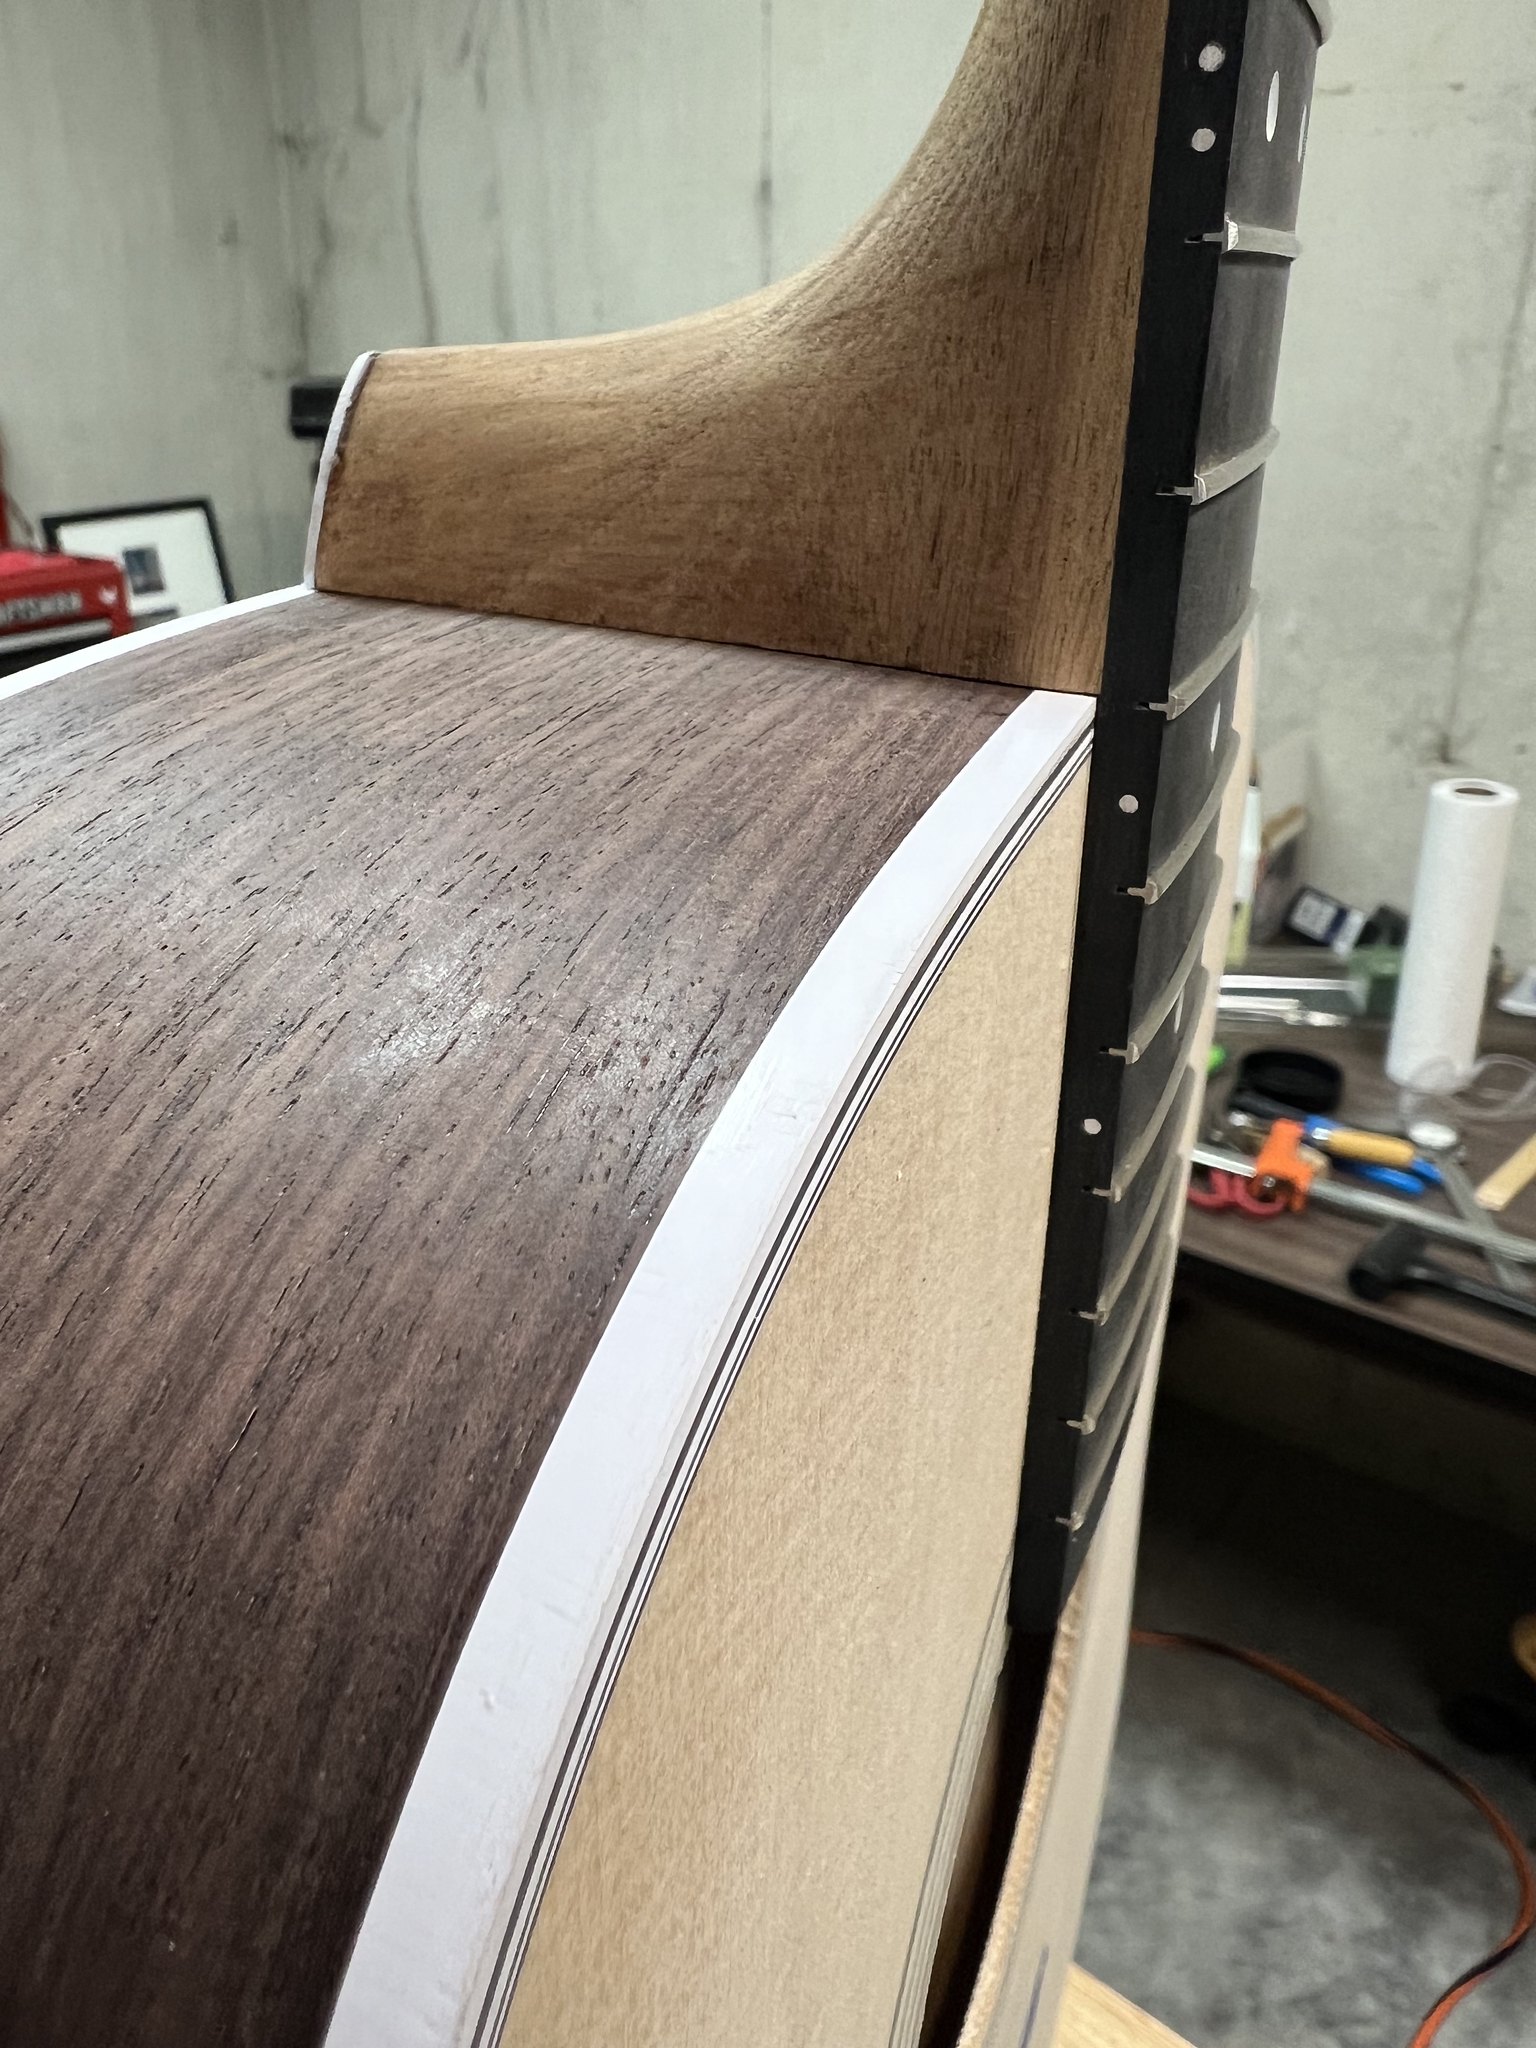
Tonight, I spent some time getting the bridge located, and tomorrow I'll likely drill out two of the bridge pin holes. In the meantime, I got the side markers installed in the fingerboard. I honestly didn't know what the 1/16" white rod was, and somewhere I saw this was for the side markers. Holy smokes, ebony is some hard wood. I ended up using an awl to mark the holes and then a 1/16" bit in the drill press. Tomorrow, I'll cut/file/sand them flush with the side of the fingerboard.

-
BlindBo
- Posts: 120
- Joined: Sat Feb 11, 2023 12:53 pm
Re: First kit build - Martin dred
RC, you continue to do a great job. I’m with the folks who finish separately. It makes the neck & sides easier to finish.
If I understood, you are proceeding with your bridge layout and possibly install before finishing? For me, that’s one of the last steps. The reason is that the initial neck joint setup can change slightly when you do the final fitting after finishing. I usually have to do some strip sanding to get the tight fit you are looking for in your glue joint. Personally, I want the neck permanently fixed in place to determine the exact bridge location. Since you asked, that is my recommendation. Keep up the good work.
If I understood, you are proceeding with your bridge layout and possibly install before finishing? For me, that’s one of the last steps. The reason is that the initial neck joint setup can change slightly when you do the final fitting after finishing. I usually have to do some strip sanding to get the tight fit you are looking for in your glue joint. Personally, I want the neck permanently fixed in place to determine the exact bridge location. Since you asked, that is my recommendation. Keep up the good work.
-
phavriluk
- Posts: 560
- Joined: Mon Jul 09, 2012 9:49 pm
Re: First kit build - Martin dred
What he said.BlindBo wrote: ↑Tue Feb 13, 2024 8:32 am RC, you continue to do a great job. I’m with the folks who finish separately. It makes the neck & sides easier to finish.
If I understood, you are proceeding with your bridge layout and possibly install before finishing? For me, that’s one of the last steps. The reason is that the initial neck joint setup can change slightly when you do the final fitting after finishing. I usually have to do some strip sanding to get the tight fit you are looking for in your glue joint. Personally, I want the neck permanently fixed in place to determine the exact bridge location. Since you asked, that is my recommendation. Keep up the good work.
peter havriluk
-
Kevin Sjostrand
- Posts: 3728
- Joined: Sat Feb 09, 2008 8:06 pm
- Location: Visalia, CA
Re: First kit build - Martin dred
The reason I suggested gluing in your dovetail neck then finishing the guitar is because if you are spraying a finish and you don't made off perfectly the mating surfaces you will probably encounter the neck joint not fitting the same as it did in the raw. Not something that can't be dealt with but one you may find frustrating.
With a bolt on mortise and tenon neck, a different story because you have more "wiggle room" on your fit and...the heel can go right on top of your finish. It's not a glue surface. Some glue there on a dovetail and some don't.
Neither way is wrong just preference.
Look at factory guitars that have dovetail joint necks. You'll probably always find finish over the neck joint surface.....sprayed with the neck attached.
-
rcplanefan
- Posts: 53
- Joined: Mon Nov 27, 2023 7:36 pm
Re: First kit build - Martin dred
While I await better weather in Cincinnati to start the finishing process, I got a few more things completed. I fretted the fingerboard for starters. I used diagonal cutting pliers to cut the frets about 1/8" too long (per side), and then I hammered the frets in with a dead-blow hammer. I then used a number of different straightedges to check that all the frets were seated (checking 3 at a time, and if it straightedge rocked, the middle fret was high). Then, I dropped a little thin CA into each end of each fret. Finally, I nipped the frets close, filed them closer, and then used my 300 grit diamond sharpening plate to finish getting the frets smooth against the fingerboard sides.
I learned that frets are sharp, and without gloves, you bleed a bit doing this job. Next time, I may wear some kind of gloves until all the sharp edges have been removed.

I learned that frets are sharp, and without gloves, you bleed a bit doing this job. Next time, I may wear some kind of gloves until all the sharp edges have been removed.
-
Kevin Sjostrand
- Posts: 3728
- Joined: Sat Feb 09, 2008 8:06 pm
- Location: Visalia, CA
Re: First kit build - Martin dred
Looking really fine. Did you decide to glue in the neck before finishing?
-
BlindBo
- Posts: 120
- Joined: Sat Feb 11, 2023 12:53 pm
Re: First kit build - Martin dred
RC, I don’t know how many times I can keep responding by say, “ You are doing a great job!”. I may just have to start off with, “That’s what he said!”.😂😂
Anyway, you are now getting into the area where final fit, finishing, and final set up processes all depend on your approach. There is no cut and dried, hard set of rules at this point. Different builders take different paths depending on their preferences, experiences, and their shop capabilities. You are also at the crossroads where finish becomes an important factor in your overall satisfaction with the results. Basically, the sound is predetermined long before this point (unless, of coarse, you glob 0.040” of lacquer on the top!😂
So, apply the neck and finish or finish separately and apply the neck afterwards ?
Applying the neck first means your neck joint should fit as per the initial set up and you can get on to spraying and polishing. One advantage is that the neck gives you a good “handle” while running the body thru the buffing process. The disadvantage is that it’s pretty hard to get a nice, even polish in that joint area when the two pieces are bonded together.
Doing them separately means you will end up with a uniform finish in the neck/body joint area, but, you will have to tweak that joint before final gluing. If you got it right initially, then this shouldn’t be a big adjustment.
This becomes your choice based on you shop, etc.
The other big question is fret before gluing the neck or after. Until the current project I’m building, I’ve always followed the StewMac instructions of fretting the board before gluing and induce relief in the neck before gluing the fretboard in place. I’ve had variable results with this method. I am now following John Hall’s method of leveling the neck blank surface before fitting the neck joint, then setting the neck plane surface to the top after getting all the neck angles correct. The fretboard is glued on after the neck is glued 1st in place. This means the neck plane should be very close to correct before you do the final set up. Once everything is locked in, it’s a matter of leveling the fretboard surface and installing frets with minimal leveling required.
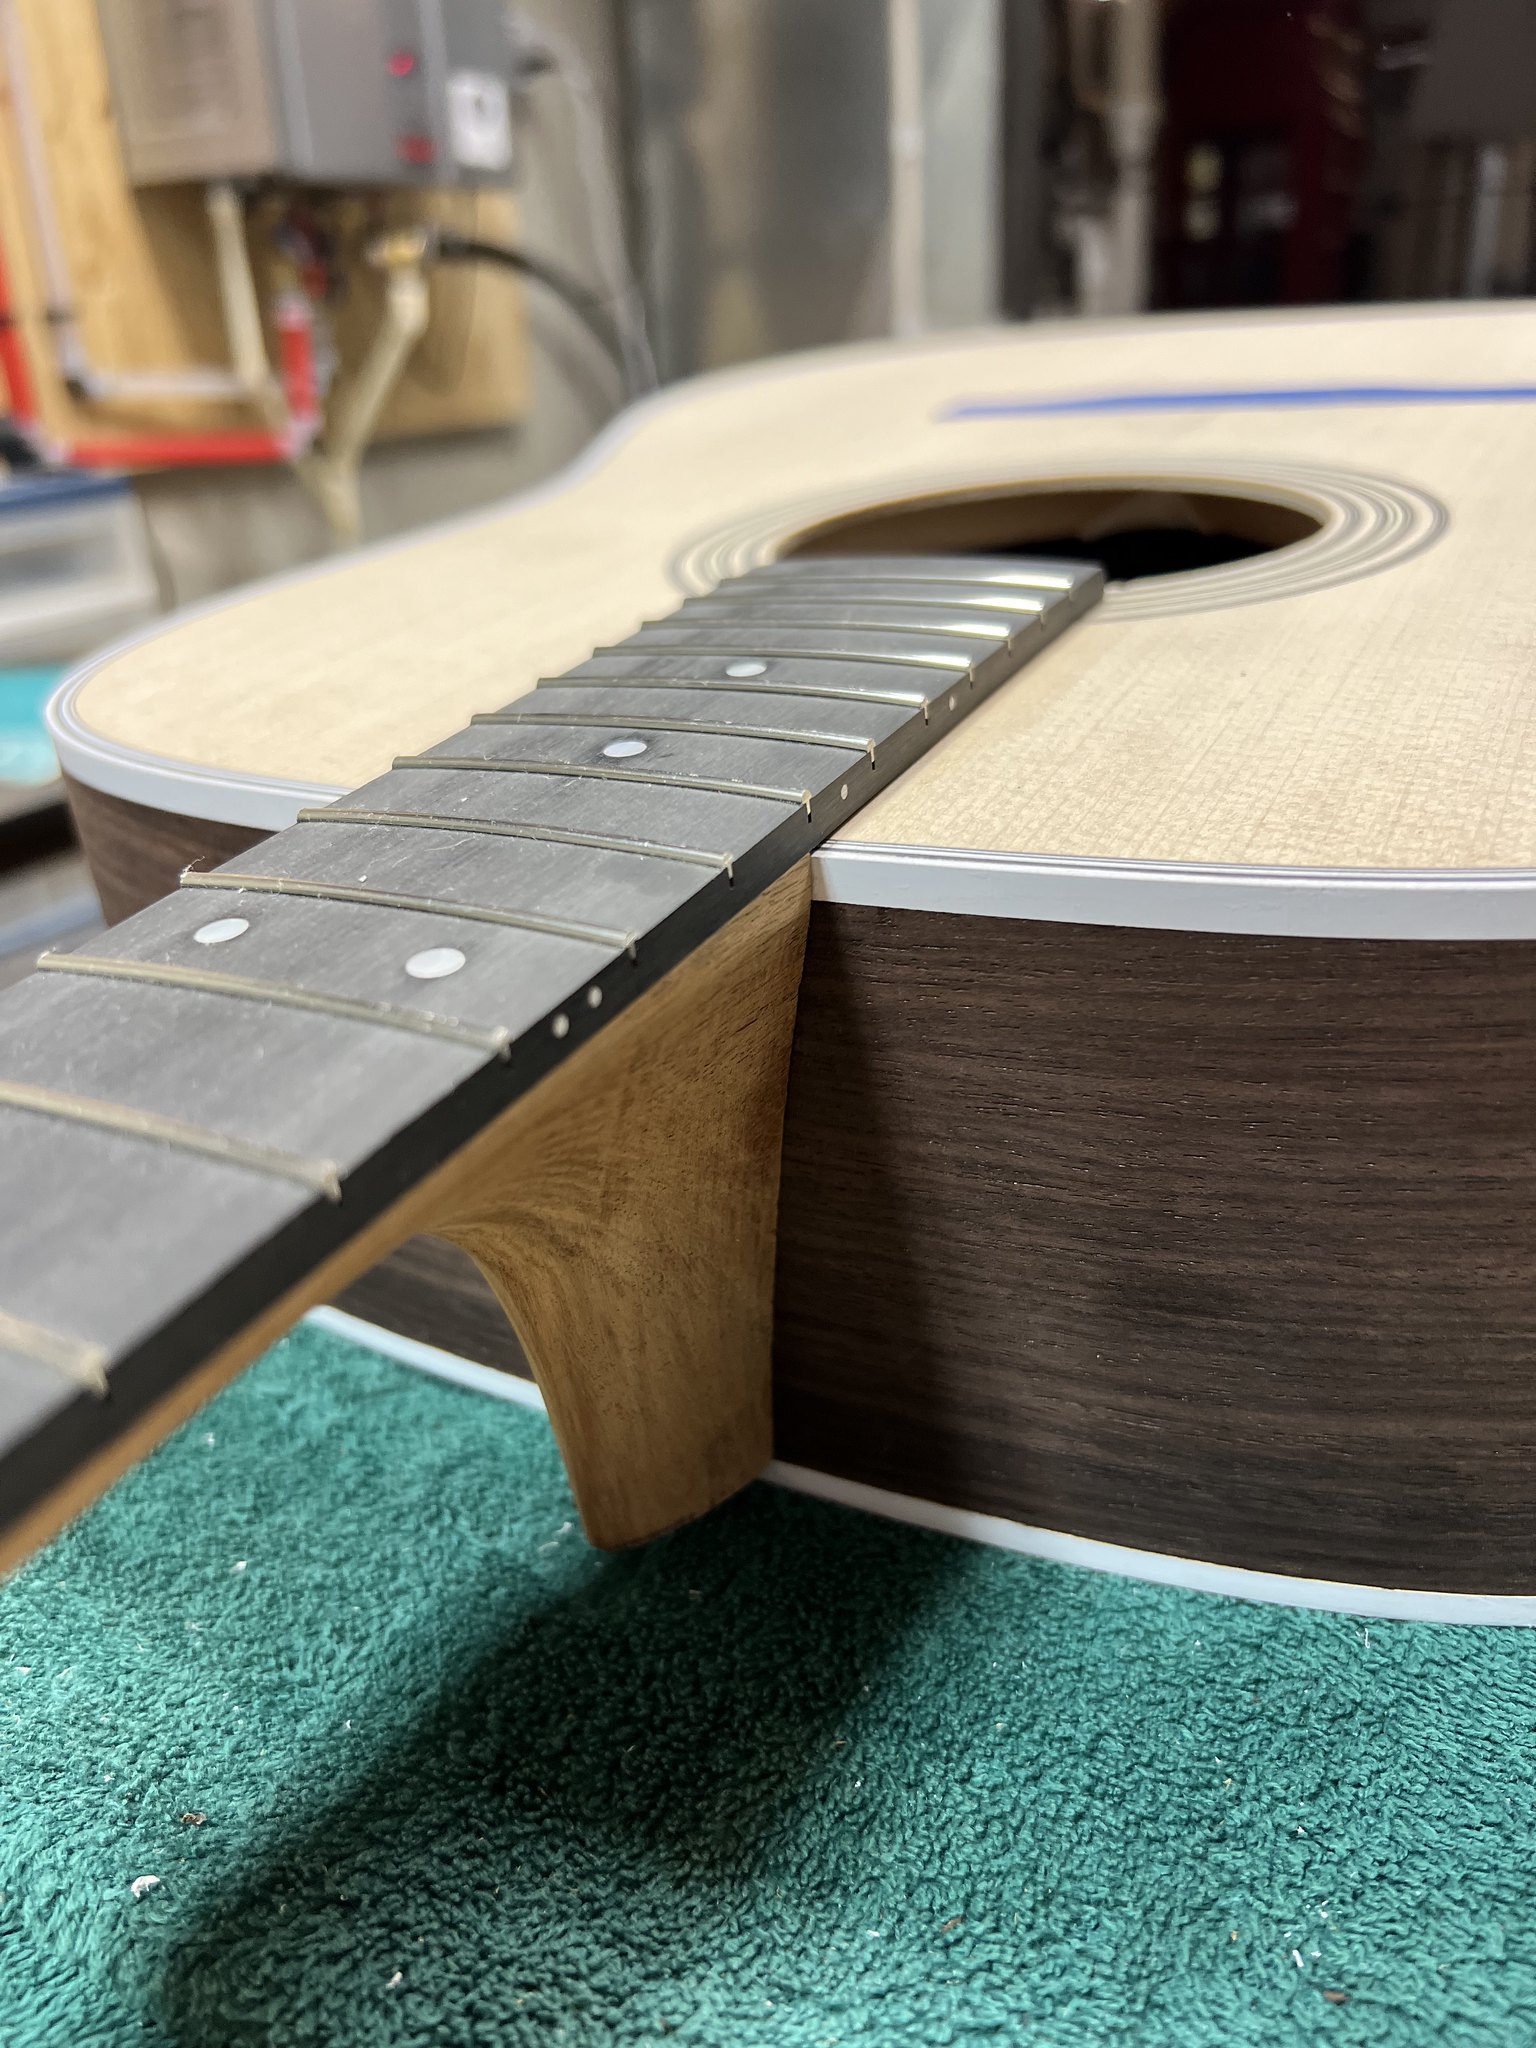
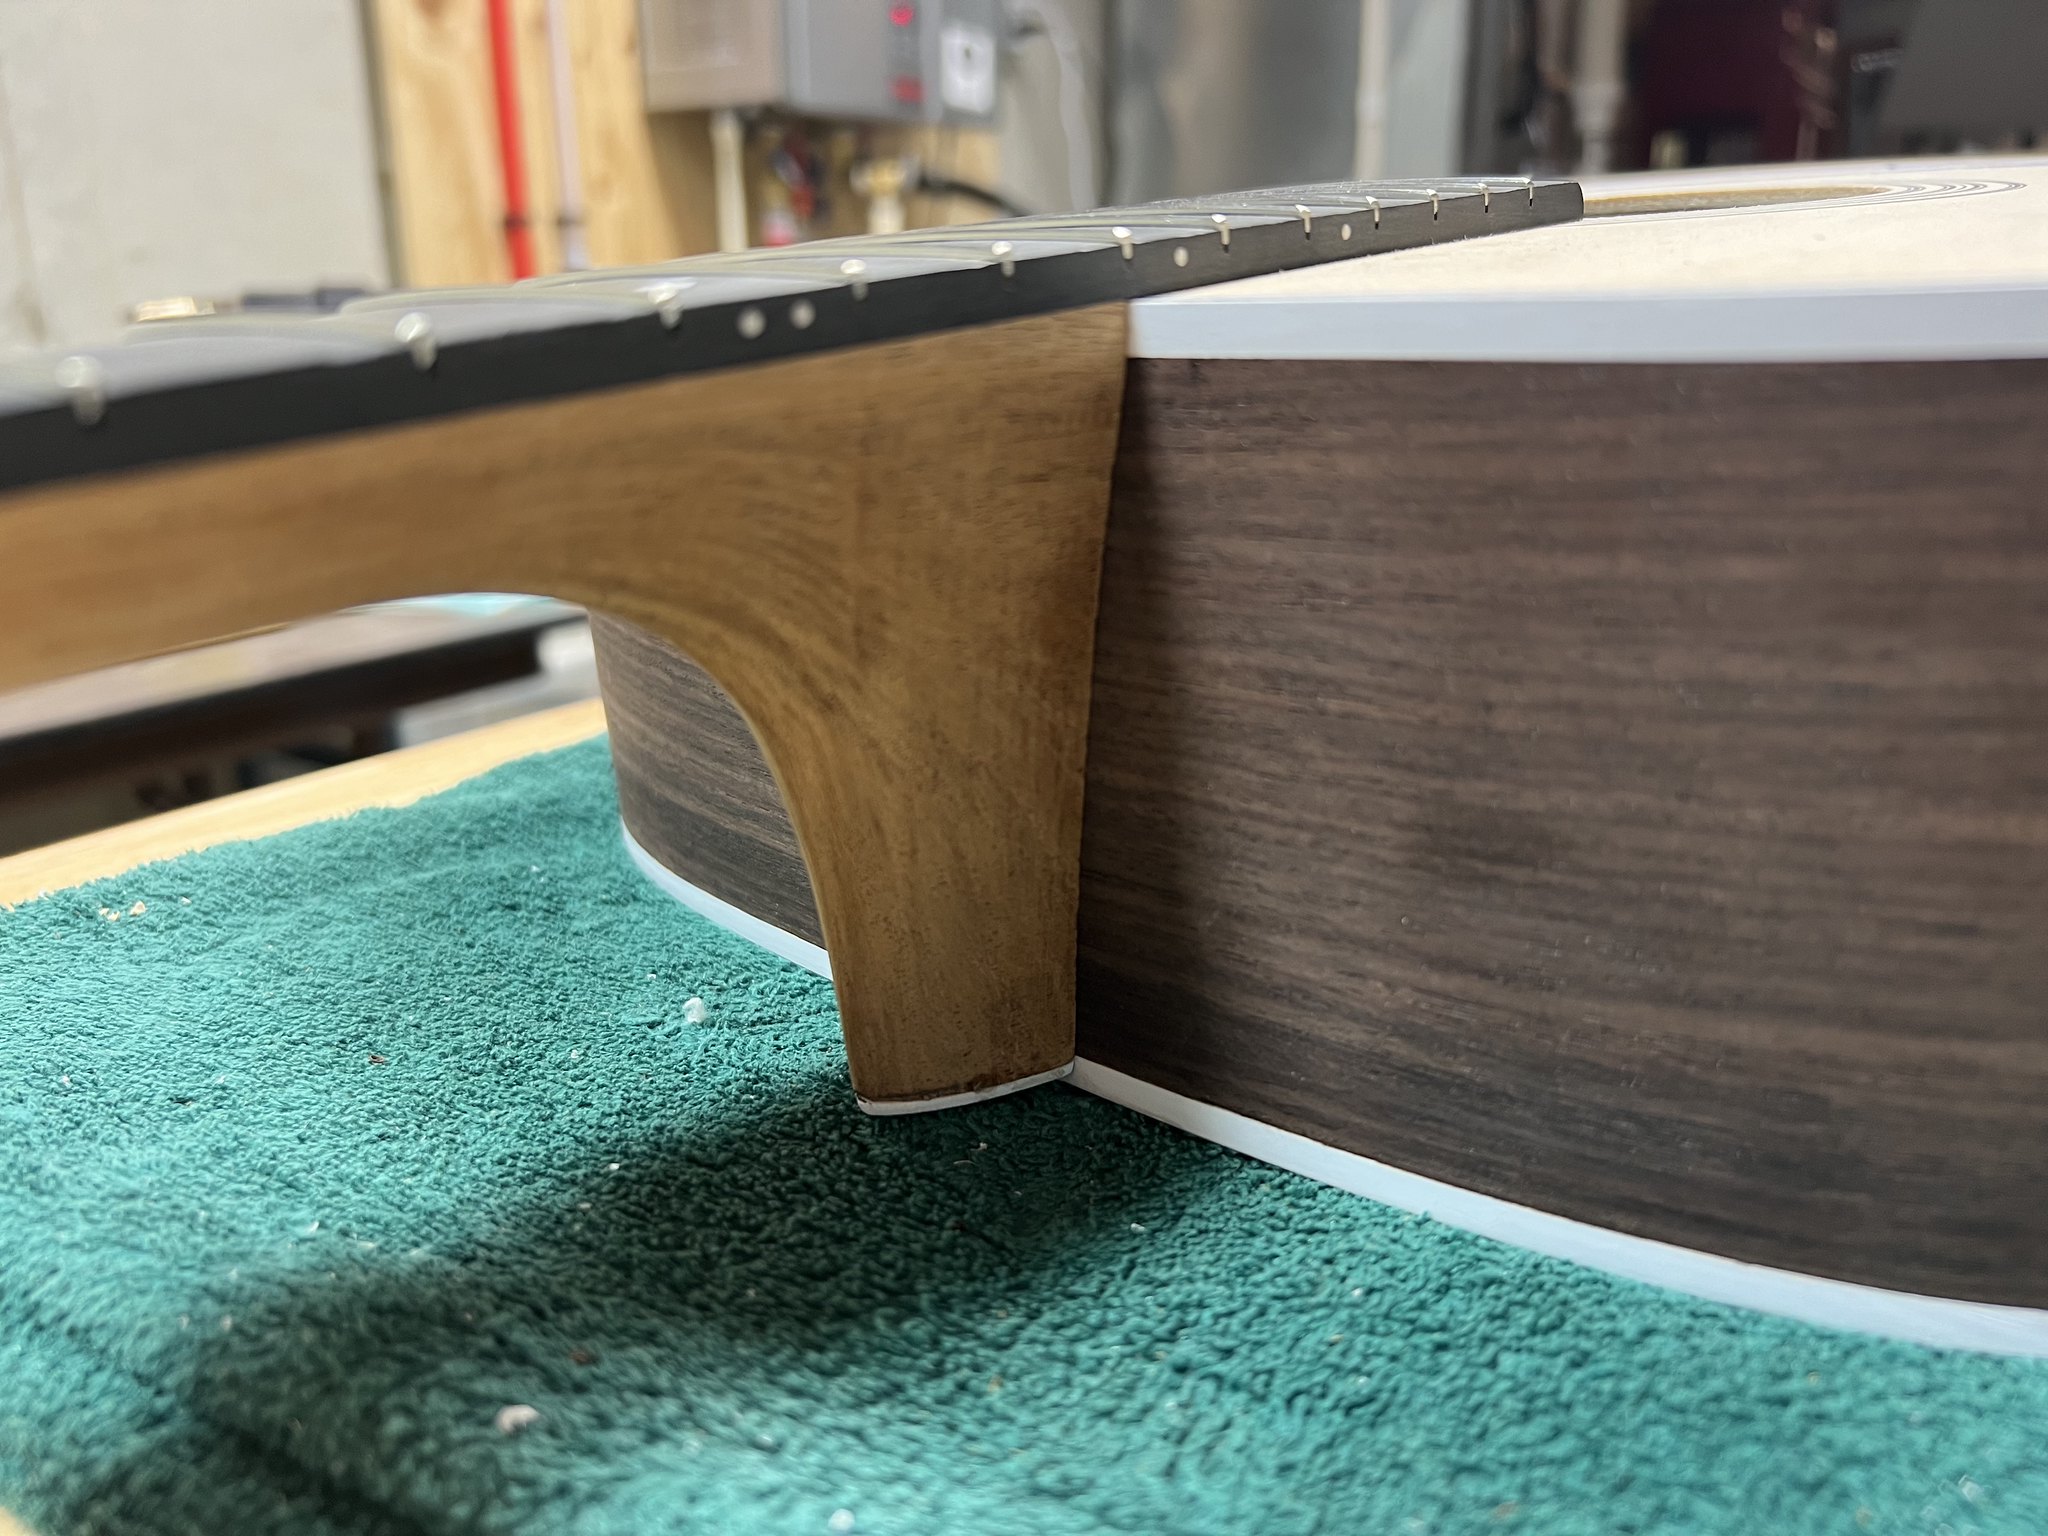
While your pictures look great, the shot from the bass side of the neck joint/to-appear to show the need for some slight elevation adjustment to get the joint tight and the fretboard extension tight to the top.
Ok, this is much more than I expected to post and if any of the more experienced folks want to correct anything I’ve suggested, please do. It’s all about sharing knowledge.
Good luck, RC.
Anyway, you are now getting into the area where final fit, finishing, and final set up processes all depend on your approach. There is no cut and dried, hard set of rules at this point. Different builders take different paths depending on their preferences, experiences, and their shop capabilities. You are also at the crossroads where finish becomes an important factor in your overall satisfaction with the results. Basically, the sound is predetermined long before this point (unless, of coarse, you glob 0.040” of lacquer on the top!😂
So, apply the neck and finish or finish separately and apply the neck afterwards ?
Applying the neck first means your neck joint should fit as per the initial set up and you can get on to spraying and polishing. One advantage is that the neck gives you a good “handle” while running the body thru the buffing process. The disadvantage is that it’s pretty hard to get a nice, even polish in that joint area when the two pieces are bonded together.
Doing them separately means you will end up with a uniform finish in the neck/body joint area, but, you will have to tweak that joint before final gluing. If you got it right initially, then this shouldn’t be a big adjustment.
This becomes your choice based on you shop, etc.
The other big question is fret before gluing the neck or after. Until the current project I’m building, I’ve always followed the StewMac instructions of fretting the board before gluing and induce relief in the neck before gluing the fretboard in place. I’ve had variable results with this method. I am now following John Hall’s method of leveling the neck blank surface before fitting the neck joint, then setting the neck plane surface to the top after getting all the neck angles correct. The fretboard is glued on after the neck is glued 1st in place. This means the neck plane should be very close to correct before you do the final set up. Once everything is locked in, it’s a matter of leveling the fretboard surface and installing frets with minimal leveling required.
While your pictures look great, the shot from the bass side of the neck joint/to-appear to show the need for some slight elevation adjustment to get the joint tight and the fretboard extension tight to the top.
Ok, this is much more than I expected to post and if any of the more experienced folks want to correct anything I’ve suggested, please do. It’s all about sharing knowledge.
Good luck, RC.
-
rcplanefan
- Posts: 53
- Joined: Mon Nov 27, 2023 7:36 pm
Re: First kit build - Martin dred
Thanks to you both!
I actually decided to finish the neck and body separately. Partly because I don't think I'll be able to start for a month or two (snow, cold, etc), and partly to make handling the parts easier. I will carefully mask and I'm aware I may need to make some final adjustments.
I knew some skilled luthier would see my neck joint and wonder. I only inserted the neck into the dovetail for the photo. Tonight, I went ahead and tightened the joint with a clamp and took a couple of photos. I also followed John's video (setting the neck joint addendum), and I believe the fit is very good. The neck plane seems right, and the fingerboard extension is flat against the top.
Here are a couple of photos of the finished fit.
-
BlindBo
- Posts: 120
- Joined: Sat Feb 11, 2023 12:53 pm
Re: First kit build - Martin dred
“That’s what he said!” 😂😂👍